|
Forums34
Topics48,346
Posts813,060
Members9,208
| |
Most Online1,046
Aug 24th, 2023
|
|
|
|
Joined: Dec 2008
Posts: 21,868 Likes: 167
Roadster Guru Member of the Inner Circle
|
OP

Roadster Guru Member of the Inner Circle
Joined: Dec 2008
Posts: 21,868 Likes: 167 |
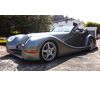
From my earlier blog, I was asked to show how this was done in more detail. I braved the cold this morning to fit my Centenary badge - (which I've just noticed is number 258 !!!!!!!  ) Anyway some pictures will follow, and they seem to magically downsize overnight, so apologies if they come across all big for now. Here we go then......  This first shot shows the two threaded studs and my angled washers. It's a little bit indistinct, but I've used some rubber half washers angled on some W&D to straighten up the angle of the number plate box.  Next two shots - as it came off. This is an MGB pre75 rear number plate backing plate in stainless steel. They are sold in pairs. The two original mounting holes are grommeted. I've cut two slots to allow the plate to slide over the threaded studs on the car, which diverge significantly. The small brackets towards each end provide a buffer on the MGB so that the plate doesn't scratch the paint. It doesn't matter on this application but I've grommeted them anyway. You can also see how the plate is curved and fitted 'wrong way round', and that the badges are spaced with stainless nuts.   Now here's the Centenary Badge fitted centrally.  And this is how it's done. The mounting bracket is 2/3 of a conventional badge bar bracket, cut and straightened. The only alteration after this shot was that I had to space the bracket with two nuts to get a proper fit. The curvature of the plate is absolutely crucial, so there's quite a bit of trial fitting and removal involved. Don't attempt this if you have no patience or little time!!!!  Back on the Mog and I must say that's a nice jobby. I wondered about a central badge but am well pleased. This job took 3 hours at a leisurely pace. If you're wondering what the four shiny bolt heads are doing - I can only guess that when the previous owner had a personal plate fitted, the fitter butchered the plastic number plate box, because behind there are two rough cut home-made alloy brackets. I smartened them up and replaced the coach bolts with stainless fasteners. Later Mogs have a revised shape, which I'm assuming is stronger - this design is very fragile round those two holes.   And this is how it looks close up from behind.  That's me done for now. Time for a cuppa!!   
Last edited by DaveW; 10/01/09 01:29 PM. Reason: Spelling!!
DaveW
'05 Red Roadster S1
'16 Yellow (Not the only) Narrow AR GDI Plus 4
|
|
|
|
|
Joined: Oct 2008
Posts: 3,422 Likes: 5
Goodwood Drifter Talk Morgan Addict
|
|
Goodwood Drifter Talk Morgan Addict
Joined: Oct 2008
Posts: 3,422 Likes: 5 |
realy nice,
you give us good ideas on small mods on our moggies
I'm going to try to not to use the nr-plate holder
it looks so bulky and belgian plates are small+ugly
hope to see some more tricks from you!!!!!!!!!
Steven
sold: M3W, Aeromax,V6, 4/4 4seater
now: +fourLM62
|
|
|
|
|
Joined: Nov 2008
Posts: 453
Learner Plates Off!
|
|
Learner Plates Off!
Joined: Nov 2008
Posts: 453 |
A very elegant way to put the badges.
It could work as well on an aero.
The downdide is that is less easy to change your badges, specialy when your plate is riveted to the plate holder
(in some contries you are not allowed to simply screw them, they have to be attached with rivets)
As I have more than 3 badges, I like from time to time change them.
H3
H3
|
|
|
|
|
Joined: Oct 2007
Posts: 455
Learner Plates Off!
|
|
Learner Plates Off!
Joined: Oct 2007
Posts: 455 |
A very tidy job. Top chap for taking the time to show us all. 
|
|
|
|
|
Joined: Jun 2008
Posts: 1,597
Talk Morgan Enthusiast
|
|
Talk Morgan Enthusiast
Joined: Jun 2008
Posts: 1,597 |
I was going to buy a badge bar from the factory shop next week when I collected my car, but your method looks better.
|
|
|
|
|
Joined: Oct 2007
Posts: 1,502
Talk Morgan Enthusiast
|
|
Talk Morgan Enthusiast
Joined: Oct 2007
Posts: 1,502 |
Just thinking. I would probably only wish to fit 2 badges. Perhaps that would be possible by just making 2 small plates, one to fit over each protruding stud, and with the two bolts for each badge hidden below the top edge of the number plate plinth. These could be made of aluminium as its corrosion resistant and easy to work compared to S/S (and I have some). The 2 plates would be held captive by tightening the nuts securing the number plate plinth. Or I could even use one smaller plate made of aluminium, to fit over the studs as above - then no chance of rotation.
|
|
|
|
|
Joined: Dec 2008
Posts: 21,868 Likes: 167
Roadster Guru Member of the Inner Circle
|
|
OP
Roadster Guru Member of the Inner Circle
Joined: Dec 2008
Posts: 21,868 Likes: 167 |
Thanks all for your compliments. You see, I'm a Yorkshire chap so I look for simple cheap solutions............  But funnily enough, the family tree goes back to Herefordshire about 1800. Not that far from Malvern.  I'd go for a single plate, I think one each side might rotate unless it's shaped to fit inside the box. Worth experimenting. You're right about stainless. It's a pig to work with.
Last edited by DaveW; 12/01/09 08:53 PM. Reason: Added more.
DaveW
'05 Red Roadster S1
'16 Yellow (Not the only) Narrow AR GDI Plus 4
|
|
|
|
|
Joined: Dec 2008
Posts: 21,868 Likes: 167
Roadster Guru Member of the Inner Circle
|
|
OP
Roadster Guru Member of the Inner Circle
Joined: Dec 2008
Posts: 21,868 Likes: 167 |
It's been a while........ I've been acquiring a few badges from E-Bay, and with the new MSCC Diamond Jubilee badge coming this year, it was time to revisit my barless bar. First job was to re-contour the number plate plinth, thus: Using my trusty Dremel.........  Compare this to the earlier shots. Take it slow if you try this, the plastic will melt if it gets hot. This is how it looked refitted:  This is a new stainless backing plate, marked out and drilled for even more badges. I bought some decent cobalt drills - what a difference - they carve through stainless as if its plastic.  Here's the current ensemble:  Note that I've fabricated two stainless extensions on each end, ready for the extras:  And here's the new arrangement. I wanted the Cornwall MOG 2008 badge because that's the year I bought the Morgan.  I'll post the pictures when I add the final two later in the year.
DaveW
'05 Red Roadster S1
'16 Yellow (Not the only) Narrow AR GDI Plus 4
|
|
|
|
|
Joined: May 2008
Posts: 1,103 Likes: 2
Has a lot to Say!
|
|
Has a lot to Say!
Joined: May 2008
Posts: 1,103 Likes: 2 |
With all that extra weight on the front it should solve any front end bounce!!  But as always a very professional job!
Keith
Car 54 - 'Le Mans 62' 4/4 Supersport
OxMog Member (and associated with CranMog and SwanMog)
|
|
|
|
|
Joined: Dec 2008
Posts: 21,868 Likes: 167
Roadster Guru Member of the Inner Circle
|
|
OP
Roadster Guru Member of the Inner Circle
Joined: Dec 2008
Posts: 21,868 Likes: 167 |
You'd be surprised how heavy this lot is Keith!!!!!!! Anyway......at the same time as fitting the two extra badges, I wanted to replace the simple white capped philips screws with something a bit more secure. My plan was a pair of stainless allen headed setscrews capped with number plate screw finishers. First I had to fix the nuts on the back. These were fitted to some aluminium L sections using JB Weld. The joining surfaces were cleaned and glued with Araldite to the plastic box.  Then the two badges were added to the end plates. The holes had to be slotted, because the 75 year badge is a bit oversize in comparison to the others, and I wanted a level appearance overall. This took quite a while.  The box was drilled to take the M5 allen headed setscrews.  This shows the plastic fixing washer. The setscrews were lightly greased.  And the cover in place  The fixing screws are very close to the cowl edge - so I've fixed two grommets as protection....here's the nearside.  Finally here's the whole thing completed. Remember that I didn't intend to have any badges.  I think that's 'Job Done'.
DaveW
'05 Red Roadster S1
'16 Yellow (Not the only) Narrow AR GDI Plus 4
|
|
|
|
|