|
7 members (Lord Sward, Paul2408, JohnHarris, Stevo666, SCX358G, IcePack, DickJ),
168
guests, and
122
robots. |
|
Key:
Admin,
Global Mod,
Mod
|
|
|
|
|
|
|
|
Goodwood
by waikiore - 19/09/26 02:50 PM
|
|
|
|
|
|
|
|
|
Forums39
Topics49,931
Posts838,505
Members9,638
| |
Most Online1,063
Jun 14th, 2026
|
|
|
|
Joined: Dec 2008
Posts: 22,385 Likes: 358
Roadster Guru Member of the Inner Circle
|
OP

Roadster Guru Member of the Inner Circle
Joined: Dec 2008
Posts: 22,385 Likes: 358 |
But first...........  I was inspired by the Trad picture on here with the Centenary Badge on the dash. Since imitation is the sincerest form of flattery.................I've used a Centenery key fob. The cast emblem is retained by two flat blades curved over on themselves. This can be pulled from the leather fob. Then the blade can be persuaded to part company from the emblem with a small screwdriver, which leaves two small rivet type heads which must be filed flat. Then two pieces of double sided tape, one small piece to fill the hole left by the blade, and a larger piece to locate the badge on the dash. I'm quite pleased with the result.  Doing this job prompted me to post where I've located my Union Flags emblems.These are the cast enamelled flags which the Dealers sell. They come with pretend fixing screws which I don't like, so I filed these off and polished the edges. Most Mogs have them on the bonnet (Hood), but the bonnet panel is slightly curved, so I went for a flatter option - the side of the bulkhead panel. After a bit of trial and error, I chose next to the top hinge - it seems to look best there.  And now.........  You may recall that my Roadster had been fitted with a "sports exhaust". You may also recall that it was so damned noisy at 70/75mph that I just couldn't stand it. So the first day back home I took it off and replaced it with the original system which thankfully came with the car. The exhaust is held in place by four right angled brackets (two each side), and one rubber hanger each side at the tailpipe. Now the truth is that the four angled brackets are "aligned" on assembly so that the offset bracket which holds the U bolt, and therefore the exhaust falls in the right place. At the front it's not too critical, but space is tight between the flange and the front of the silencer. At the rear it's more important, because the offset nature of this arrangement means that the U clamp may not align with the joint where the tailpipe assembly meets the main silencer. Still with me???? All will now become clear.  When the sports exhaust was fitted (by an 'unnamed' specialist), they could not align the mounting with the exhaust joint, so the right angle bracket was "slotted" and large washers were used. The next picture shows this, alongside a new bracket. Although this is thick and strong metal, to me this is a bodge.   Before I got to this stage, I was seriously worried about unbolting this bracket. The reason being that two studs emerge from the chassis rail and if those stud heads are not captives, then getting behind - adjacent to the spring hanger is a time consuming job. As luck would have it, the local Dealer had a stripped chassis in the workshop which was fitted with what can be best described as a "bridge" with those two studs attached. Although there was no way of knowing for certain that mine would be the same, I thought it worth a punt. So I marked the end of each stud with a blob of Tippex at the six o clock position. Then as I cracked the nuts, I watched that they didn't rotate. They didn't.  And this is what it looks like with the new bracket fitted, and Dinitrol wax applied.  The fixings were shabby.........  So I opened my (large) box of assorted fasteners...... And tin of black heat resistant paint...........  And fixed it back properly................. This is the nearside rear looking forward. The U bolt is offset from the mounting forward, and just nips the exhaust joint.  All I had to do on the nearside front was to replace the fixings........ Again, the U bolt is offset forwards and just cleares the flare in the pipe. Fitted with the U bolt offset rearwards gets very close to the silencer and it's difficult to tighten the nuts.  The offside was trickier. The angle bracket was a shade too far forward to allow a forward offset of the U bracket, so I'd been running with it (since the change) - offset to the rear but it was a tight fit. So for this one I used a large hammer to realign the bracket further back.  Now it fits as it should.... forward offset.  And finally................... The offside rear was the furthest out of alignment. The right angle bracket was well forward, and I don't know whether that was an MMC solution, or the chap who fitted the sports exhaust later. The U bolt would only fit offset rearwards, because the other way round it missed the exhaust join completely. With my new sense of confidence I tippexed the fixing studs and removed the bracket from the chassis. In the vice I persuaded it to take up a rearward alignment , and filed the slots a touch wider so that I could mount it further to the rear. Once refitted, the U clamp nips the exhaust join just where it should with a forward offset. So now all are the same and I am so happy.........  And now I must away to clean my wire wheels. Well, shortly anyway...  
DaveW
'05 Red Roadster S1
'16 Yellow (Not the only) Narrow AR GDI Plus 4
|
|
|
|
|
Joined: Oct 2008
Posts: 3,439 Likes: 7
Goodwood Drifter Talk Morgan Addict
|
|
Goodwood Drifter Talk Morgan Addict
Joined: Oct 2008
Posts: 3,439 Likes: 7 |
And now I must away to clean my wire wheels.
gosh, I really love my simple black alloys 
Steven
sold: M3W, Aeromax,V6, 4/4 4seater
now: +fourLM62
|
|
|
|
|
Joined: Dec 2008
Posts: 22,385 Likes: 358
Roadster Guru Member of the Inner Circle
|
|
OP
Roadster Guru Member of the Inner Circle
Joined: Dec 2008
Posts: 22,385 Likes: 358 |
The above refurb was posted just two years ago. This is how those U bolts & fittings look after two years..............  So, a quick lick of satin black, and new U bolts, painted with Hycote silver this time, plus some stainless fittings......  I decided to fit some deflectors - the idea is to keep all the crap off the fixings, and also to deflect any flying debris. They were made out of alloy, the rears were offcuts from my undertray, the fronts were freshly cut from a sheet, both using brown paper templates, then bent in the vice. Rear offside:   Front offside:    Nice and simple for once.
DaveW
'05 Red Roadster S1
'16 Yellow (Not the only) Narrow AR GDI Plus 4
|
|
|
|
|
Joined: Jul 2007
Posts: 28,916 Likes: 354
Salty Sea Dog Member of the Inner Circle
|
|
Salty Sea Dog Member of the Inner Circle
Joined: Jul 2007
Posts: 28,916 Likes: 354 |
Very neat Dave. As ever! 
Graham (G4FUJ)
Sold L44FOR 4/4 Giallo Fly
'11 MINI Countryman Cooper D All4
'90 LR 90 SW
|
|
|
|
|
Joined: Aug 2009
Posts: 152
L - Learner Plates On
|
|
L - Learner Plates On
Joined: Aug 2009
Posts: 152 |
Hi All,
Dave, I replaced all brackets and plates by stainless steel ones from John Worrall (HoE). The problem was to find S/S U-bolts because it seems not possible to find in Europe except in Germany where I found some items, but at price of massive gold. These zinc platted U-bolts are virtually dead every year as they are mounted so exposed to water and everything on the road. Fortunately I was not alone and someone here gave me a company in the USA who made these items in good quality S/S, so I ordered, polished and installed. I used all metal lock nuts, so it prevents loosing themselves as usual with S/S bolts and nuts and are not affected by temperature.
This has been a tricky job because as usual JW items was of a very high quality, but unfortunately the holes didn’t fit my car (2003 Plus 8) and I had to remake oblong holes in all the brackets. In a something in stainless steel of 6mm thickness it is not an easy job (4 holes on every bracket). I did that 18 months ago and all look as new.
BR.
Daniel.
|
|
|
|
|
Joined: Apr 2009
Posts: 462
Learner Plates Off!
|
|
Learner Plates Off!
Joined: Apr 2009
Posts: 462 |
a company in the USA who made these items in good quality S/S,
Daniel, do you have an address, probably also from the German company? I need some extra long ones for my Trike. Thanks in advance Frank
1967 4/4 1500 Comp.
1935 Super Sports Barrelback
|
|
|
|
|
Joined: May 2009
Posts: 2,190
South Wales Correspondent Talk Morgan Expert
|
|
South Wales Correspondent Talk Morgan Expert
Joined: May 2009
Posts: 2,190 |
a company in the USA who made these items in good quality S/S,
Daniel, do you have an address, probably also from the German company? I need some extra long ones for my Trike. Thanks in advance Frank Frank, I went to the US outfit for my stainless steel U-bolts. Service was excellent, delivery was very prompt but the import tax does push the price up: http://www.speedwaymotors.com/Stainless-Steel-Muffler-Clamps,1699.html regards, G
GLLHG
|
|
|
|
|
Joined: Aug 2009
Posts: 152
L - Learner Plates On
|
|
L - Learner Plates On
Joined: Aug 2009
Posts: 152 |
a company in the USA who made these items in good quality S/S,
Daniel, do you have an address, probably also from the German company? I need some extra long ones for my Trike. Thanks in advance Frank Hi All, Frank, I found those items there: http://www.schmitt-bcs.de/but, be careful as it seems that they are very pricey. As GLLHG, I got mine from Speedway Motors and all was perfect, the only bug is that I paid more for p&p than the price of the stuff, any way it was less expansive than in Germany. BR. Daniel.
|
|
|
|
|
Joined: Dec 2008
Posts: 22,385 Likes: 358
Roadster Guru Member of the Inner Circle
|
|
OP
Roadster Guru Member of the Inner Circle
Joined: Dec 2008
Posts: 22,385 Likes: 358 |
Post Photobucket Reboot from February 2009:But first........... I was inspired by the Trad picture on here with the Centenary Badge on the dash. Since imitation is the sincerest form of flattery.................I've used a Centenery key fob. The cast emblem is retained by two flat blades curved over on themselves. This can be pulled from the leather fob. Then the blade can be persuaded to part company from the emblem with a small screwdriver, which leaves two small rivet type heads which must be filed flat. Then two pieces of double sided tape, one small piece to fill the hole left by the blade, and a larger piece to locate the badge on the dash. I'm quite pleased with the result. 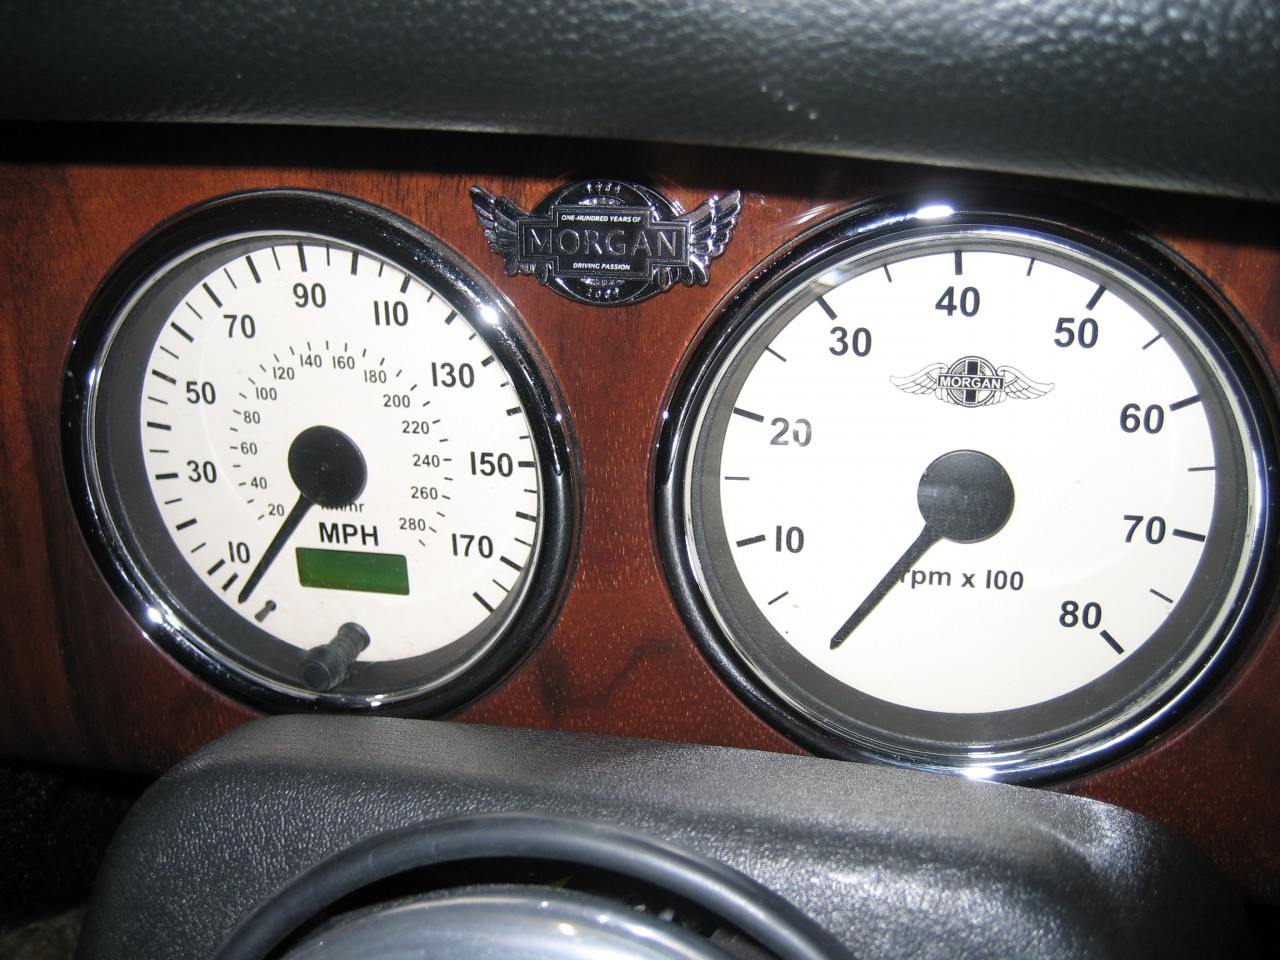 Doing this job prompted me to post where I've located my Union Flags emblems.These are the cast enamelled flags which the Dealers sell. They come with pretend fixing screws which I don't like, so I filed these off and polished the edges. Most Mogs have them on the bonnet (Hood), but the bonnet panel is slightly curved, so I went for a flatter option - the side of the bulkhead panel. After a bit of trial and error, I chose next to the top hinge - it seems to look best there. 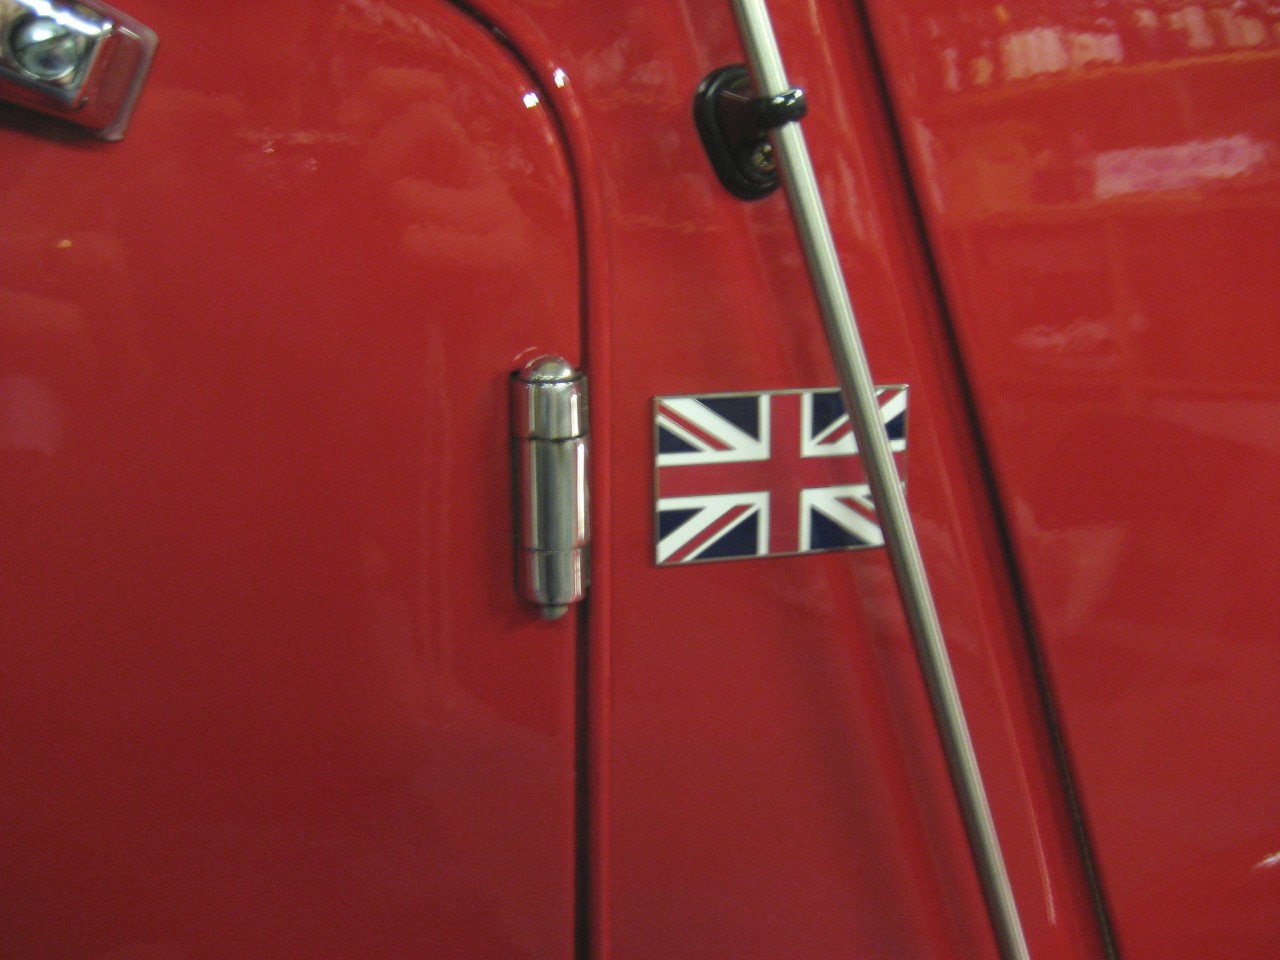 And now......... You may recall that my Roadster had been fitted with a "sports exhaust". You may also recall that it was so damned noisy at 70/75mph that I just couldn't stand it. So the first day back home I took it off and replaced it with the original system which thankfully came with the car. The exhaust is held in place by four right angled brackets (two each side), and one rubber hanger each side at the tailpipe. Now the truth is that the four angled brackets are "aligned" on assembly so that the offset bracket which holds the U bolt, and therefore the exhaust falls in the right place. At the front it's not too critical, but space is tight between the flange and the front of the silencer. At the rear it's more important, because the offset nature of this arrangement means that the U clamp may not align with the joint where the tailpipe assembly meets the main silencer. Still with me???? All will now become clear. When the sports exhaust was fitted (by an 'unnamed' specialist), they could not align the mounting with the exhaust joint, so the right angle bracket was "slotted" and large washers were used. The next picture shows this, alongside a new bracket. Although this is thick and strong metal, to me this is a bodge. 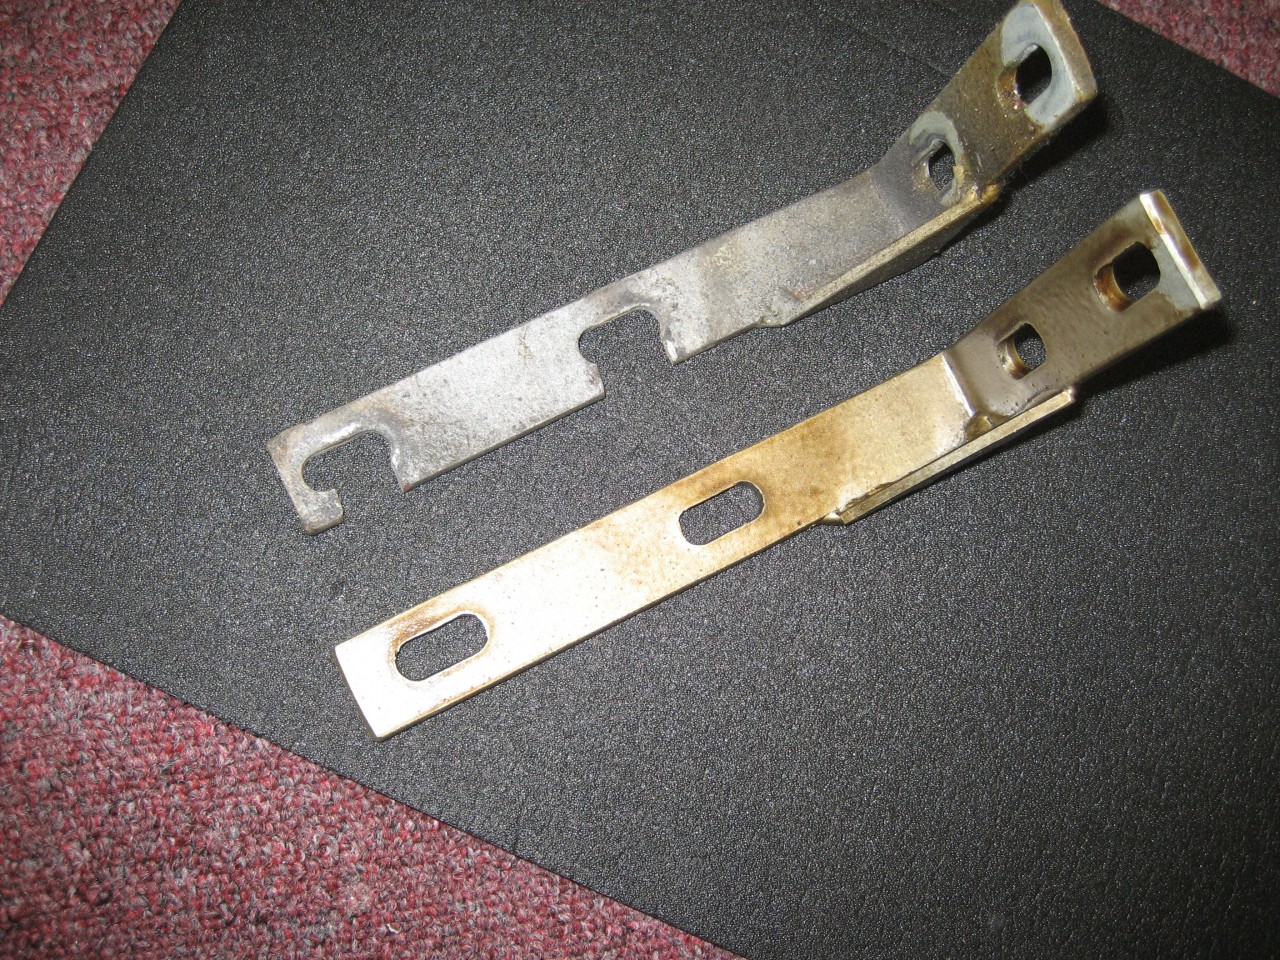 Before I got to this stage, I was seriously worried about unbolting this bracket. The reason being that two studs emerge from the chassis rail and if those stud heads are not captives, then getting behind - adjacent to the spring hanger is a time consuming job. As luck would have it, the local Dealer had a stripped chassis in the workshop which was fitted with what can be best described as a "bridge" with those two studs attached. Although there was no way of knowing for certain that mine would be the same, I thought it worth a punt. So I marked the end of each stud with a blob of Tippex at the six o clock position. Then as I cracked the nuts, I watched that they didn't rotate. They didn't. And this is what it looks like with the new bracket fitted, and Dinitrol wax applied. 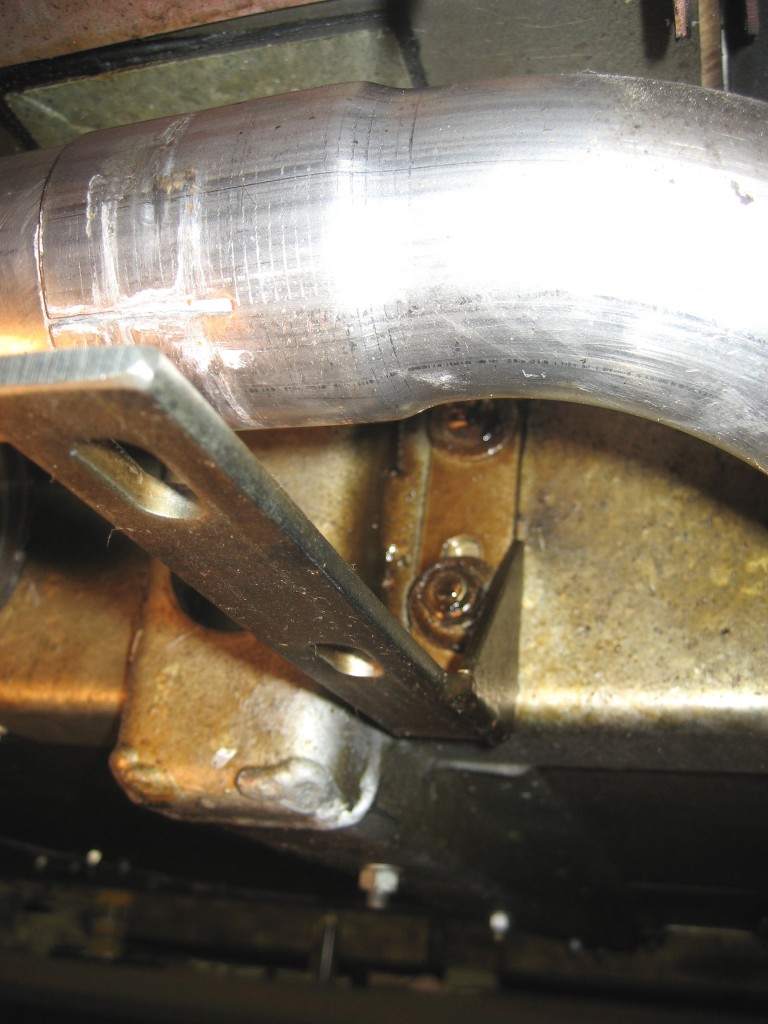 The fixings were shabby......... 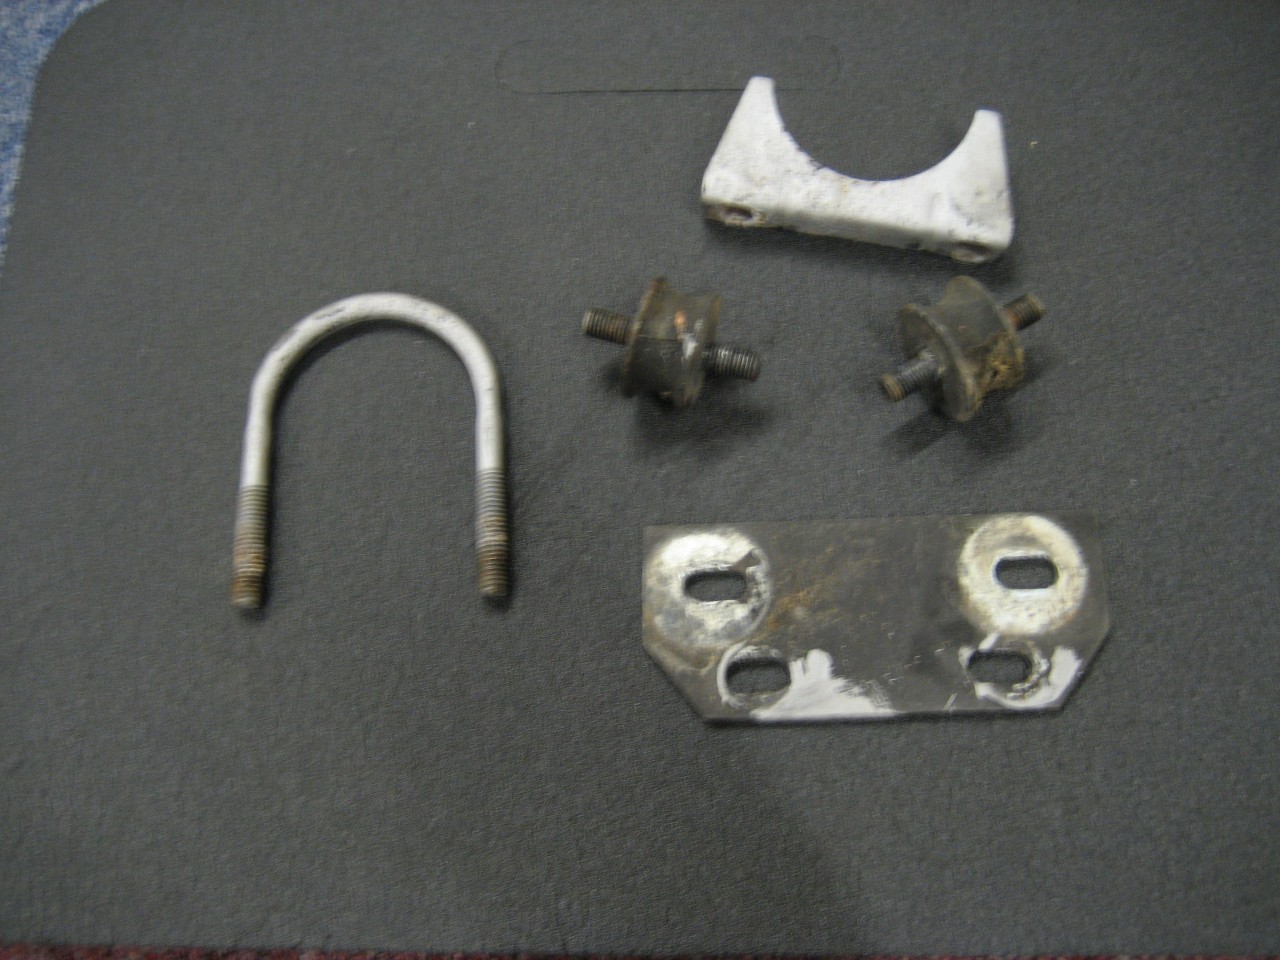 So I opened my (large) box of assorted fasteners...... And tin of black heat resistant paint........... 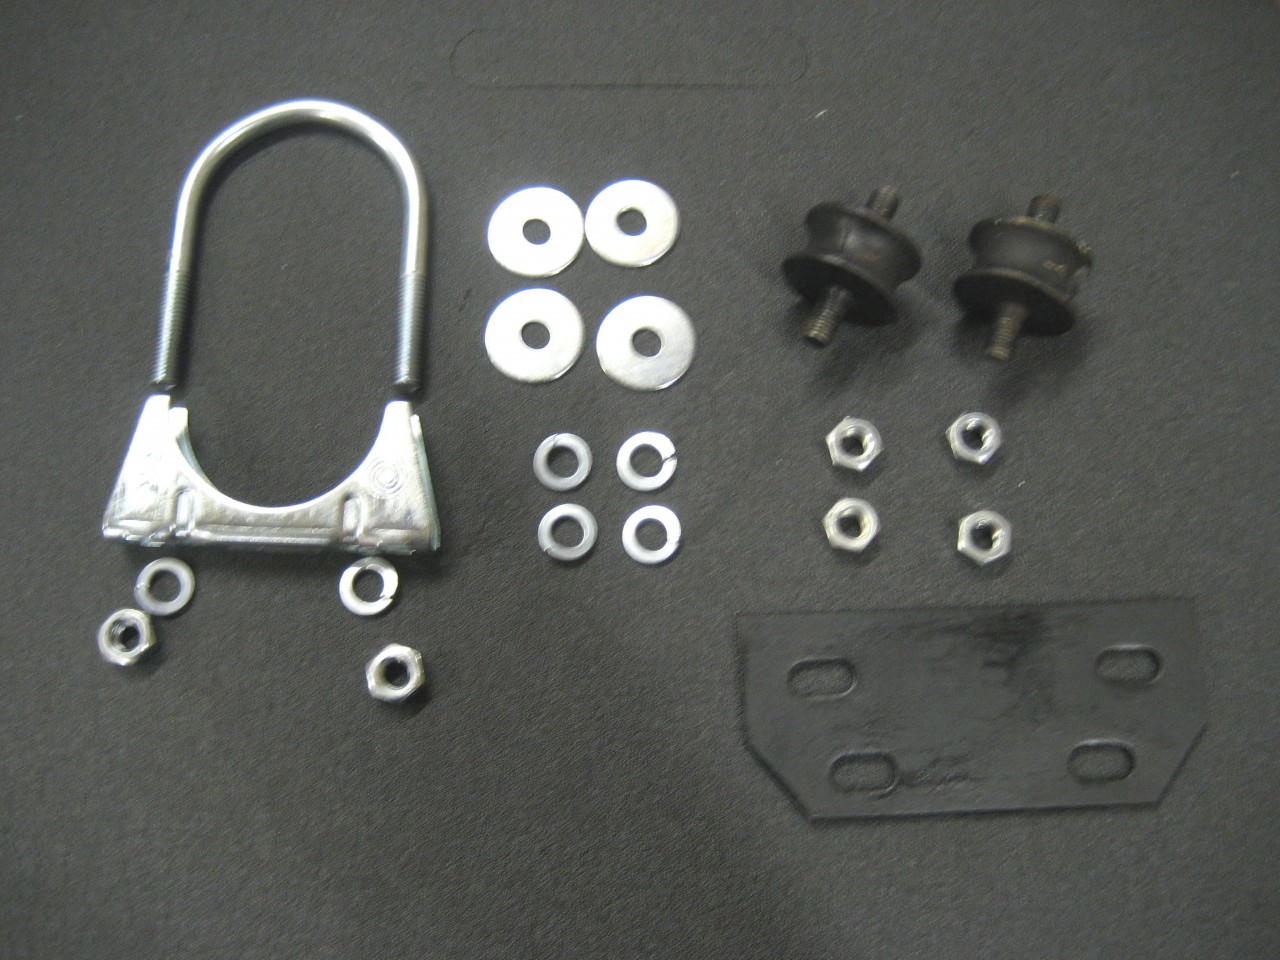 And fixed it back properly................. This is the nearside rear looking forward. The U bolt is offset from the mounting forward, and just nips the exhaust joint. 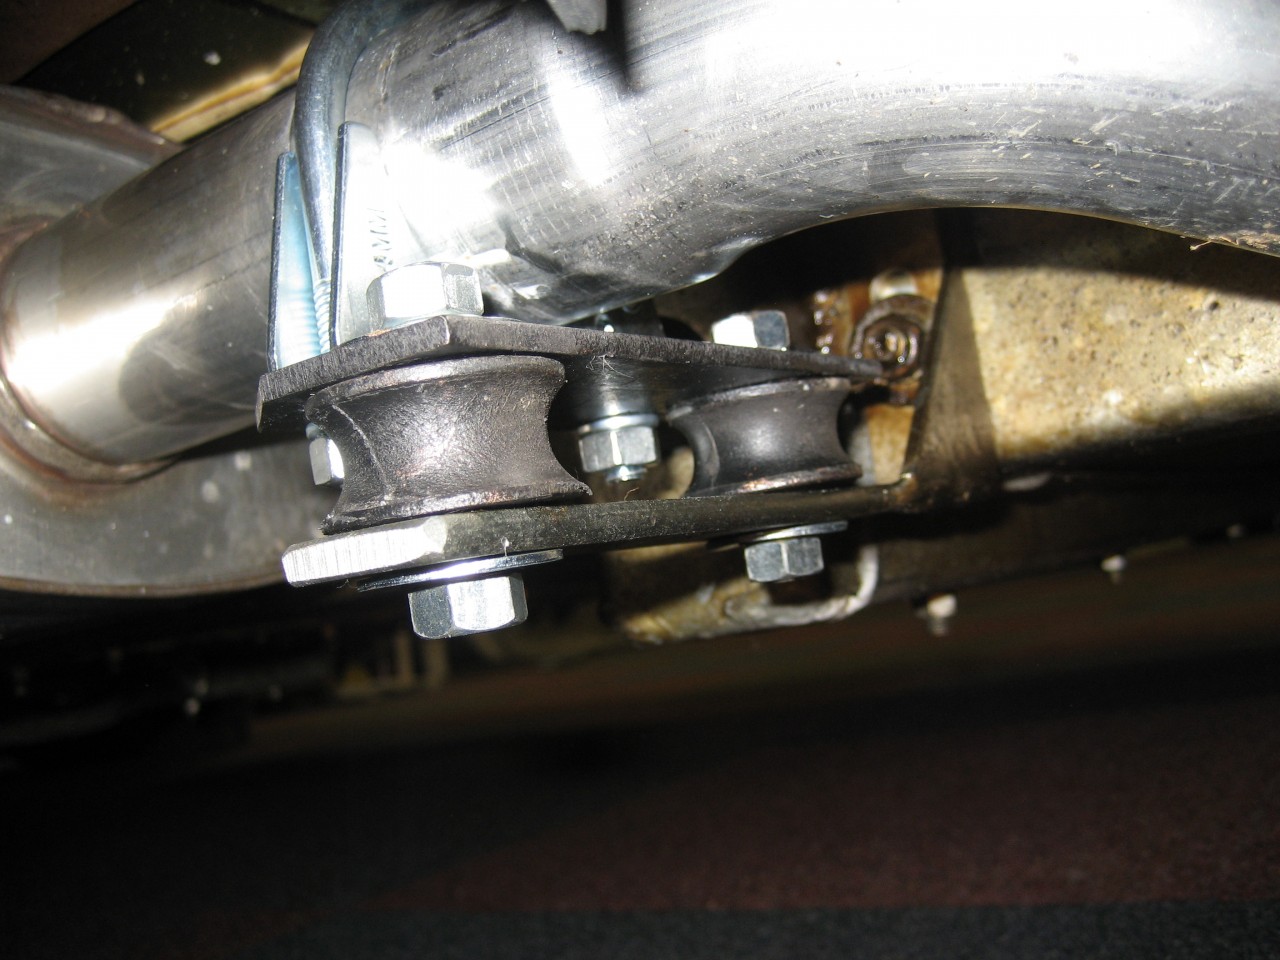 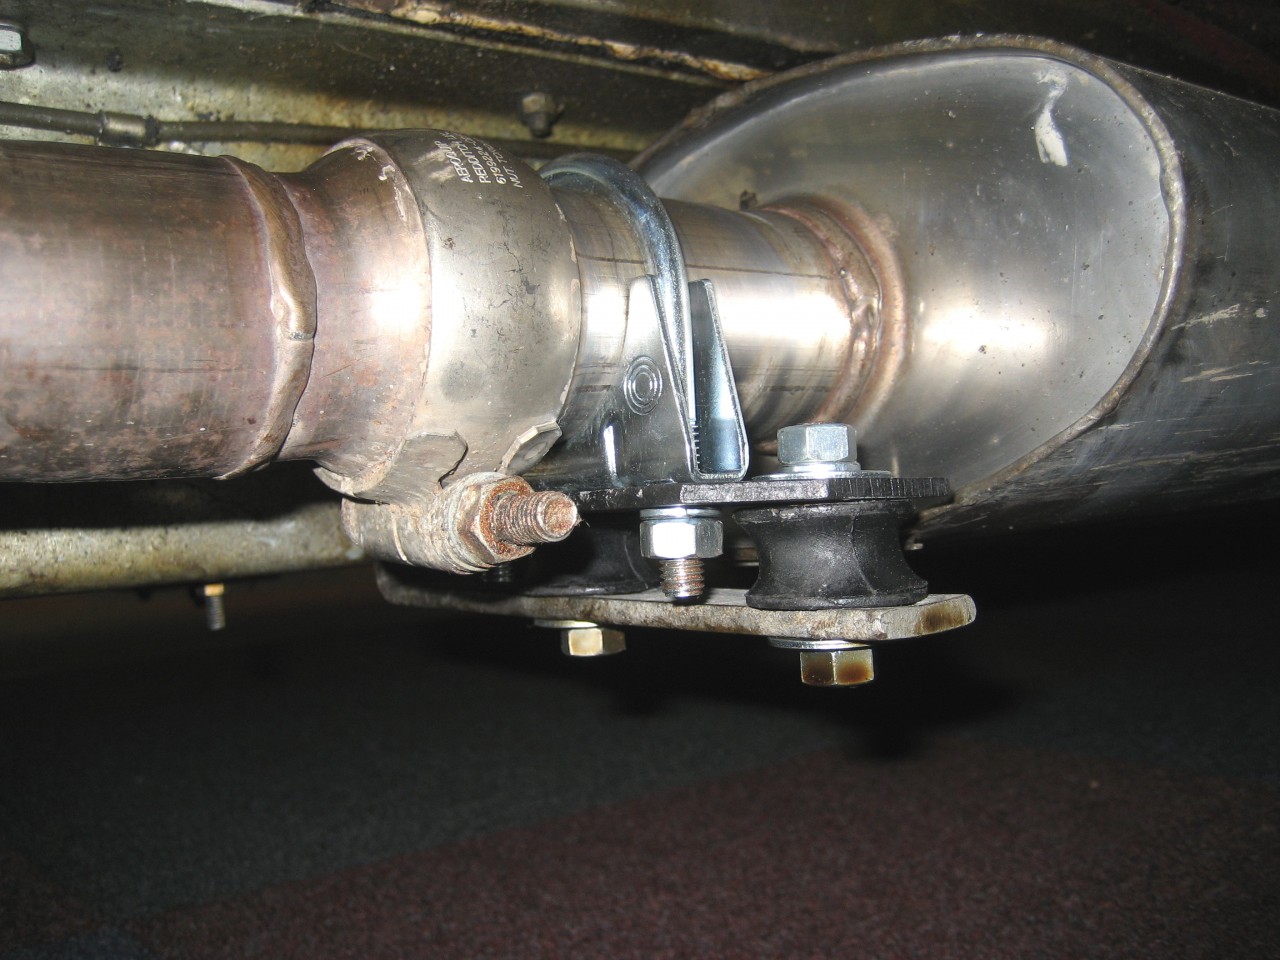 All I had to do on the nearside front was to replace the fixings........ Again, the U bolt is offset forwards and just cleares the flare in the pipe. Fitted with the U bolt offset rearwards gets very close to the silencer and it's difficult to tighten the nuts.  The offside was trickier. The angle bracket was a shade too far forward to allow a forward offset of the U bracket, so I'd been running with it (since the change) - offset to the rear but it was a tight fit. So for this one I used a large hammer to realign the bracket further back. Now it fits as it should.... forward offset. And finally................... The offside rear was the furthest out of alignment. The right angle bracket was well forward, and I don't know whether that was an MMC solution, or the chap who fitted the sports exhaust later. The U bolt would only fit offset rearwards, because the other way round it missed the exhaust join completely. With my new sense of confidence I tippexed the fixing studs and removed the bracket from the chassis. In the vice I persuaded it to take up a rearward alignment, and filed the slots a touch wider so that I could mount it further to the rear. Once refitted, the U clamp nips the exhaust join just where it should with a forward offset. So now all are the same and I am so happy......... 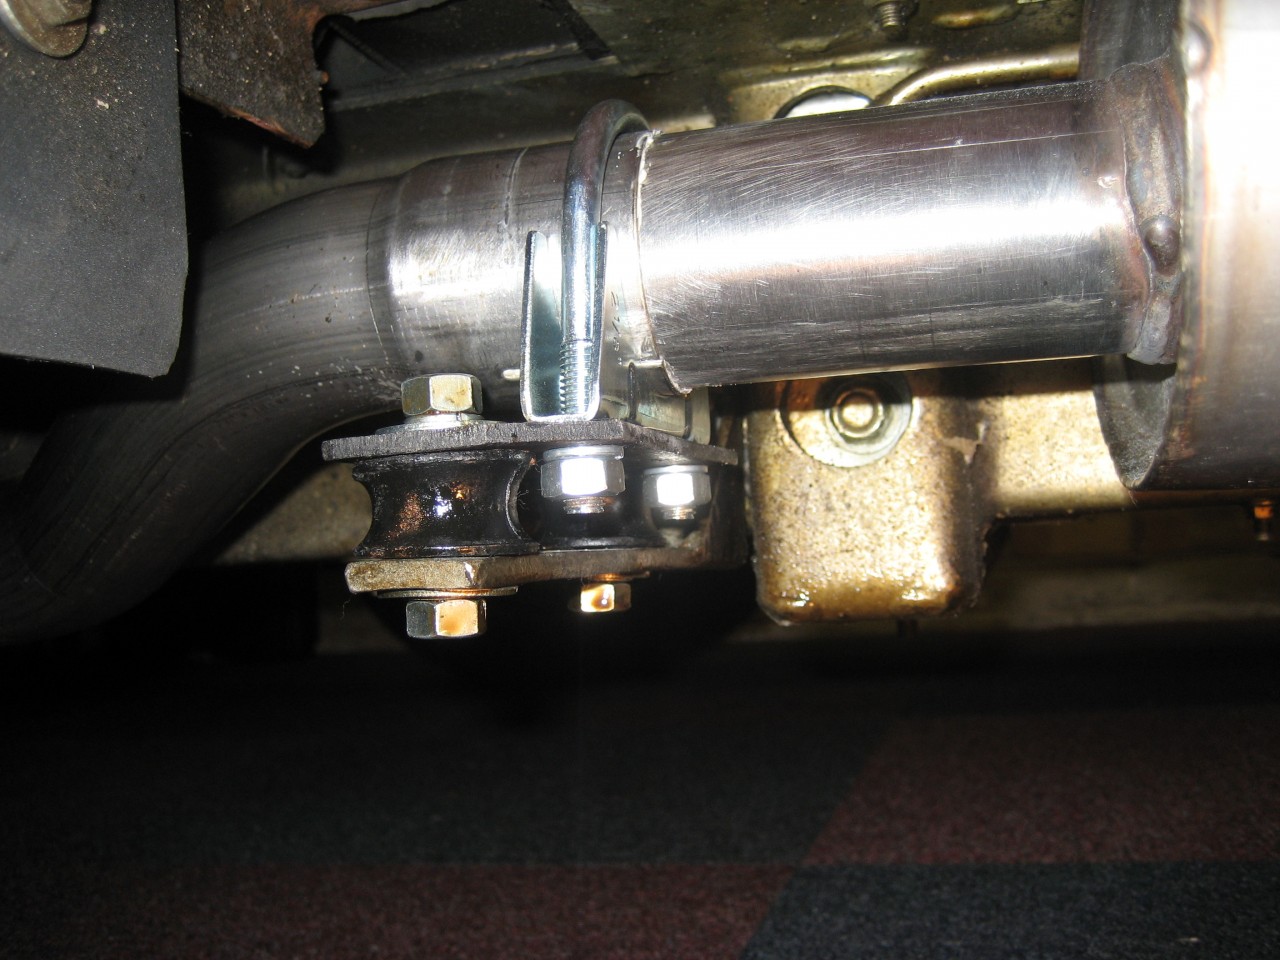 And now I must away to clean my wire wheels. Well, shortly anyway...
DaveW
'05 Red Roadster S1
'16 Yellow (Not the only) Narrow AR GDI Plus 4
|
|
|
|
|
Joined: Dec 2008
Posts: 22,385 Likes: 358
Roadster Guru Member of the Inner Circle
|
|
OP
Roadster Guru Member of the Inner Circle
Joined: Dec 2008
Posts: 22,385 Likes: 358 |
Post Photobucket Reboot from March 2011:The above refurb was posted just two years ago. This is how those U bolts & fittings look after two years.............. 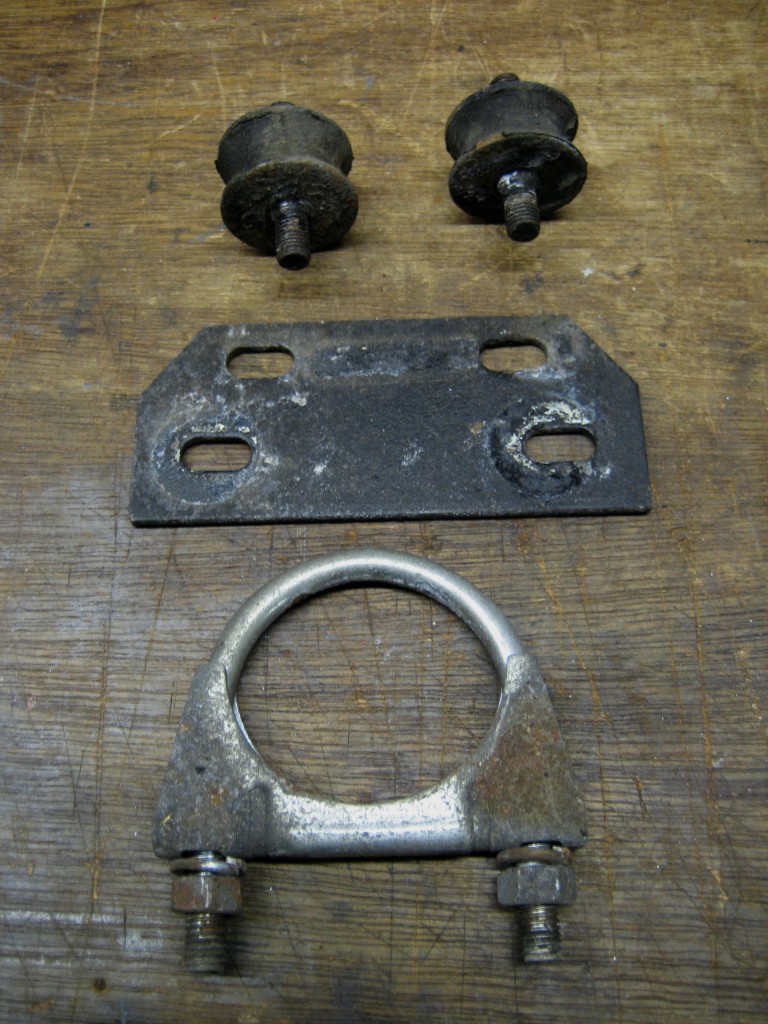 So, a quick lick of satin black, and new U bolts, painted with Hycote silver this time, plus some stainless fittings...... 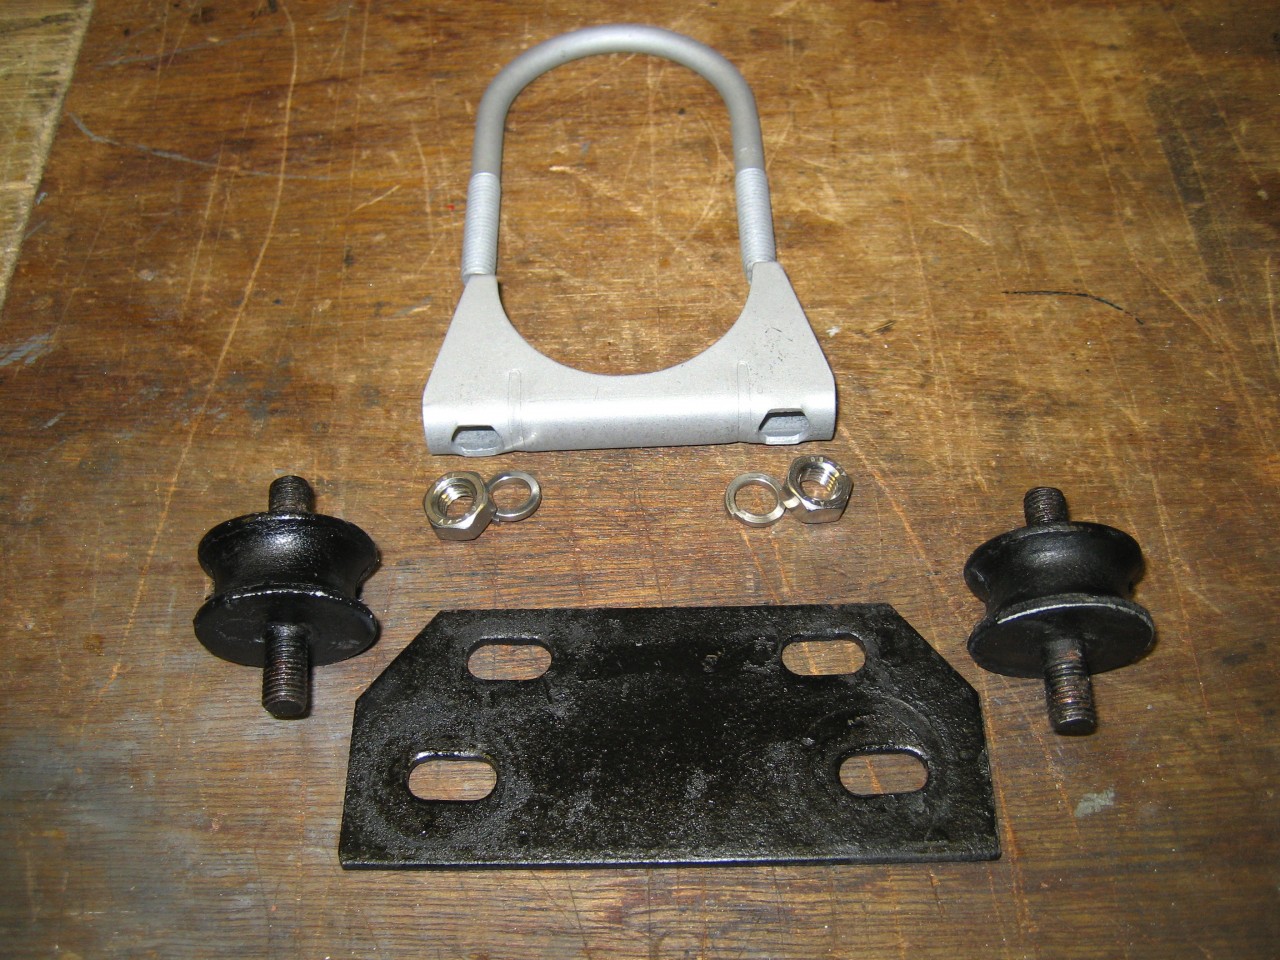 I decided to fit some deflectors - the idea is to keep all the crap off the fixings, and also to deflect any flying debris. They were made out of alloy, the rears were offcuts from my undertray, the fronts were freshly cut from a sheet, both using brown paper templates, then bent in the vice. Rear offside: 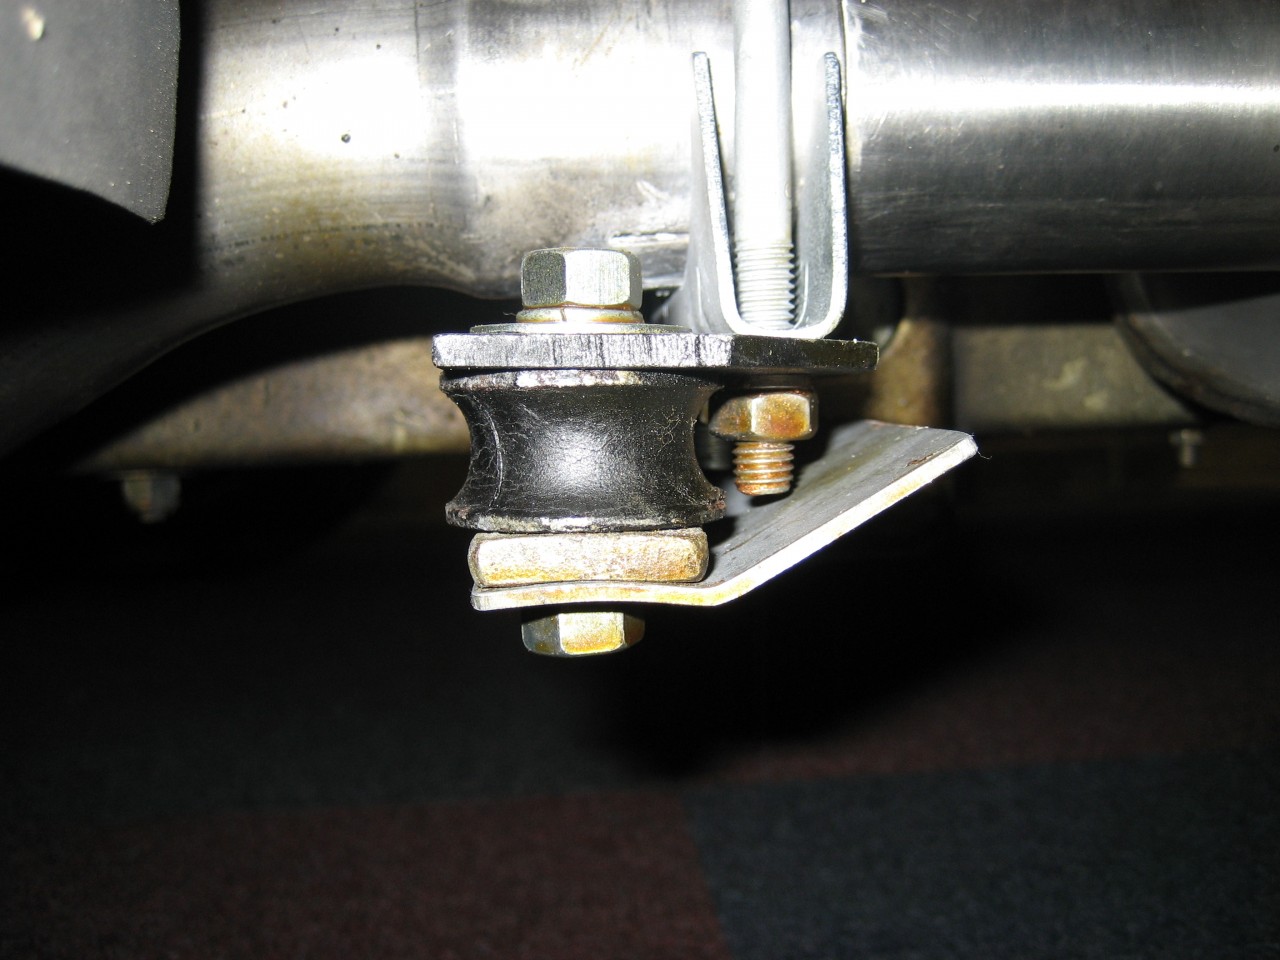 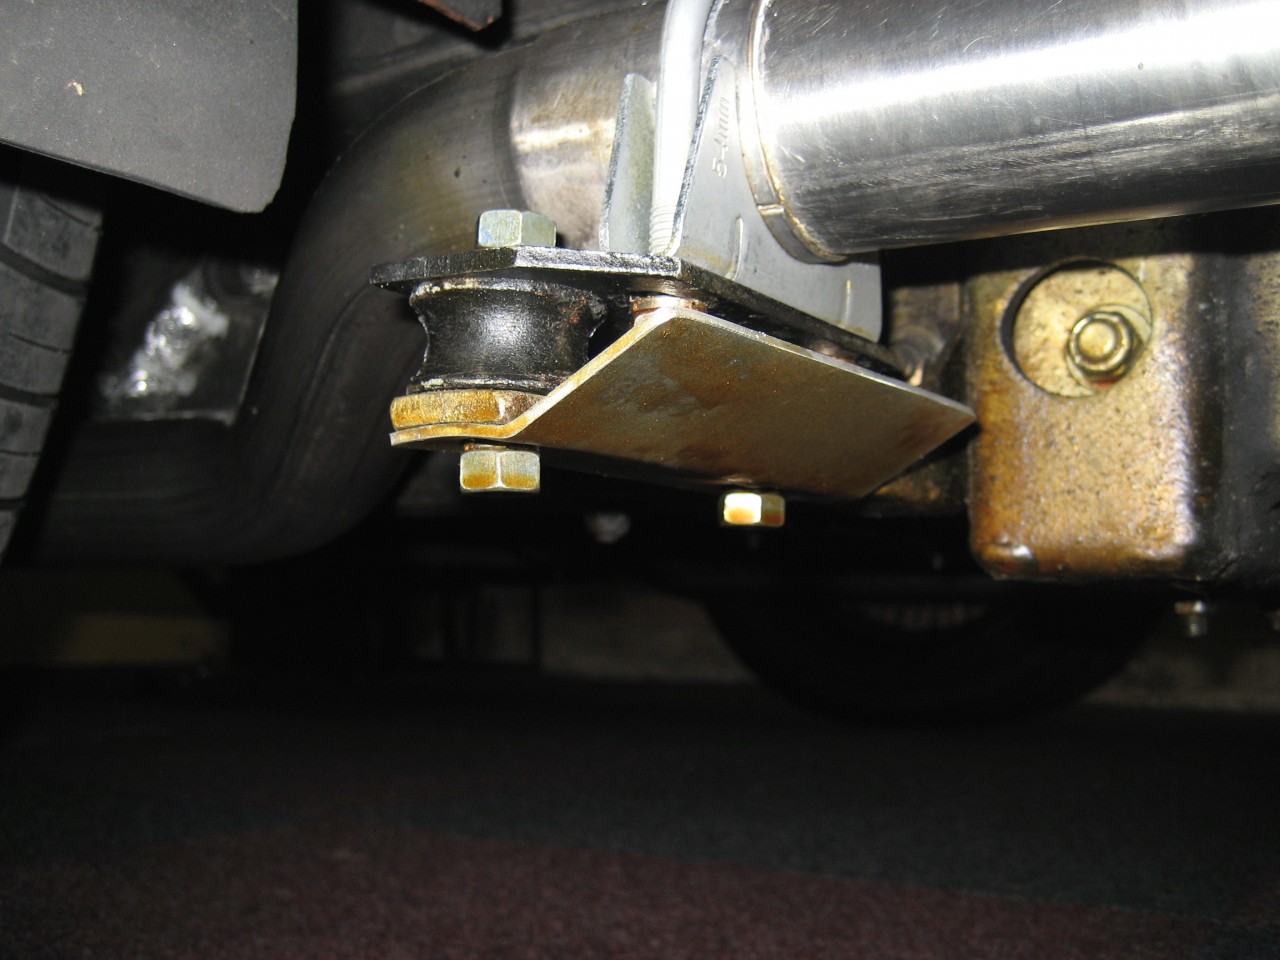 Front offside: 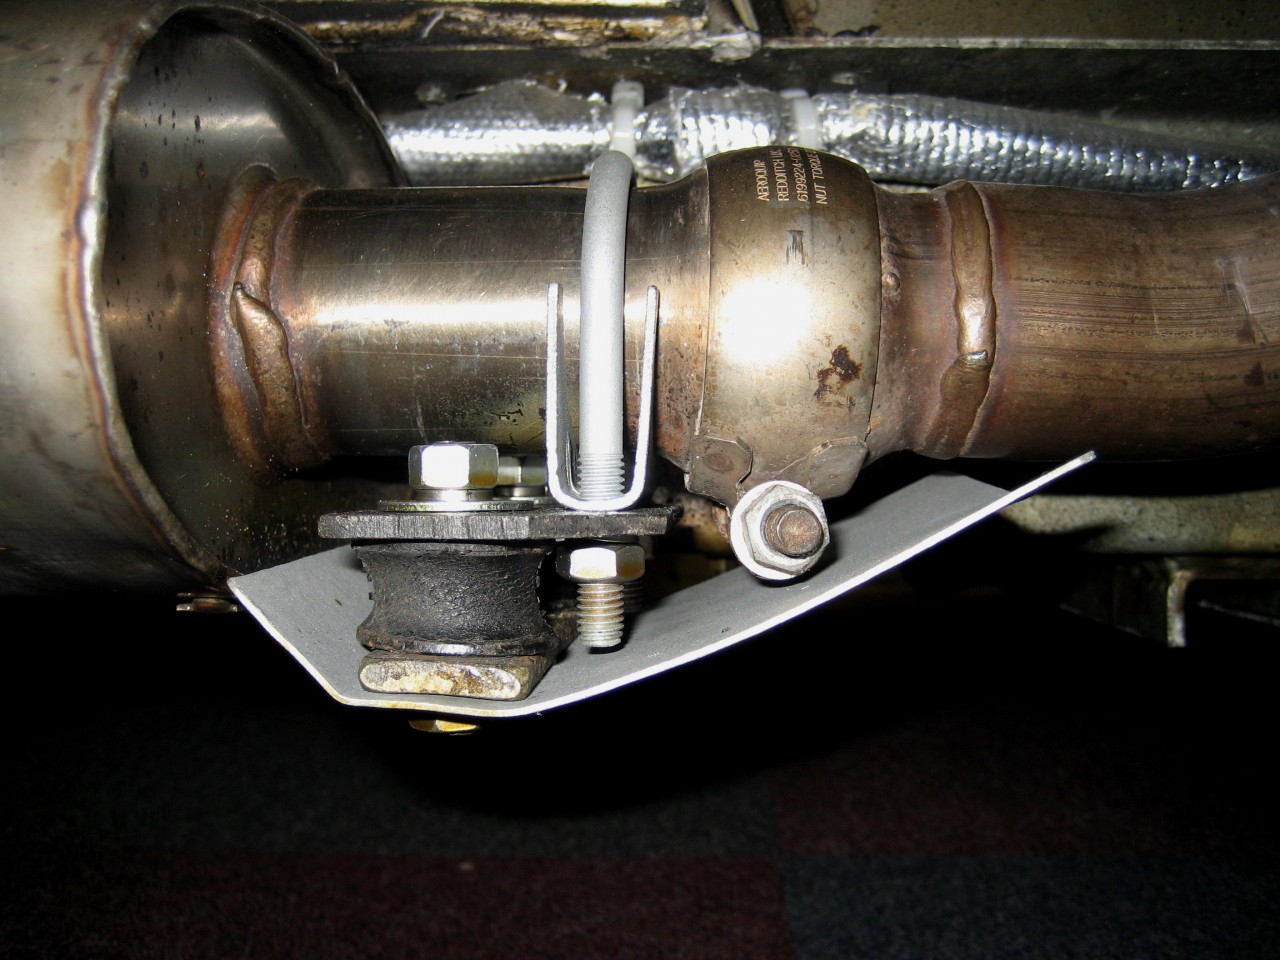 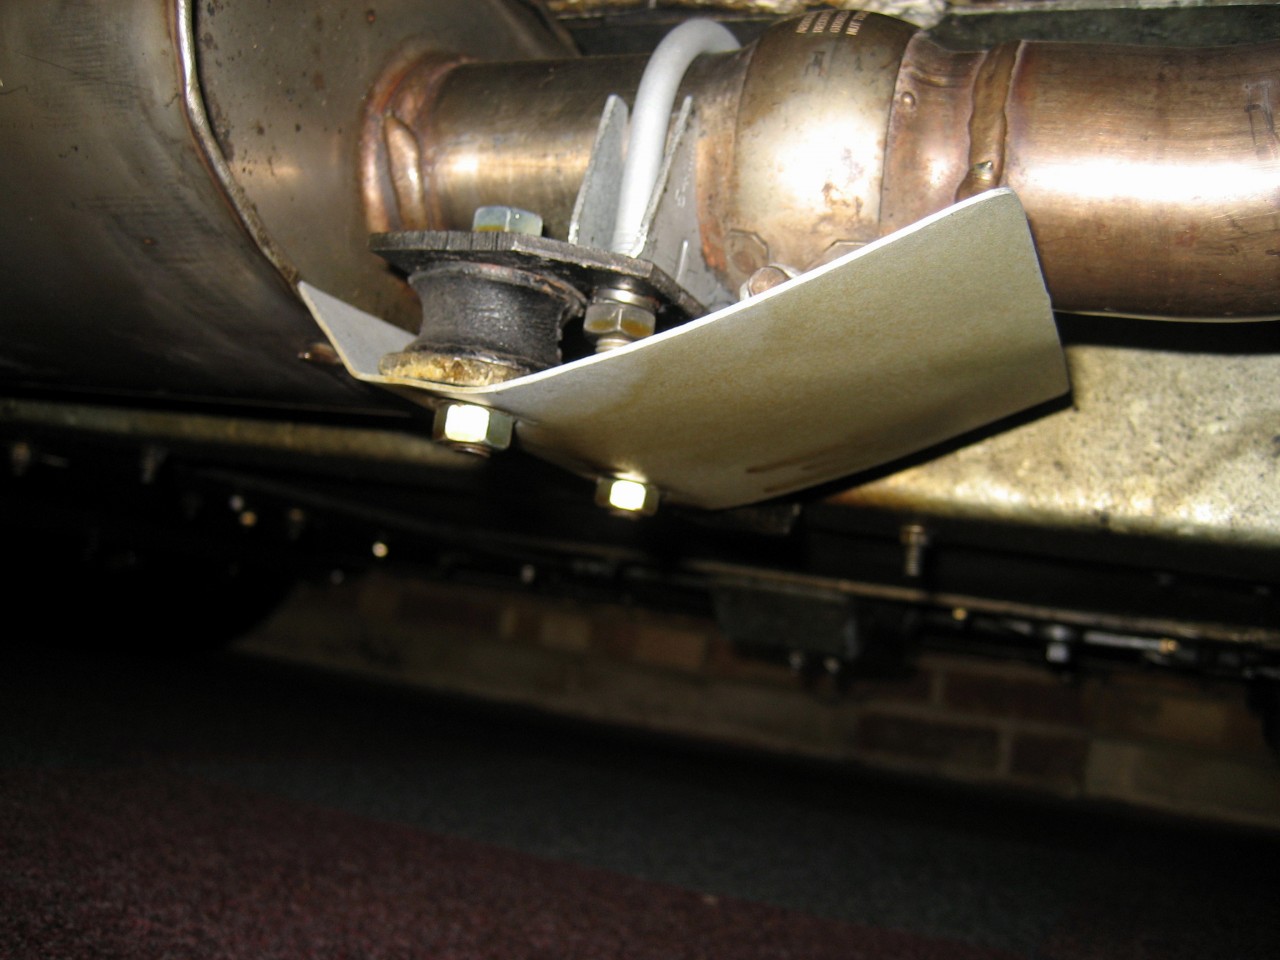 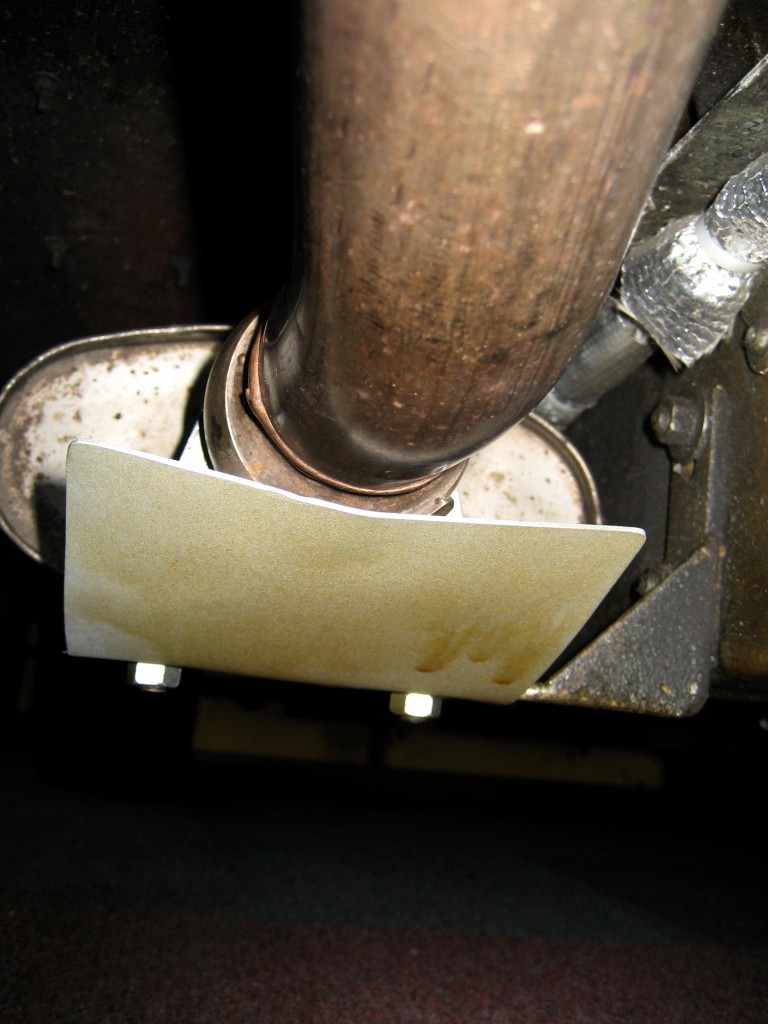 Nice and simple for once.
DaveW
'05 Red Roadster S1
'16 Yellow (Not the only) Narrow AR GDI Plus 4
|
|
|
|
|