Click here to return to the home page.
Image of a road.
Who's Online Now
2 members (DaveW, flyfisher), 109 guests, and 17 robots.
Key: Admin, Global Mod, Mod
Top Posters(30 Days)
+8Rich 103
John V6 66
Newest Members
BenRoadster, Max5787, Jack Noir, phenompilot52, Orjan
9,638 Registered Users
Newest Topics
Old Book
by Morganmike - 21/09/26 07:54 PM
ABS Unit problems on 2013 Aero Plus 8
by Ambrose2 - 21/09/26 11:23 AM
Factory meet
by Julian BB - 21/09/26 09:25 AM
Diss Festival of Transport
by RichardV6 - 20/09/26 01:35 PM
Goodwood
by waikiore - 19/09/26 02:50 PM
My 4/4 as it was in 1975
by Strathaven - 18/09/26 09:09 AM
US Cars - Metric Threads?
by Paul F - 17/09/26 08:29 PM
Latest Photos
First Morgan as it is now
by Strathaven, September 15
New to me 95 plus 4 daily driver
by SailingTom2, September 12
Bits to give away
Bits to give away
by TigerTim, September 11
1989 Morgan Plus 4 in Ontario, Canada
by Carbuilder, September 5
First anniversary of Plus 4
by Strathaven, September 5
Forum Statistics
Forums39
Topics49,932
Posts838,511
Members9,638
Most Online1,063
Jun 14th, 2026
Today's Birthdays
AlexCreasey
Previous Thread
Next Thread
Print Thread
Page 4 of 5 1 2 3 4 5
Joined: Feb 2011
Posts: 14,009
Member of the Inner Circle
Offline
Member of the Inner Circle
Joined: Feb 2011
Posts: 14,009
Nice work Dave!


Jays
Former Morgan owner. Gone but hopefully not forgotten!
Joined: Dec 2008
Posts: 22,385
Likes: 358
DaveW Online Content OP
Roadster Guru
Member of the Inner Circle
OP Online Content
Roadster Guru
Member of the Inner Circle
Joined: Dec 2008
Posts: 22,385
Likes: 358
Originally Posted By Paul F
That is impressive. Have you considered the price for a production version yet?
hide


Well Paul, the labour cost would be £xxx, so would be way too expensive to sell.
MMC could make these by Superform (with some compromises on depth to "fit all")and fit to each car, but otherwise it's not really a commercial propositon.

The only commercial option would be to manufacture sections which could be 'fitted' and assembled to individual cars.


DaveW
'05 Red Roadster S1
'16 Yellow (Not the only) Narrow AR GDI Plus 4
Joined: Aug 2010
Posts: 5,473
Likes: 173
Charter Member
Offline
Charter Member
Joined: Aug 2010
Posts: 5,473
Likes: 173
Originally Posted By DaveW
Originally Posted By Paul F
That is impressive. Have you considered the price for a production version yet?
hide


Well Paul, the labour cost would be £xxx, so would be way too expensive to sell.
MMC could make these by Superform (with some compromises on depth to "fit all")and fit to each car, but otherwise it's not really a commercial propositon.

The only commercial option would be to manufacture sections which could be 'fitted' and assembled to individual cars.


The Superform option would make a great accessory. I don't have your patience so would happily pay a reasonable price for something ready made.


Paul
Costock, UK
Plus Four 75th - Furka Rouge - Pip
Disco 5
Teddy - 17h1 Irish Draught cross
Joined: Dec 2008
Posts: 22,385
Likes: 358
DaveW Online Content OP
Roadster Guru
Member of the Inner Circle
OP Online Content
Roadster Guru
Member of the Inner Circle
Joined: Dec 2008
Posts: 22,385
Likes: 358
After a run out today I've added a few small tweaks. Nothing catches but I've added a bit more clearance for the rear flexible hose, which emerges from the union at 90 degrees. I'll put a couple of photos up when I get time. We're off to a wedding tomorrow.............................

I agree that Superform would be a fantastic accessory, and sometimes it's hard to see why MMC don't take advantage of something as obvious as this.


DaveW
'05 Red Roadster S1
'16 Yellow (Not the only) Narrow AR GDI Plus 4
Joined: Dec 2008
Posts: 22,385
Likes: 358
DaveW Online Content OP
Roadster Guru
Member of the Inner Circle
OP Online Content
Roadster Guru
Member of the Inner Circle
Joined: Dec 2008
Posts: 22,385
Likes: 358
So just to wrap this up............

I decided to give the flexible pipe a bit more clearance.
Here it emerges from the union horizontally......


So I broke out the Dremel with cutting disc, and it made short work of the modification.


While I was at it.........
I just couldn't resist finishing off the holder-downers. They needed a bit of rounding off with a file. Not so good as the 2005 versions. Then I found some fine leather, and some glue and this was the result.


Very thin leather will wrap over the edge and stick.

So that's it. Job done.

thumbs


DaveW
'05 Red Roadster S1
'16 Yellow (Not the only) Narrow AR GDI Plus 4
Joined: Dec 2008
Posts: 22,385
Likes: 358
DaveW Online Content OP
Roadster Guru
Member of the Inner Circle
OP Online Content
Roadster Guru
Member of the Inner Circle
Joined: Dec 2008
Posts: 22,385
Likes: 358
Yes Perry it's the battery umbilical (as I call it)........
I added it early on in the 'early days' thread.

I've also stuck some leather buffers where the tray sits on the tank. After one trip I could see where they needed to be!


DaveW
'05 Red Roadster S1
'16 Yellow (Not the only) Narrow AR GDI Plus 4
Joined: Jul 2014
Posts: 1,767
Likes: 21
Talk Morgan Enthusiast
Offline
Talk Morgan Enthusiast
Joined: Jul 2014
Posts: 1,767
Likes: 21
excellent job Dave and good to see so many explanatory photo's thumbs

James


Aero8 , Series 1 - Boston Green
RR Evoque P300E Autobiography
Smart Brabus Convertible
Monkey Z125
Joined: Dec 2008
Posts: 22,385
Likes: 358
DaveW Online Content OP
Roadster Guru
Member of the Inner Circle
OP Online Content
Roadster Guru
Member of the Inner Circle
Joined: Dec 2008
Posts: 22,385
Likes: 358
Post-Photobucket Re-Post...............

Well, today I made a start on this. My first effort eight years ago was wholly wood, and made use of the extra depth available on the offside. It was fiddly to build, but has stood the test of time, but a 'never again' job.

So three years ago when I needed another, having contemplated a wood & aluminium composite, I ended up making one essentially out of a single piece of aluminium, shaped like an aerofoil, and with two pieces added at the sides, and an aluminium box over the diff. It was about 85% OK, but really tested my ability with the tools I have available. It was a 'never again' job. ooo ooo

So faced with this again............ and the reason is very simple. Without extra capacity in the tool tray, all tools and other essentials end up under or behind the seats.

This is the standard set up. On the left is a circular recess which is said to be for a spare wheel nut.
There's a rectangle for a first aid kit and a wheelbrace shaped recess for if you have alloys.
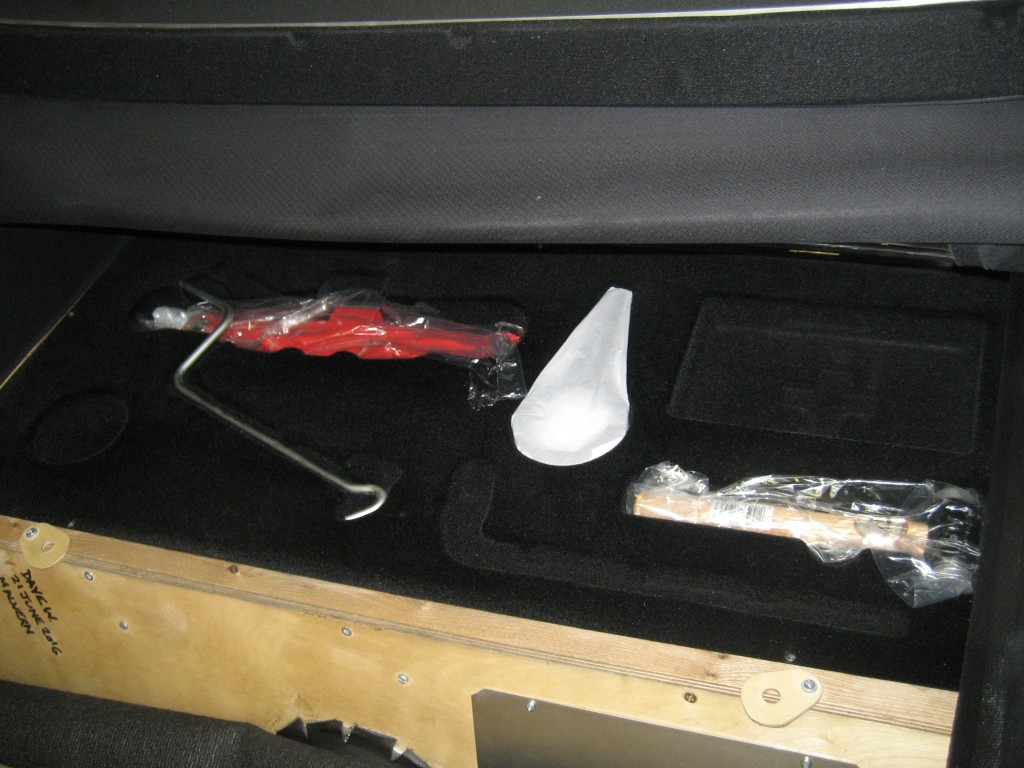


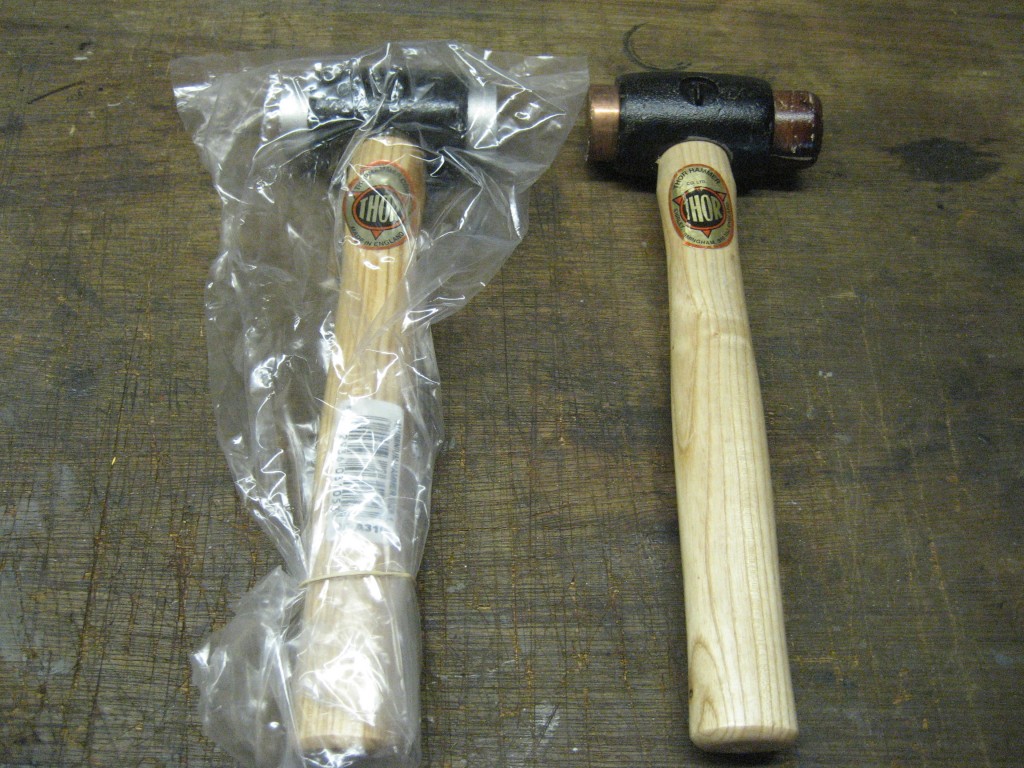
At present, the standard supplied hammer is an aluminium Thor (on the left). My old No1 Thor with copper & leather hammer is on the right.


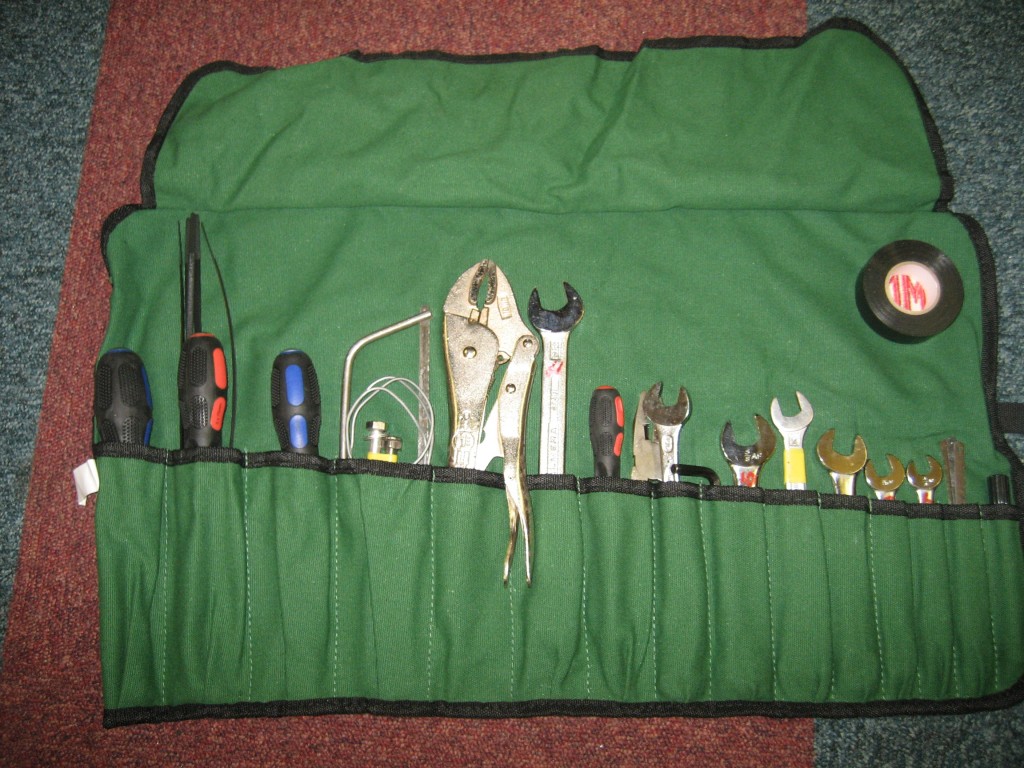
This is my tool roll, with the usual tools, plus some cable ties, wire, insulating tape (covering the MG badge), and a couple of extra nuts and bolts for the rack mountings. On the right are some spare junior hacksaw blades and a tyre pressure gauge.


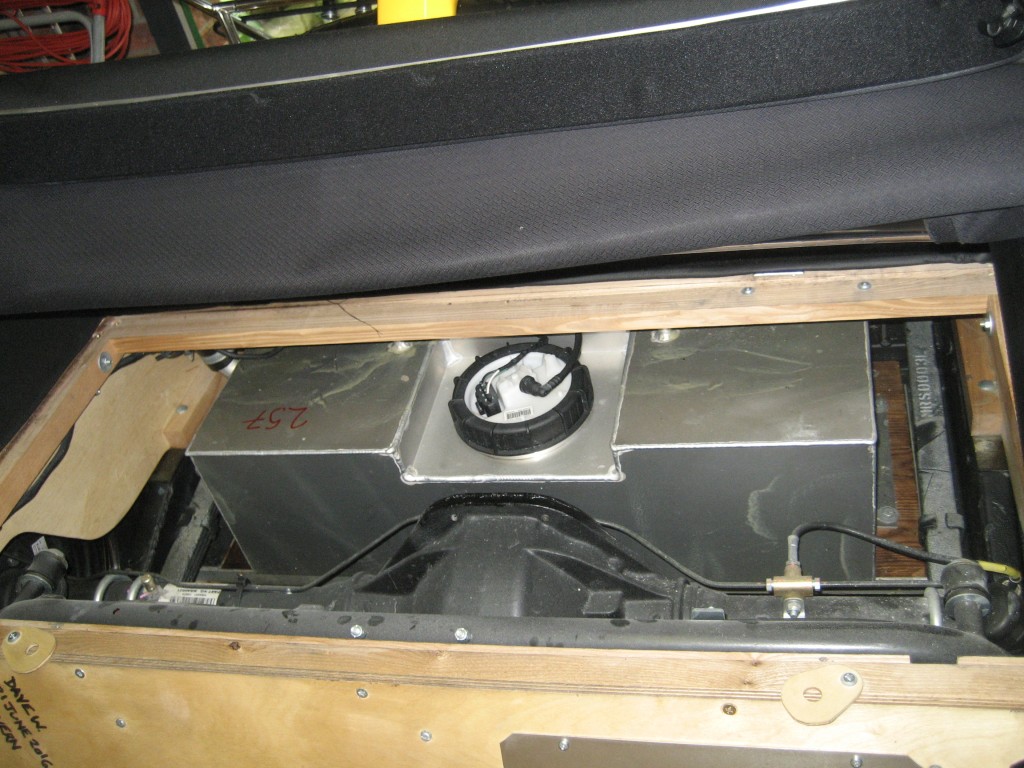
With the tray out you can see the latest tank design. This tank is higher than the 2012 tank - which did present a small problem because I started work on Bumble, but more of that in a minute.


I measured the vertical clearance between the brake pipe union and the top of the tank.
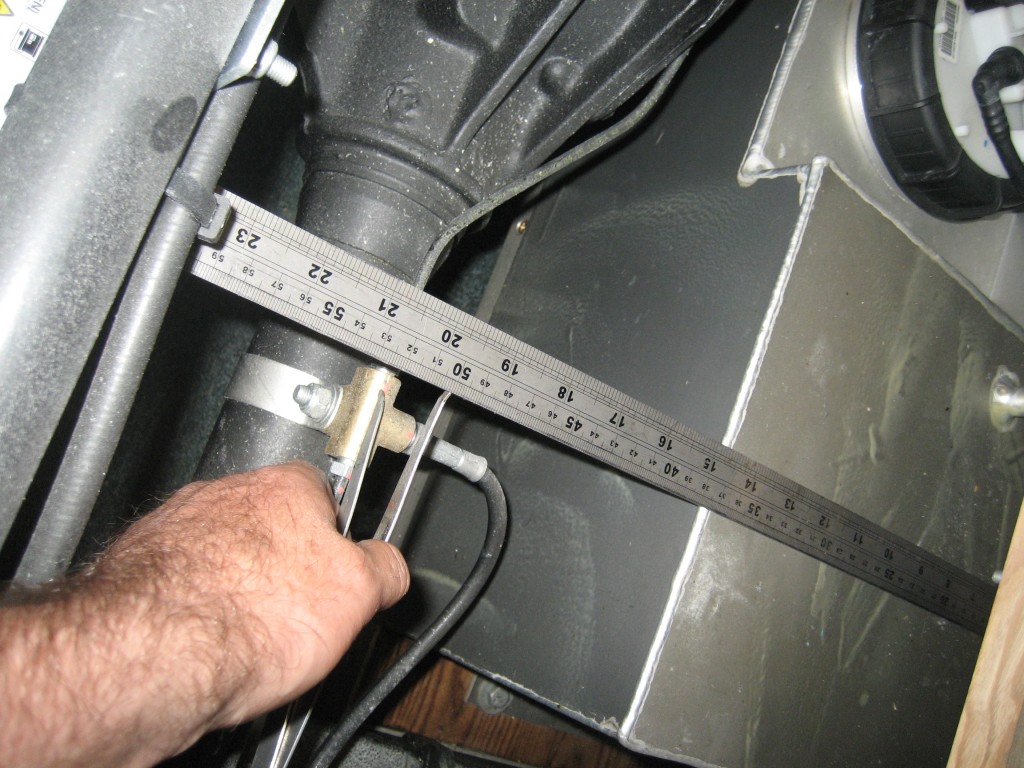


Just under 2.25 inches - 5.5cm. That should be enough.
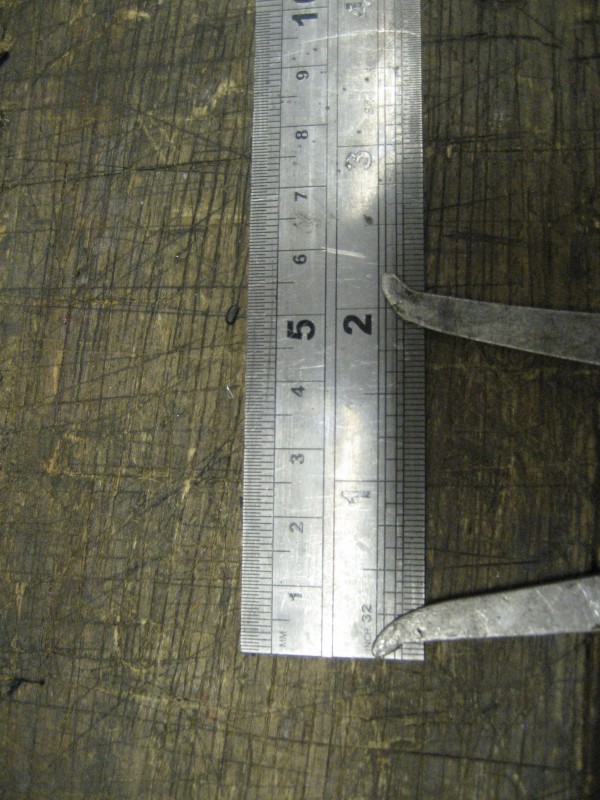


These two protruding nuts and bolt ends get in the way of the tool tray. There are two more on the other side.


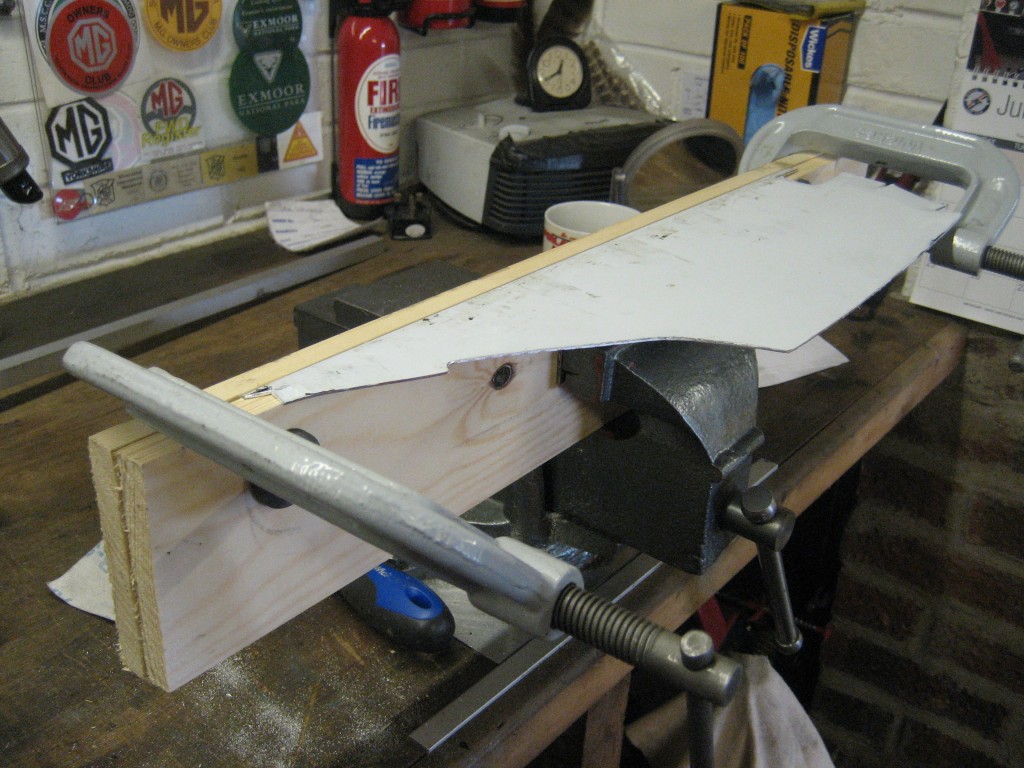
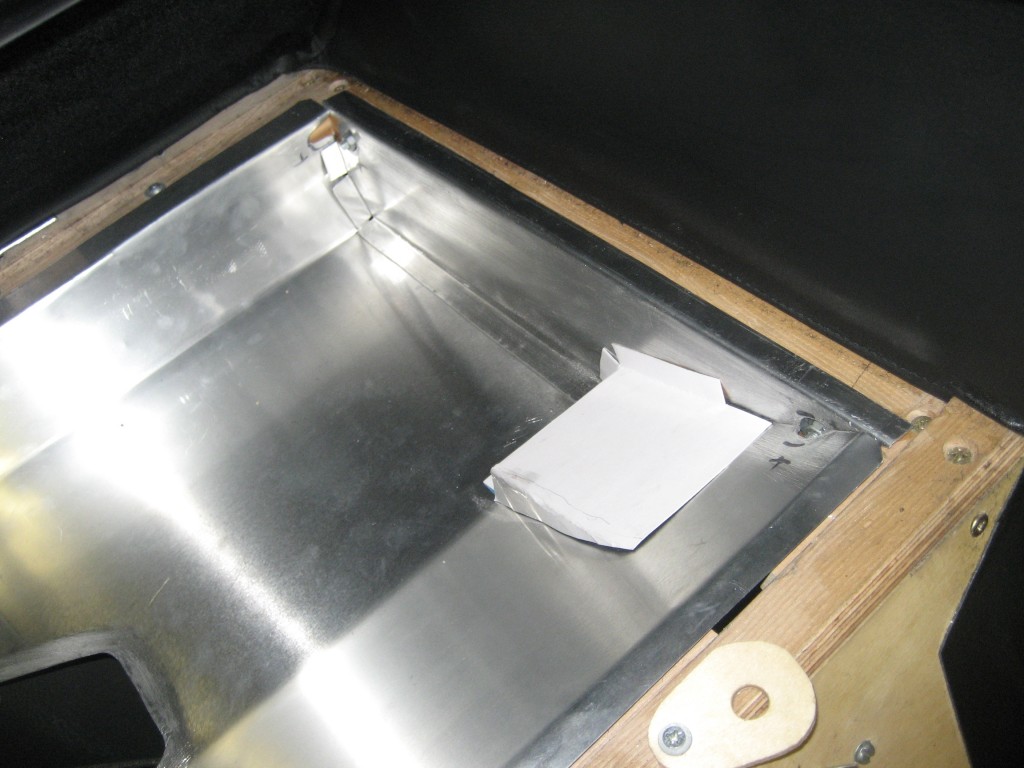
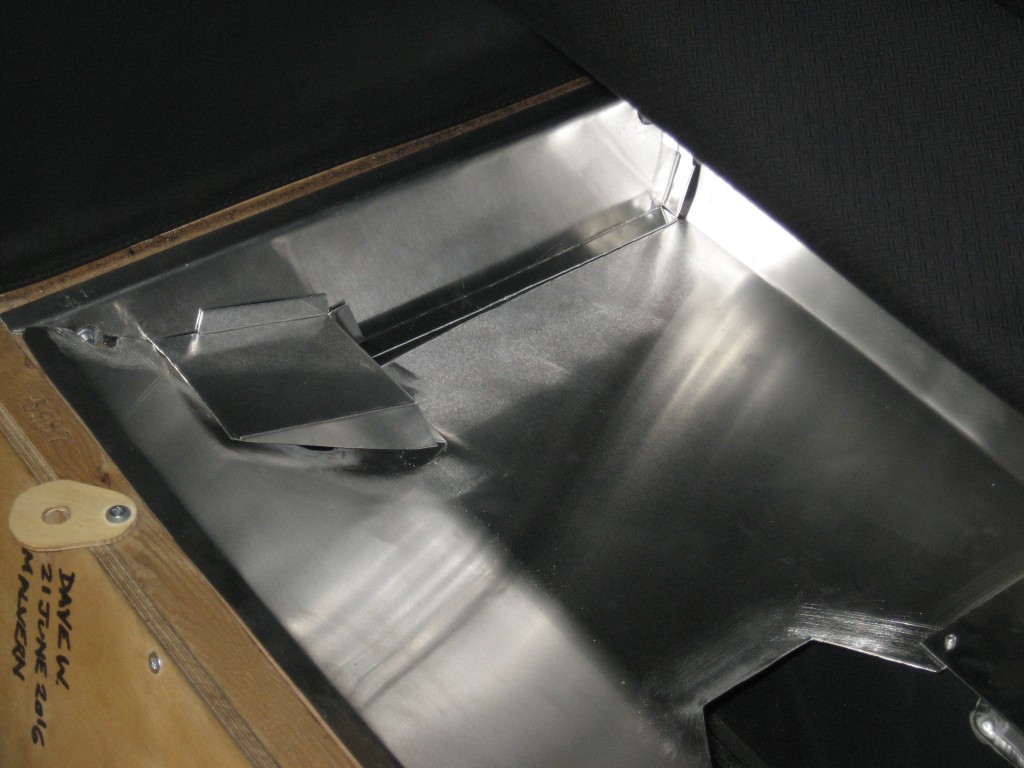
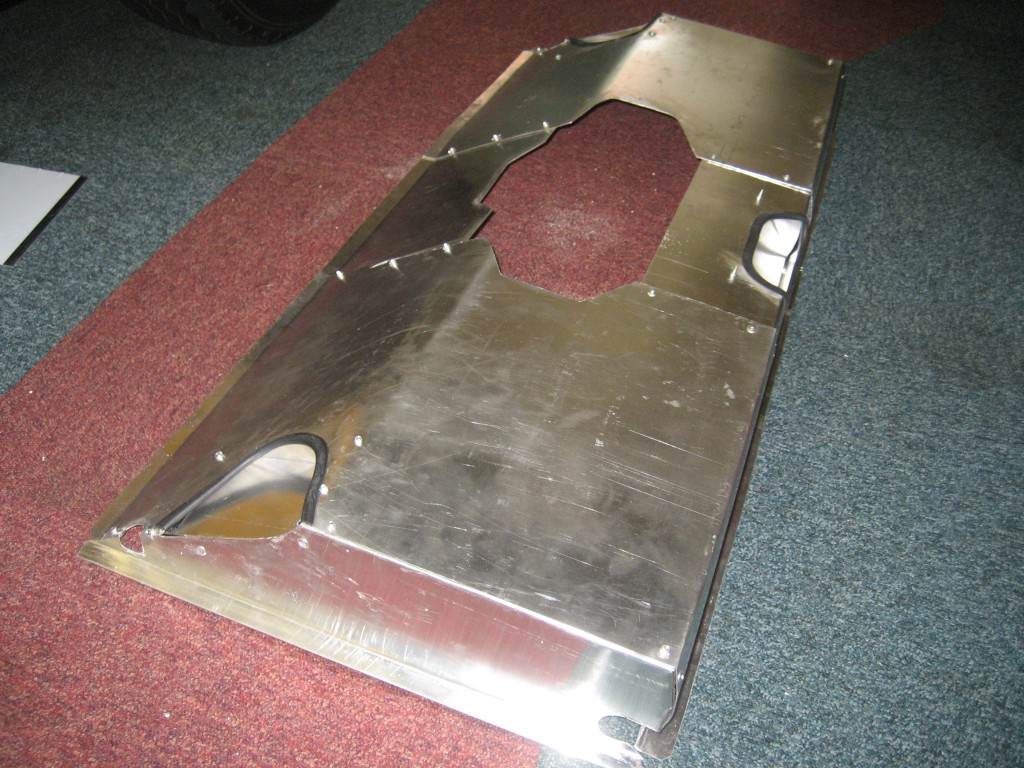
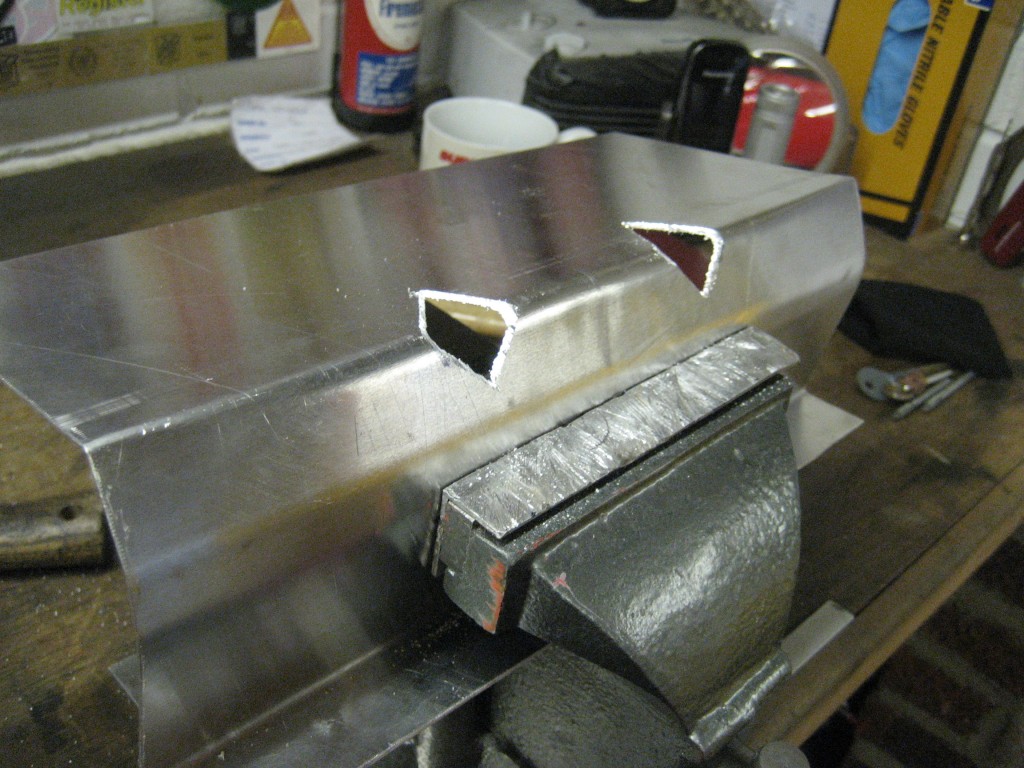
Look closely - I decided to make this tool tray in two halves with a centre section riveted in place. This way I was able to make a start on Bumble and transfer the pieces onto the new car. I knew that it wouldn't be the same, but I hadn't reckoned on the fuel tank being higher! I got round this by curving the rear section to lose a bit of height. Interestingly the cut outs I had made on Bumble for the upper damper mounts were not big enough. There was a good half inch difference, so I've been busy with the tin snips. It was much easier to bend these halves using timber formers in the vice, than the huge single piece of aluminium in the Mk2 version. Although I had planned to build a slave body frame to make things easier, the differences meant that it was easier to do the fitting on the car, but taking real care swinging the pieces in and out.
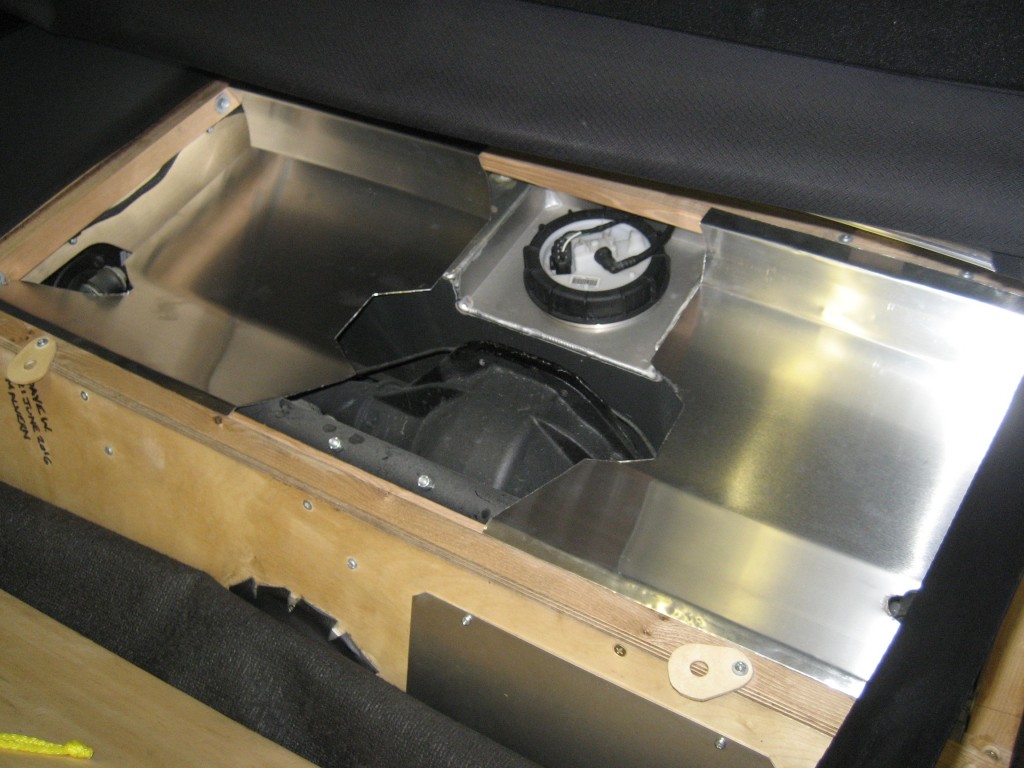


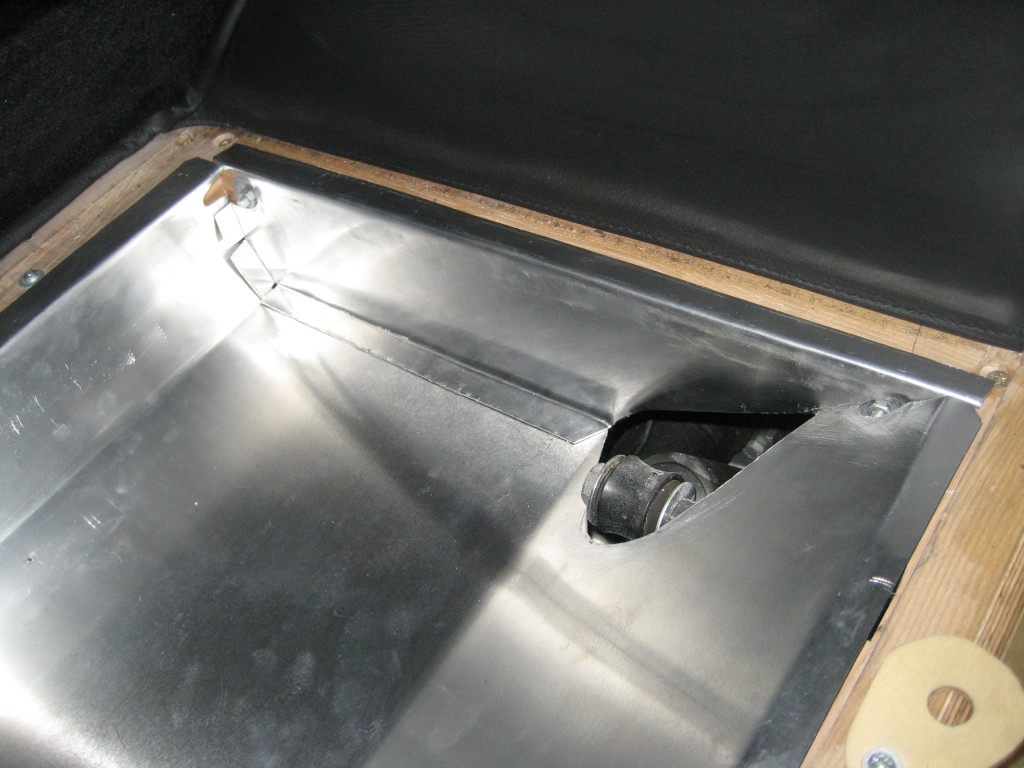
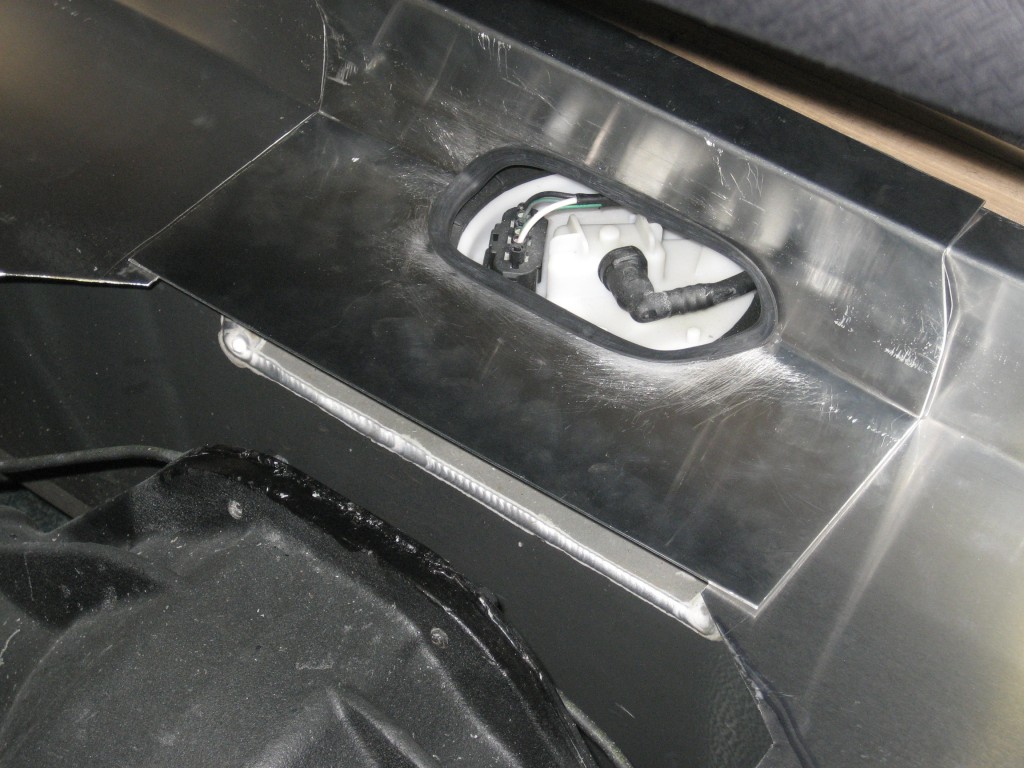
The rear centre panel needed a cut out for the protruding sender/pick up. This is how it started.


Eventually I got a good fit. I'll need to make a cover.


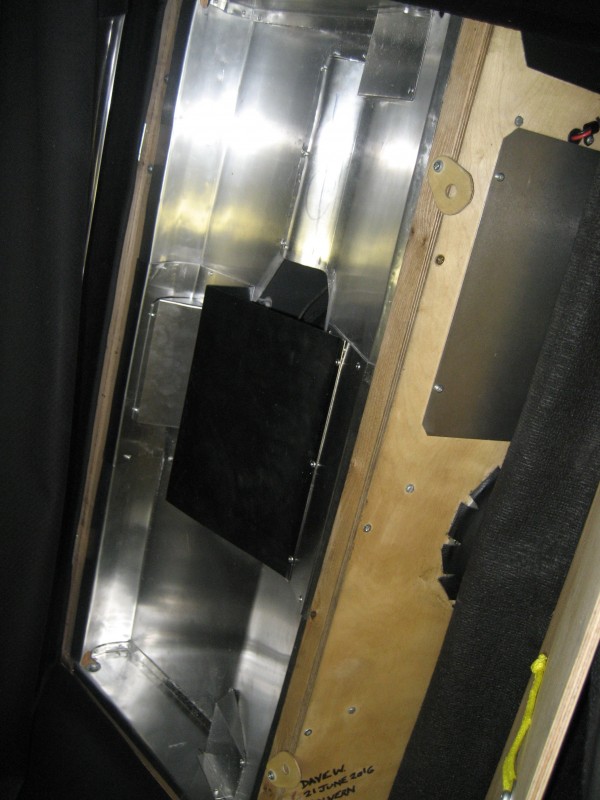
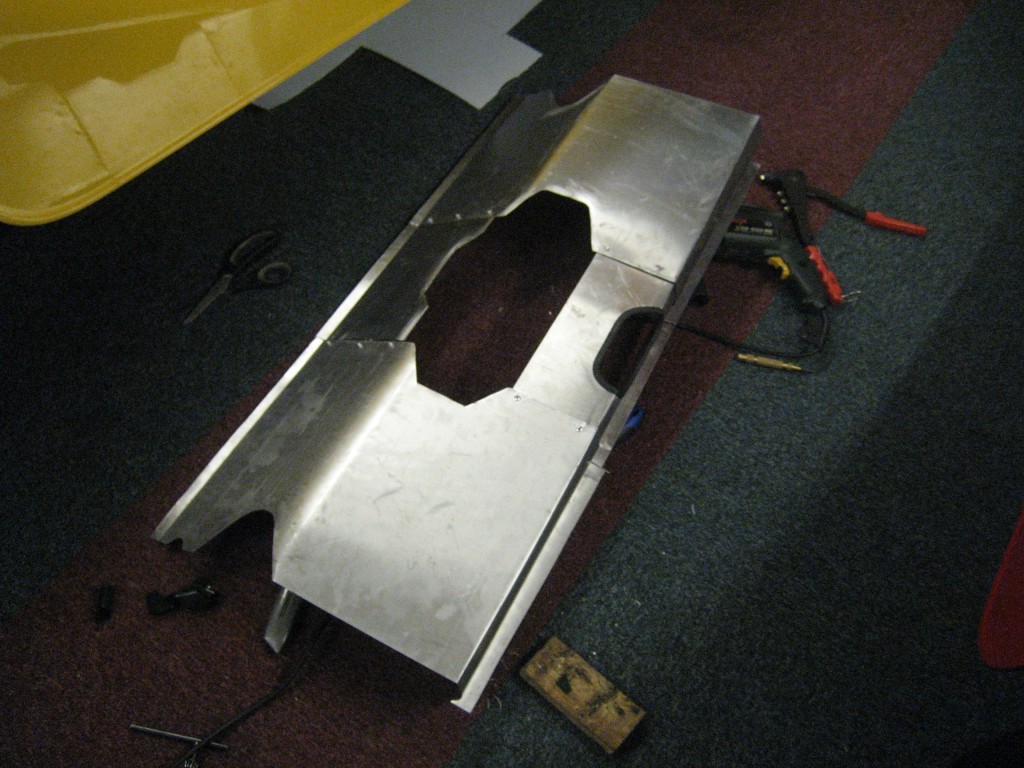
This is the underside. Now riveted into a single piece. I've used double sided tape between the overlaps to seal it.


Final test fit of the day.
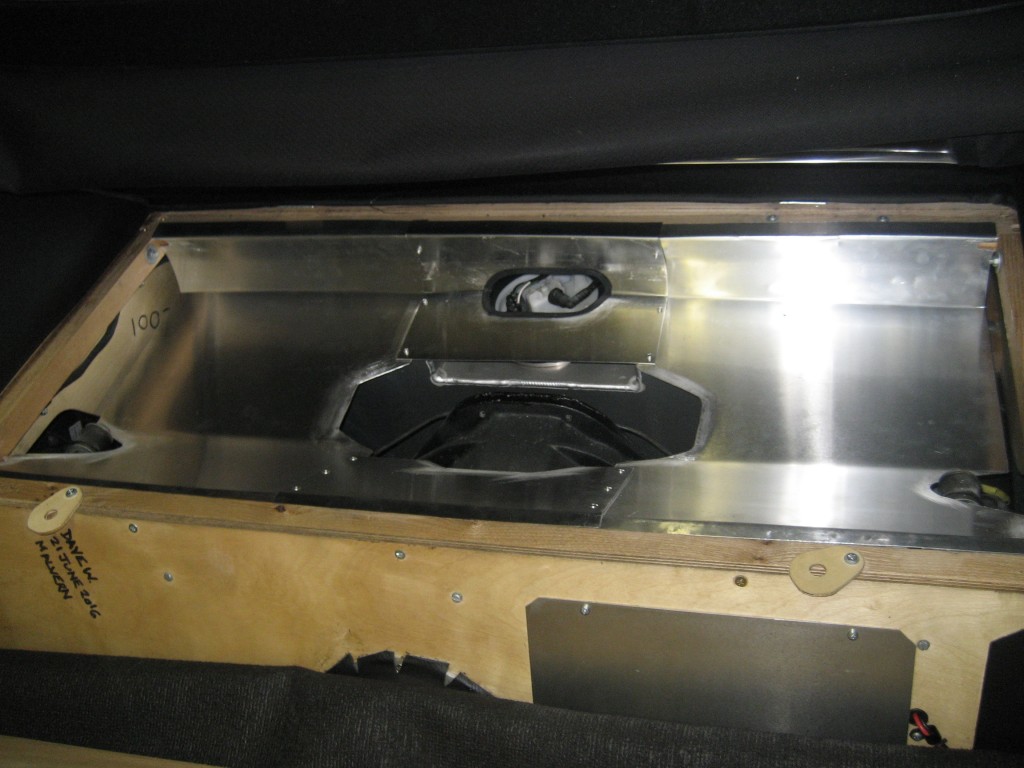


That's all for now. I have a few days at work and the Silverstone Classic, so it's on hold until next week.

It will need sides, covers for the damper top mounts and a diff cover. All very time consuming jobs, but so far I'm pleased how it's going.
You can see why the tool tray is so difficult to mass produce. Although Superform could easily bang them out, unless the trads can be standardised under the rear hatch, every one would need fettling before it would fit. To build tool trays as a cottage industry........... well, a good two days work and no guarantee it would fit without having access to the car.


DaveW
'05 Red Roadster S1
'16 Yellow (Not the only) Narrow AR GDI Plus 4
Joined: Dec 2008
Posts: 22,385
Likes: 358
DaveW Online Content OP
Roadster Guru
Member of the Inner Circle
OP Online Content
Roadster Guru
Member of the Inner Circle
Joined: Dec 2008
Posts: 22,385
Likes: 358
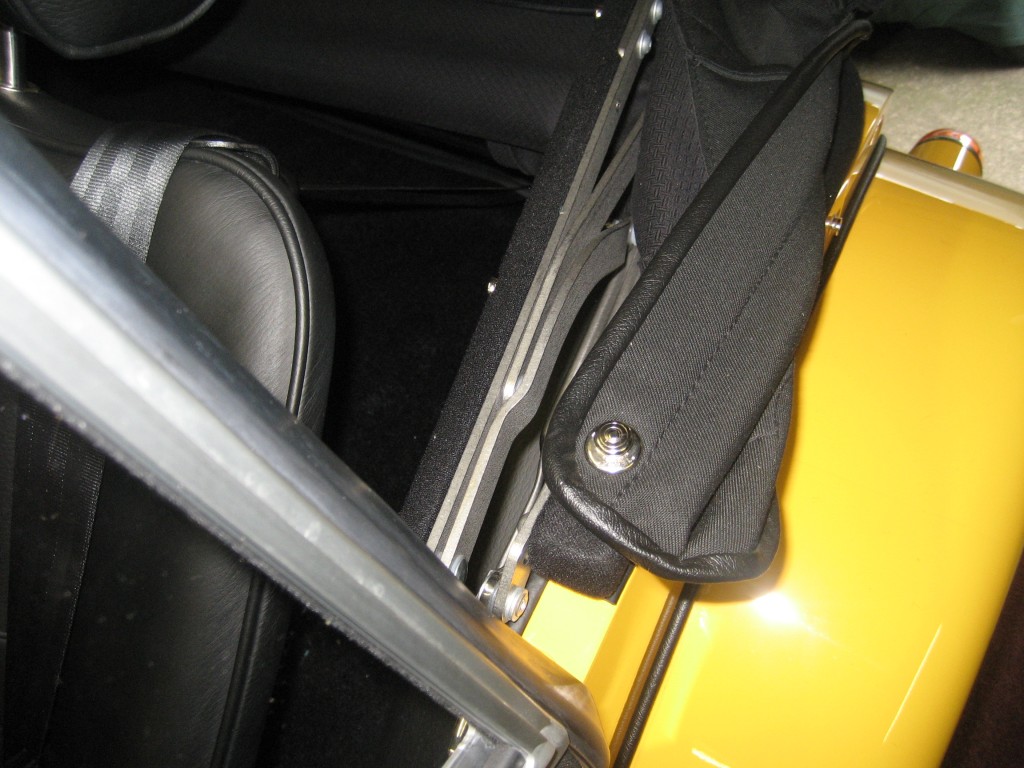
Before I move on to the tool tray, here's a really simple but effective add-on to new cars by the factory. For the easy up hood.

They've added a Tenax stud each side to the frame here:


Which stops the hood flapping about if you don't use the cover:


It's so good I've added a pair to the Roadster - 3mm drill bit and take it steady.......


DaveW
'05 Red Roadster S1
'16 Yellow (Not the only) Narrow AR GDI Plus 4
Joined: Dec 2008
Posts: 22,385
Likes: 358
DaveW Online Content OP
Roadster Guru
Member of the Inner Circle
OP Online Content
Roadster Guru
Member of the Inner Circle
Joined: Dec 2008
Posts: 22,385
Likes: 358
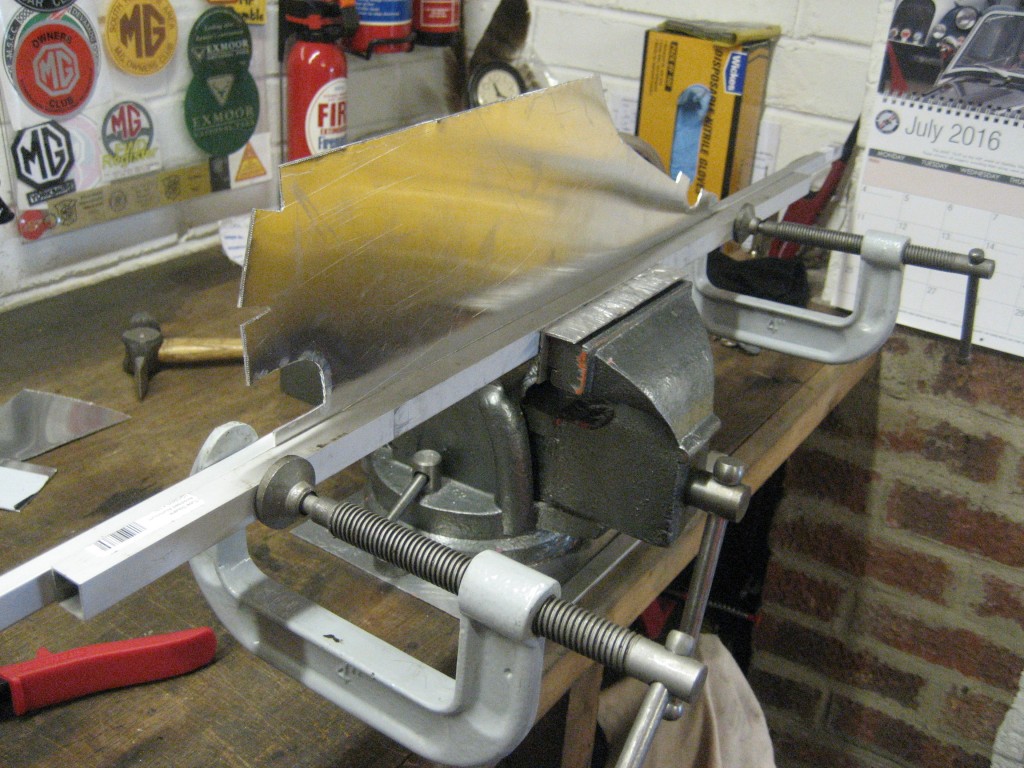
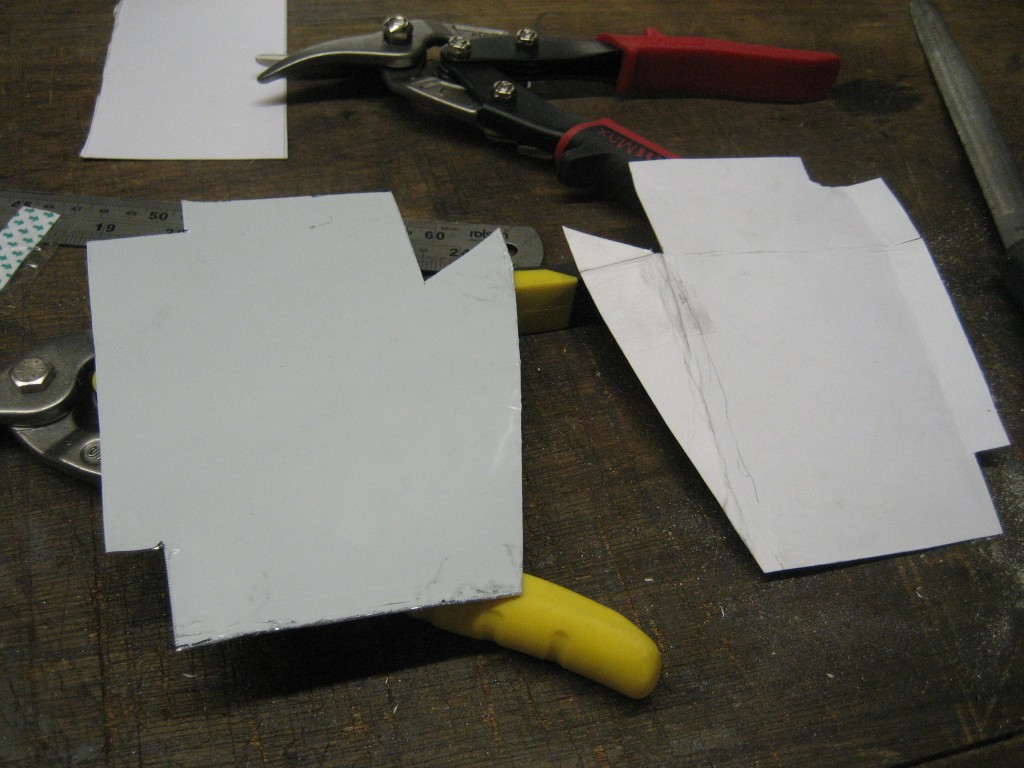
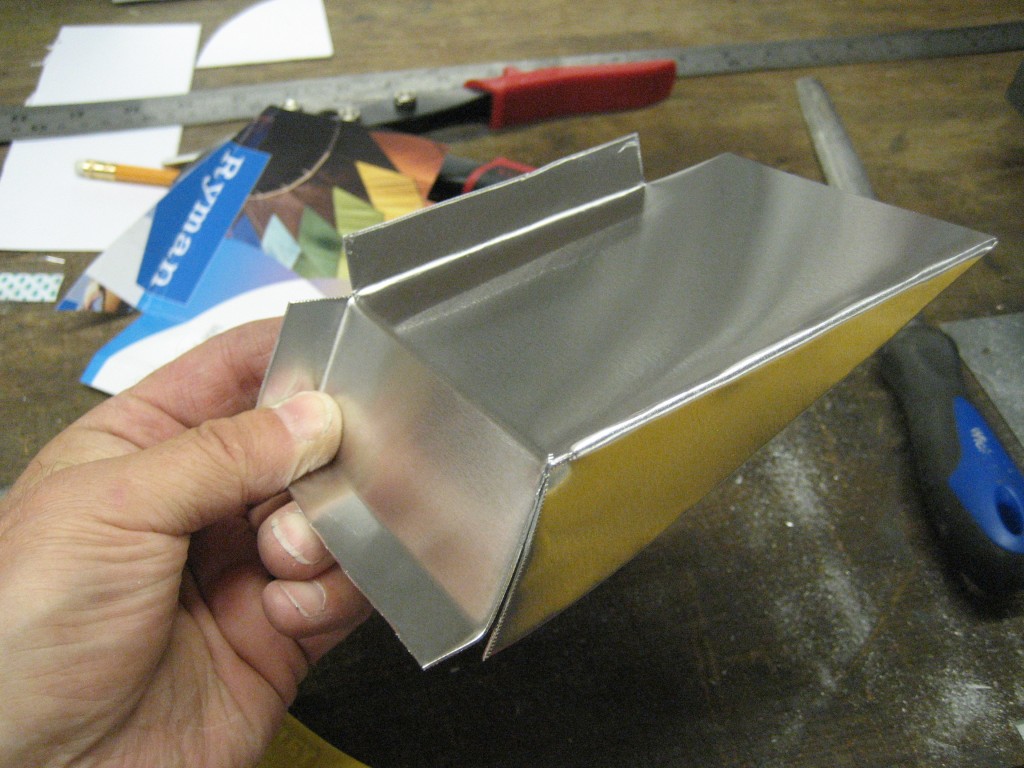
So anyway! - next I made some sides, first cardboard and then aluminium.

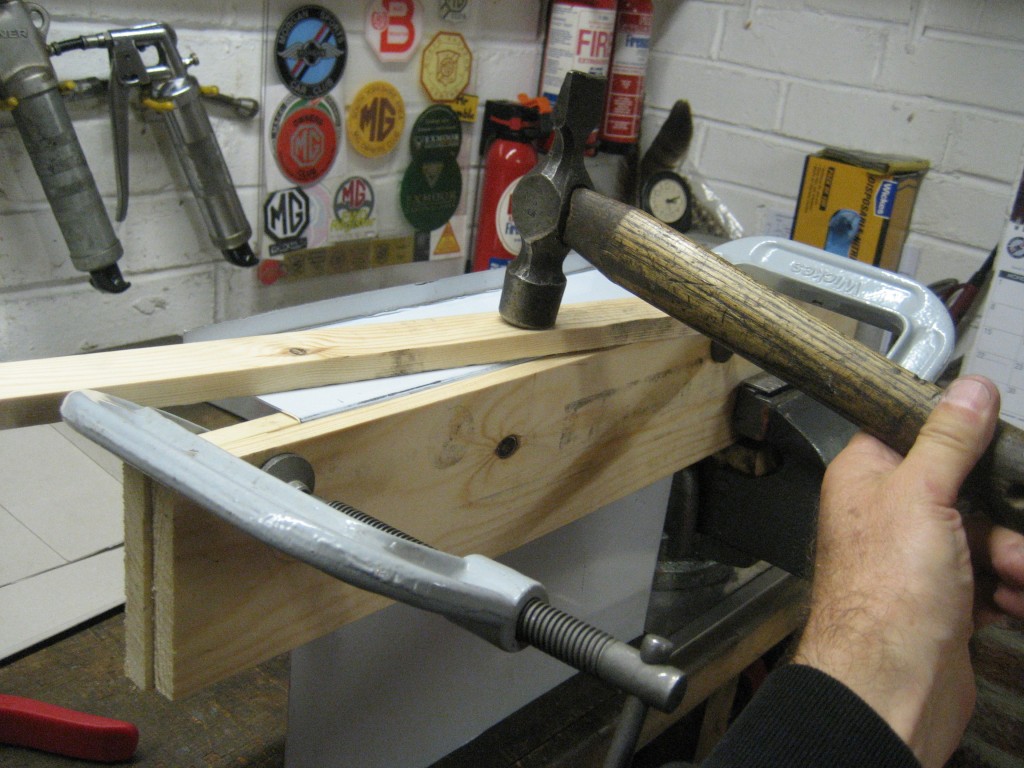
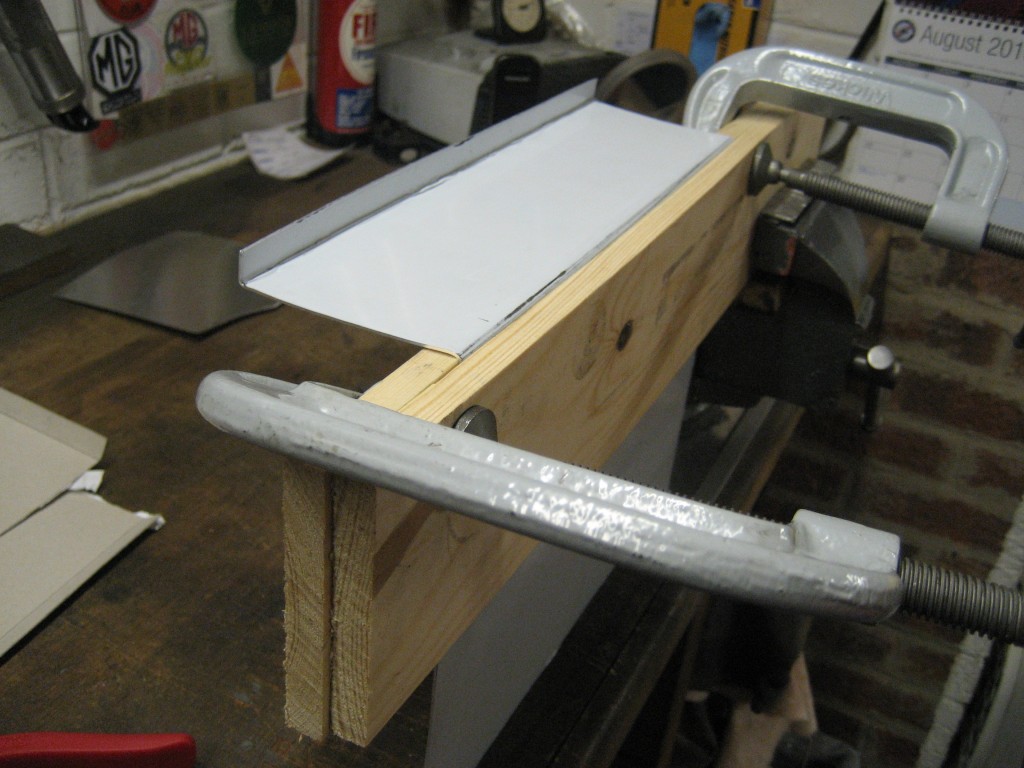
This is how I bent the flanges:


Then the damper mounting cover - here's the template:


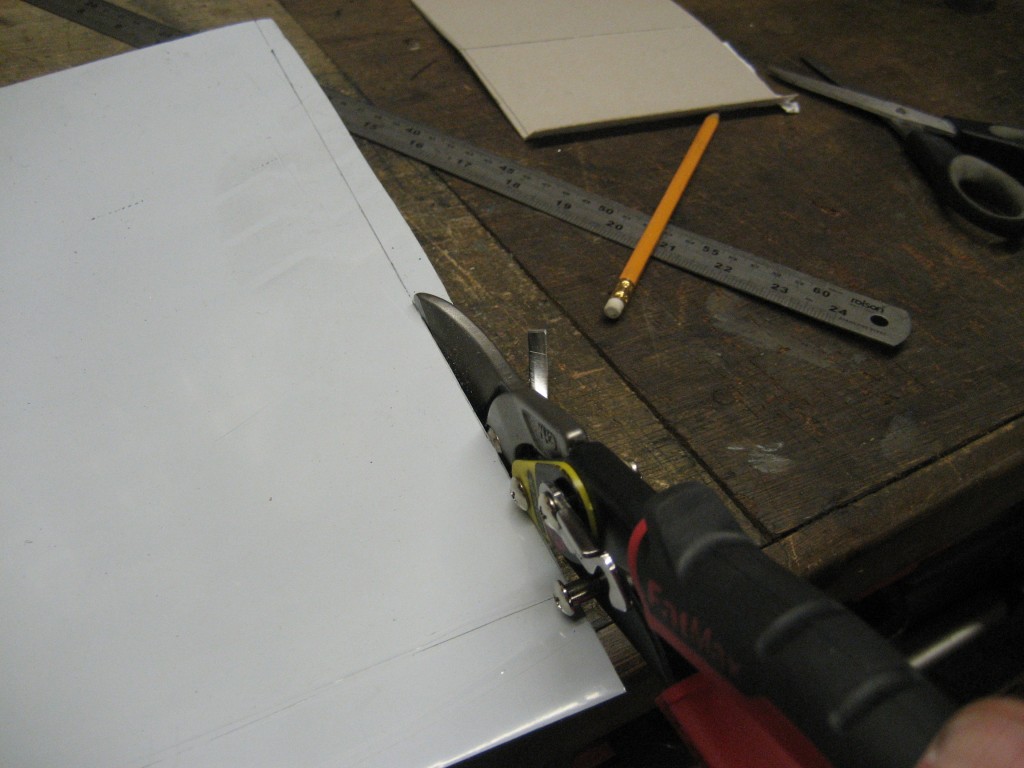
Aluminium first cut:


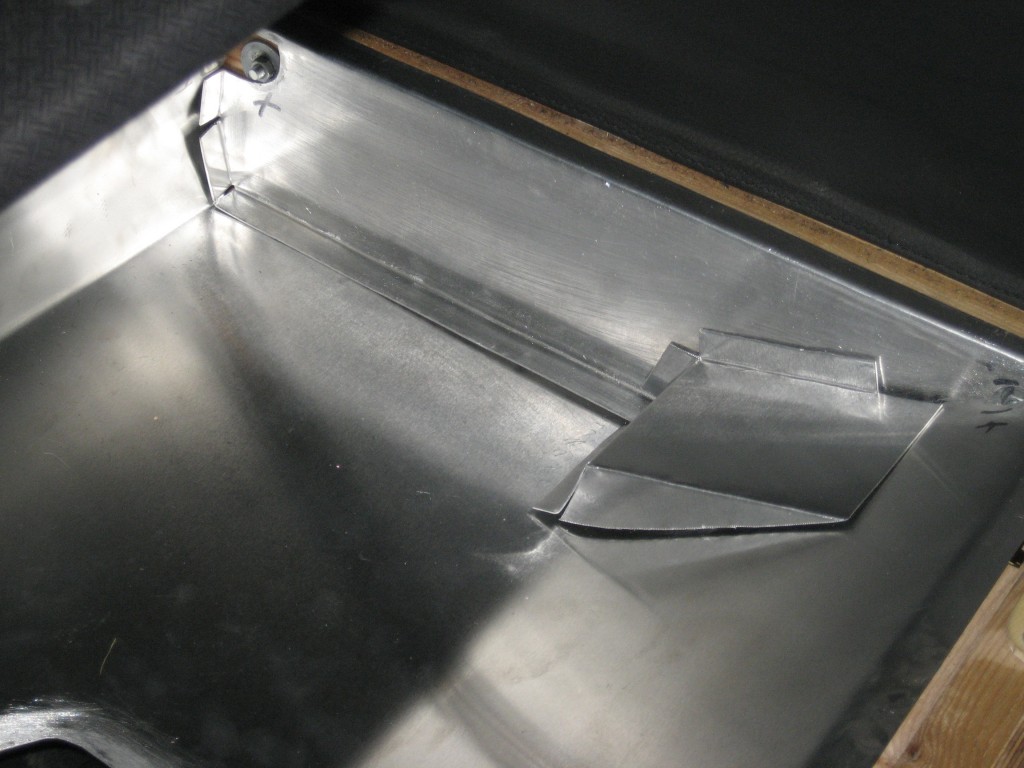
Completed cover ready for fitting/fettling.


Coming on well - I've used pop rivets this time.


I got hold of three tin snips for this job - straight and curve left and right.


Adding a tight bend:


More to follow....................


DaveW
'05 Red Roadster S1
'16 Yellow (Not the only) Narrow AR GDI Plus 4
Page 4 of 5 1 2 3 4 5

Moderated by  TalkMorgan 

Link Copied to Clipboard
Powered by UBB.threads™ PHP Forum Software 7.7.5