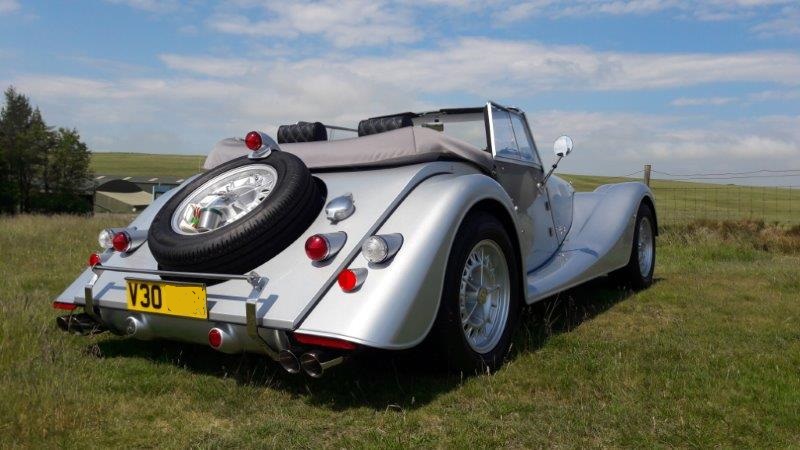
Had it not been for Lockdown, I may have waited longer before changing my GDI radiator for an aluminium replacement. It’s four years old and working perfectly. My 2012 Duratec car was the same. When I sold it on in 2016, the original radiator was fine. I chose the Si-Fab replacement radiator. Obviously other specialists & dealers can also supply replacement radiators.
The large box arrived safely, and was packed full of what turns out to be biodegradable corn extract worms. With the radiator comes a nicely packaged fitting kit, with hose-clips, a length of hose, an aluminium elbow section, replacement tie bar, fan fasteners, two brackets, three flexible bobbins, and a drain plug.
![[Linked Image]](https://tm-img.com/images/2020/08/03/P1050530.jpg)
I’m told this job can be done in under two hours. I did it over three days, because I don’t work to pit-stop mechanic times!! Before I started I had to undo some of my “improvements” which are peculiar to my Morgan. I removed the lower valance, but first I had to remove the over-riders and number plate box, and grille. Then I jacked up the front of the Plus 4, and removed the plastic drain plug, with a bucket underneath. Amazingly not one drop was spilt, although I expected a mess on the garage floor.
![[Linked Image]](https://tm-img.com/images/2020/08/03/P1050535.jpg)
Next I disconnected top and bottom hoses, and the small return hose which fits onto the radiator header tank, and I disconnected the fan wiring at the latched plug, also clipping off the cable tie. There is a strong metal bracket which is secured to the upper cross-head tube with two U bolts. This hooks over and locates into two recesses in the top of the radiator inside rubber buffers. This must be removed, and access is quite tight to get this out. Below is one of the bracket U bolts.
![[Linked Image]](https://tm-img.com/images/2020/08/03/P1050533.jpg)
For reference, this is how the standard plastic tanked radiator is secured on a 2016 Plus 4. Note the heavy duty angled bracket which loates into rubber grommets at the top of the radiator, and the two aluminium pieces, which the tank sits inside on rubber washers. It's a cross flow design with side tanks.
![[Linked Image]](https://tm-img.com/images/2020/08/03/P1050551.jpg)
Next I removed the round section tie bar which fits between the inner wing panels. I fitted the replacement tie bar, which has a slotted bracket for the top radiator mount. On my car. This tie bar was about 6mm too long to get in, even with the inner nuts at the end of the threads, so I had to cut about 3mm off each end. Even then it was a tight fit.
The next part of the instructions is to undo the centre track rod ends from the drop bracket and swing them aside. I didn’t test this with my over-rider brackets in place, because I opted for “plan B”. The lower front panel to which the grille is attached, had been drilled on a “Friday afternoon”. I wanted to put this right, but also to drill a grommeted hole on the rear face so that the horn wires could pass through the panel instead of being stretched under it. I took chance that with the lower panel removed, (four nuts & bolts), the radiator would come out. With the lower panel off the car I drilled the new hole for the horn wires, and attached two repair washers behind the panel using JB Weld. When this had set hard I was able to re-drill the holes in the right places! Next I removed the aluminium blocks and brackets which are attached to the rack mountings, one side at a time. The rack mounting bolts were not especially tight and were of different lengths, side to side. The radiator then slid out from below with a bit of jiggling. The original fan shroud is retained by two star fasteners at the top. Watch out for the nuts behind which are not captive. With these removed, the shroud and fan slide off, and the fan can be removed from the shroud, (four nuts & bolts). I then fitted the fan to the new radiator, with a tiny bit of adjustment to line up the studs, and fitted the drain plug.
Look closely just above the track rods each side to see the original lower mounting brackets in black.
![[Linked Image]](https://tm-img.com/images/2020/08/03/P1050534.jpg)
Next in the kit are two long lower mounting brackets. These use two pre-drilled holes in each side of the cross-frame. The upper bracket hole is slotted to allow adjustment. On my car the brackets fitted best fully lowered. The pre-drilled holes in my cross-frame were marginally undersize. Normally a quick pass with a drill would fix this, but there’s no access. So a few minutes with a round file was necessary.
This is the nearside new lower bracket with mounting bobbin in place.
![[Linked Image]](https://tm-img.com/images/2020/08/03/P1050538.jpg)
The instructions say to loose fit the three mounting bobbins to the radiator, before sliding it into place, but I actually loose fitted the mounts to the bottom two brackets then very carefully slid and jiggled the radiator into position. Only then did I add the top bobbin, but needed to shorten the stud to get it in, so my advice is to follow the instructions! At this point the radiator can be moved around, so I managed to get it centralised and more or less as I wanted it. Next I added the silicon hose and aluminium elbow to the bottom hose stub, taking care to get the worm drive clips as accessible as possible, but without fouling anything. The long leg of the aluminium elbow mates up with the bottom hose. This is a tight fit through the cross frame. I added some U section neoprene to the edge of the panel because clearance was literally only a couple of mm. This is a vertical flow design with top and bottom tanks.
![[Linked Image]](https://tm-img.com/images/2020/08/03/P1050540.jpg)
Top mounting:
![[Linked Image]](https://tm-img.com/images/2020/08/03/P1050541.jpg)
Neoprene edging to protect the bottom hose where it passes through the cross-frame. I had to re-route that brake pipe to clear the hose.
![[Linked Image]](https://tm-img.com/images/2020/08/03/P1050547.jpg)
This shows the bottom hose retaining bracket attached to the cross tube, making sure that it will stay clear of the belt and pulleys, and I also checked carefully that the steering rack doesn’t foul anything, lock to lock.
![[Linked Image]](https://tm-img.com/images/2020/08/03/P1050546.jpg)
On the 4/4 and Plus 4, the top hose should be trimmed back to fit, and here I found a problem. First of all the original top hose is thick walled and inflexible. Furthermore, it is a very definite S shape, whereas the alignment on my car between the radiator stub and metal pipework is almost dead straight. I tried to fit the shortened original top hose but it was nowhere near right. When I was dealing with my Roadster leak, I bought a metre length of Samco black silicone hose, of 32mm inside diameter, and coincidentally this is a perfect fit. It required a 303mm length. Being quite thin walled it is also flexible so shouldn’t transmit any stress to the radiator. I’m hoping that this is up to the job, but the piece I fitted to my Roadster a few years ago has been fine.
More to follow.........................................................








![[Linked Image]](https://tm-img.com/images/2020/08/03/P1050544.jpg)
![[Linked Image]](https://tm-img.com/images/2020/08/03/P1050531.jpg)
![[Linked Image]](https://tm-img.com/images/2020/08/03/P1050542.jpg)
![[Linked Image]](https://tm-img.com/images/2020/08/03/P1050545.jpg)
![[Linked Image]](https://tm-img.com/images/2020/08/03/P1050552.jpg)
![[Linked Image]](https://tm-img.com/images/2020/08/03/P1050550.jpg)
![[Linked Image]](https://tm-img.com/images/2020/08/03/P1050527.jpg)