Click here to return to the home page.
Image of a road.
Who's Online Now
1 members (CooperMan), 238 guests, and 27 robots.
Key: Admin, Global Mod, Mod
Top Posters(30 Days)
John V6 78
+8Rich 71
DaveW 67
Luddite 57
Newest Members
Ulfulf, Wilfried, Classic-Line, BrunswickGreen44, Franco Morgan
9,203 Registered Users
Newest Topics
Technical drawings, dimensions, 3D model M3W
by Oskar - 20/07/25 04:13 PM
Goggle eyed
by Roady - 19/07/25 06:16 PM
FOR SALE AERO8 series 1 WHEELS
by t50 - 19/07/25 12:07 PM
Lions Tour
by OZ 4/4 - 19/07/25 11:55 AM
Morgan rebuild on Facebook
by TBM - 19/07/25 10:50 AM
Ride Comfort & Tyre Age – Plus 4 Duratec
by Nick B - 19/07/25 10:22 AM
Super3 Accessory Rails for Side Blades
by BillHart - 18/07/25 11:59 PM
Latest Photos
Motorworld München
Motorworld München
by Oskar, July 20
visit to Classic Remise Düsseldorf
my book
my book
by Oskar, July 20
More Pictures of the MHR Visit
by DaveK, July 19
Visit to the Factory- Historic Morgan Group
Forum Statistics
Forums34
Topics48,335
Posts812,897
Members9,203
Most Online1,046
Aug 24th, 2023
Today's Birthdays
kamo30
Previous Thread
Next Thread
Print Thread
Page 25 of 41 1 2 23 24 25 26 27 40 41
Joined: Jan 2012
Posts: 14,976
Likes: 1
Member of the Inner Circle
Offline
Member of the Inner Circle
Joined: Jan 2012
Posts: 14,976
Likes: 1
Very interesting and informative CerealSurfer.


Richard
1976 4/4 4 Seater
Joined: Oct 2006
Posts: 2,403
C
Talk Morgan Expert
OP Offline
Talk Morgan Expert
C
Joined: Oct 2006
Posts: 2,403
Update 30 - Bulkhead repair and body fit

In the last couple of weeks we have been keen to get the blue and white car so the body can go back on. The rust on the bottom of the bulkhead was the biggest blocker...

We cut off the bottom sections of the bulkhead back to good metal. Using the off-cuts and some additional measurements we fabricated replacement bulkhead sections and butt welded them on.

The O/S received less damage in the crash and so only needed welding, the N/S needed a dent knocking out. So we started on the O/S and went from there.

Below shows the post weld with undercoat applied.


You can see we made cut-outs where the pedals go as per the original.


On the N/S for the lower section we took the same approach, this time you can see in the raw metal - we welded the corners from the inside to get a tight fit into the chassis.


Next up was a test fit of the body, this was the first time the body had been on the new chassis and the car looking like a whole car again - fingers cross everything was in the correct place!!!


Looks like we were not too bad on the measuring front, all the holes and attachments were in the right place and the body slotted straight on..... few!

This was just a test fit though so all the edges were checked.


With the body clamped in place we marked all the holes which need to be drilled into the chassis to bolt them together. It's surprising that the body is held on as standard by only eight 6mm captive head coach bolts. I for one am pleased that the roll cage and the scuttle roll bar introduce two sets of 8mm bolts with backing plates. The chassis after all is quite thin material - you can put quite a dent in it with just a sprung loaded hand centre-punch.


Anyhow.. after this fleeting moment of visual progress, we split the body from the chassis once again to undertake final preparation. Drilling all the body holes and preparing the waterproof sealant layer.


For the sealant layer, we have chosen to use industrial damp course joint sealant strip - it comes as a roll and looks like a super sticky version of blue tack - it unrolls exactly like you get new sheets of blue tack similar width and thickness - just on a roll as opposed to a sheet. It also does not dry out and go hard so should be very effective for this purpose.


Whilst all this was happening - the bulkhead had the final dent knocked out of it on the N/S and both sides were masked off and given a coat of gloss black. These were left to dry over night.


One final activity which was completed over Christmas - we picked up the damaged passengers door all fixed and ready to go again from Vintage Sheet Metal.

It was nice to see a race +8 awaiting collection.


Joined: Aug 2013
Posts: 15,794
Likes: 14
Formerly known as Aldermog
Member of the Inner Circle
Offline
Formerly known as Aldermog
Member of the Inner Circle
Joined: Aug 2013
Posts: 15,794
Likes: 14
I like the attention to detail and especially the blue painted back axle!


Peter,
66, 2016 Porsche Boxster S
No longer driving Tarka, the 2014 Plus 8...

Joined: Jan 2012
Posts: 14,976
Likes: 1
Member of the Inner Circle
Offline
Member of the Inner Circle
Joined: Jan 2012
Posts: 14,976
Likes: 1
Great work and thanks for keeping us informed. Interesting as ever.


Richard
1976 4/4 4 Seater
Joined: Oct 2006
Posts: 2,403
C
Talk Morgan Expert
OP Offline
Talk Morgan Expert
C
Joined: Oct 2006
Posts: 2,403
Update 31 - Putting the body back on

Last we left you the body was hanging above the chassis - all prepped to be dropped to mate them up.


Lining up the body in one hit was going to be the tricky part, handily this time we have suspended the body from straps as well as marking the floor when we lifted the body off. Thus allowing us to get pretty close to the correct drop position.

Next up, ripping the backing off the damp proof joining strip... it's not by design, though wonderfully handy that the joining strip is actually blue!!


We also want to make sure there was a good chance of water-tightness... so on with the automotive sealant in two large strips round the bottom of the bulkhead where it sits inside the chassis.


After some jiggery pokery the body was ceremoniously lowered onto the chassis. A quick whip round with the sealant and a trusty wet finger sealed the deal.


You can see the blue sealant strip just between the chassis and the body base. A quick trim of any ozzed out makes it look really nice.


Again you can see it looking into the rear wheel-arch.


The result represents a significant milestone.... beginning to look like a real car again!


Whilst this sorts the outer body, the inner body needs finalising. As we are using a metal floor, some adjustments need to be made to the angled wooden baton which secures the lower edge of the rear inner body. A couple of spacer strips was all that was needed, again sealed for water tightness.


Still - whilst much has been done, still lots to get sorted before it's ready to rumble....

Hopefully next week we'll receive word on the new trailer!


Joined: Jan 2012
Posts: 14,976
Likes: 1
Member of the Inner Circle
Offline
Member of the Inner Circle
Joined: Jan 2012
Posts: 14,976
Likes: 1
A milestone indeed! Well done to all and the car continues to look great.


Richard
1976 4/4 4 Seater
Joined: Oct 2006
Posts: 2,403
C
Talk Morgan Expert
OP Offline
Talk Morgan Expert
C
Joined: Oct 2006
Posts: 2,403
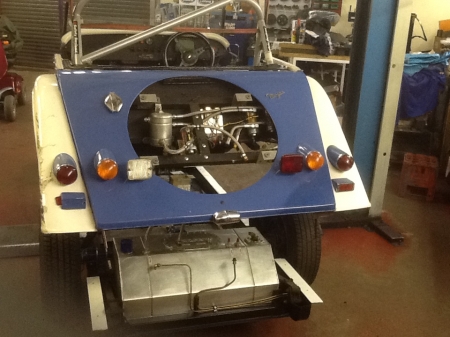
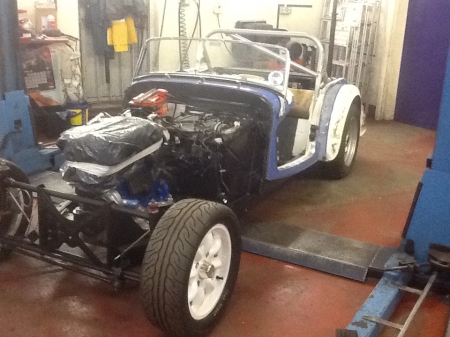
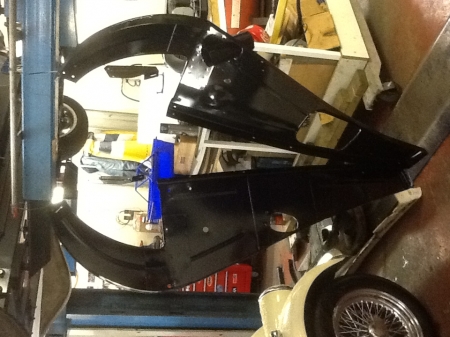
Update 32 - Inner bay panels and engine intake spacing

Side & Rear wing
So over the last couple of weeks we have been progressing with a number of small jobs. Fitting a new body side panel as well as fitting a new rear wing. Both worked out well and were easily completed.


Inner Bay panels

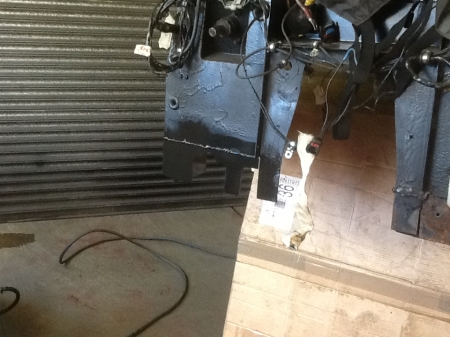
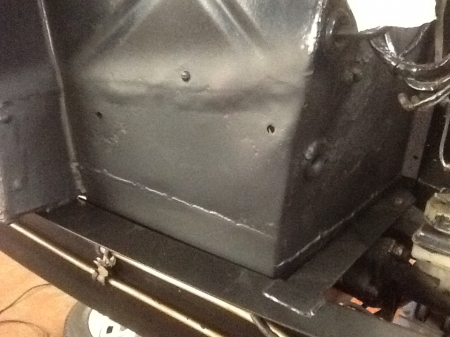
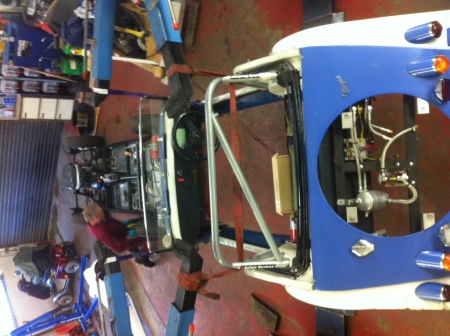
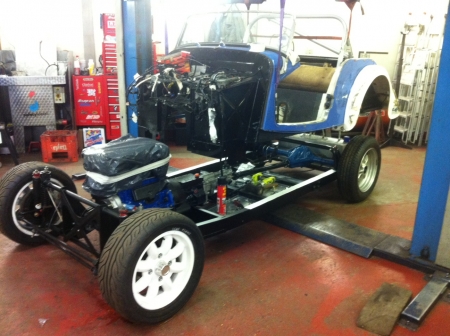
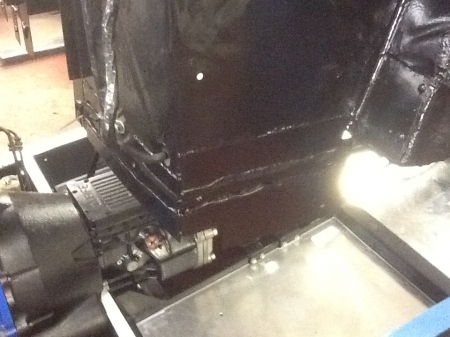
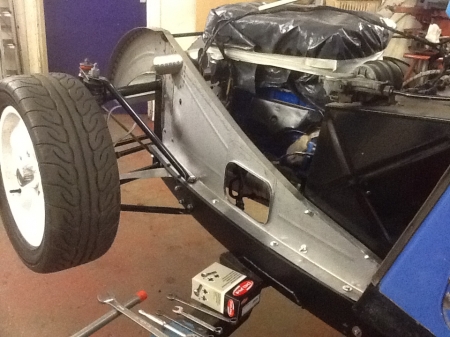
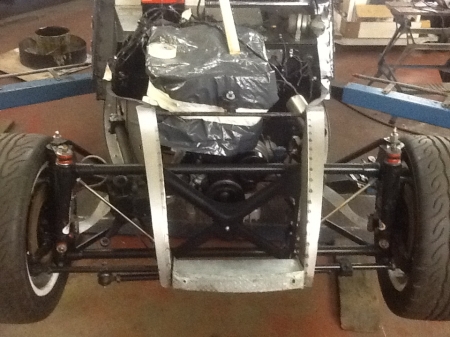
Next up was getting the bay panels sorted as the engine packaging with the new intake needed to be considered and completed prior to getting new bonnets made.

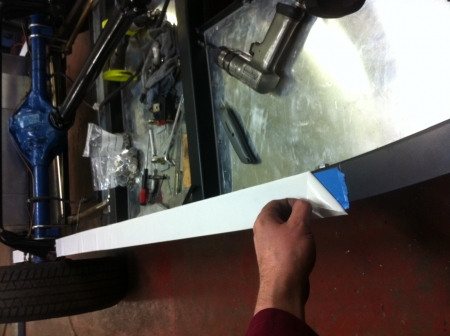
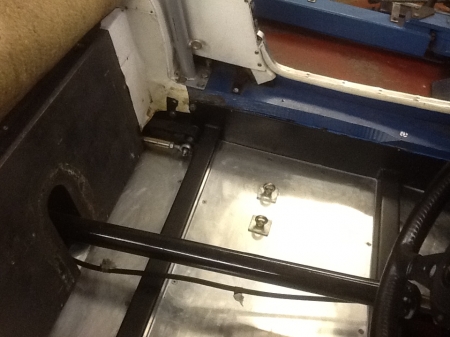
So having dug the panels out of the parts store (seems like we have a complete car in bits sometimes). They were dummied onto the car with g-clamps.


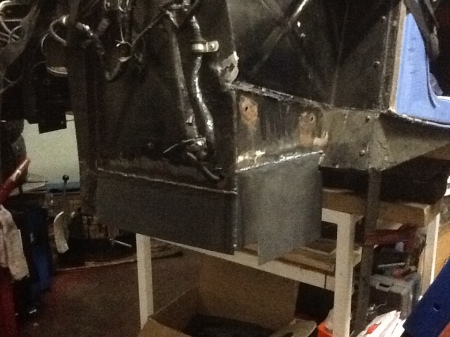
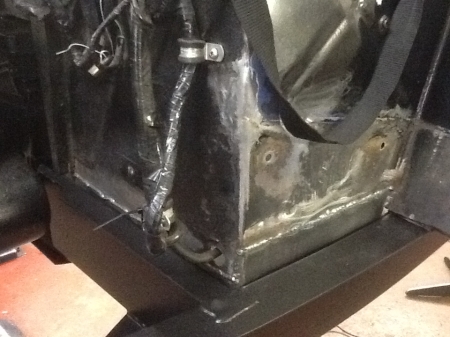
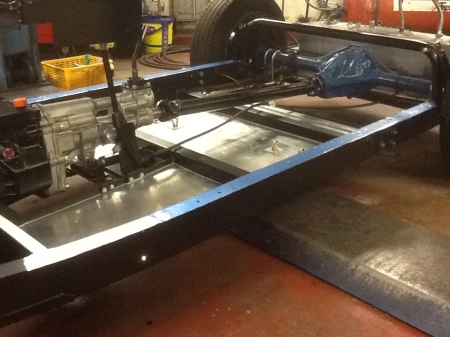
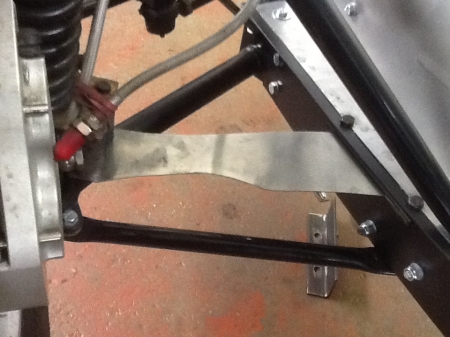
Additionally, the damper blade mounts are also located using holes in the chassis and the inner bay panel base, so these along with the brake reactions bar lower mounting point could all get sorted.


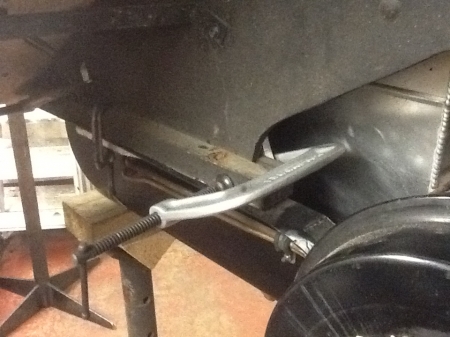
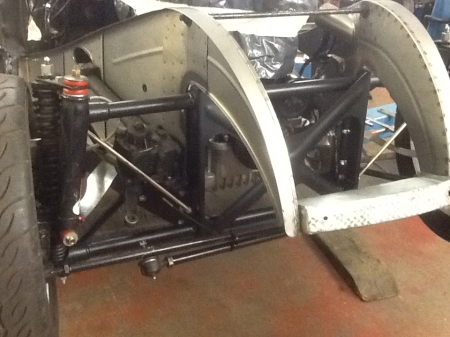
The damper blades requiring notching to allow for the larger Mulfab HiSpec 4 pot callipers to swing round on full lock.


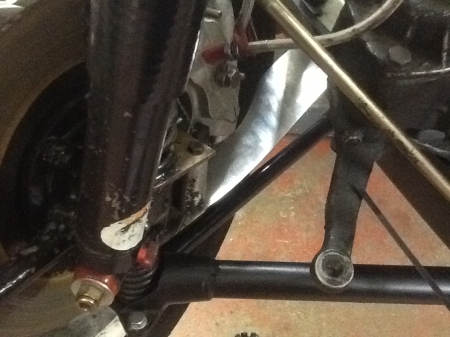
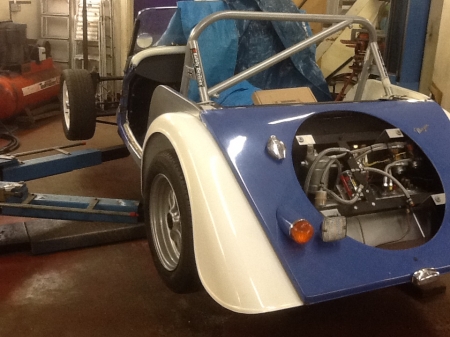
On the O/S the steering box could also be dummied on and the mountings drilled.


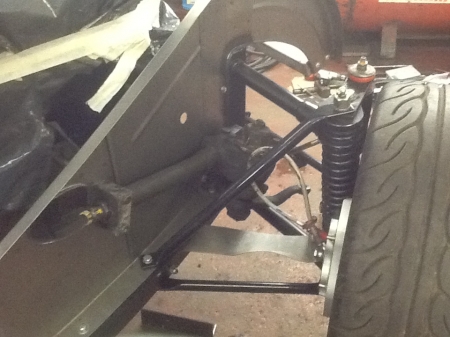
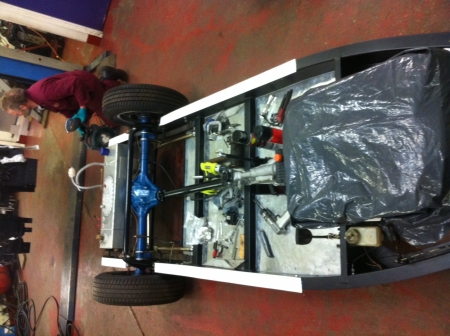
This sorts out most of the front end basics.


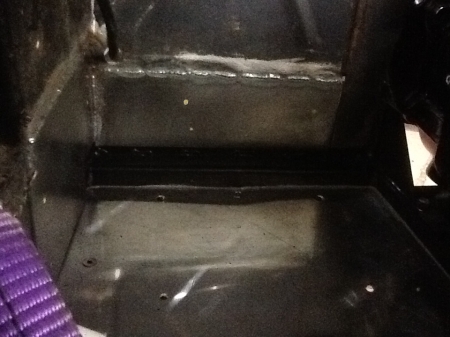
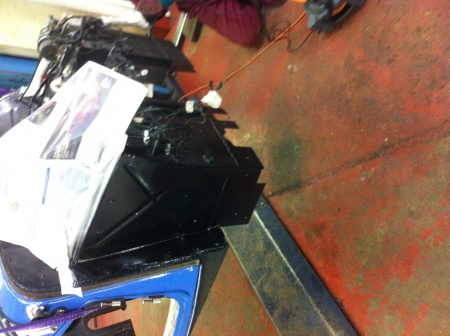
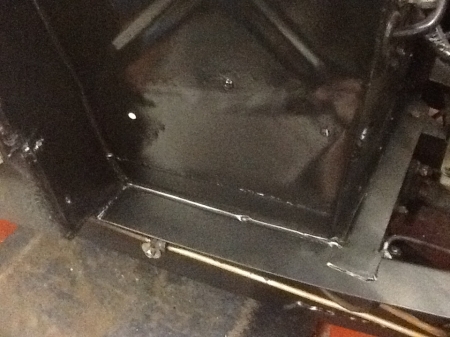
This was all set to be de-constructed and painted ready for final fit.


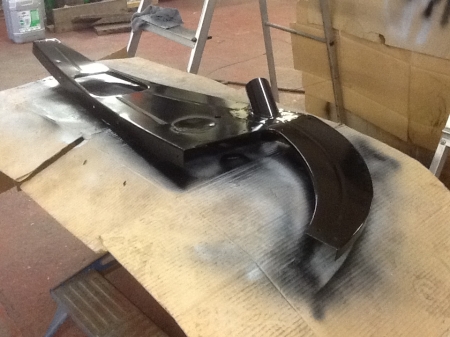
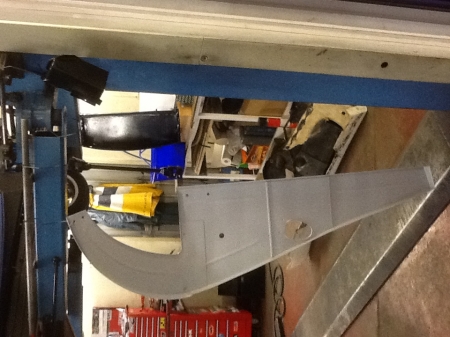
Hanging up overnight drying.


Air intake and throttle body packaging

OK, so one of the frequently asked questions on here is the packaging issues around throttle body fitment on 4/4's. We have seen in the past the challenges I've dealt with when fitting DCOE's. Whilst it is possible to get them packaged under a standard bonnet, on an earlier car with an engine conversion there is some modification required to the inner bay panel.

So, on the blue and white car, we were keen to explore how this could be resolved by going for throttle bodies. So some considerations were made in selecting the parts used.

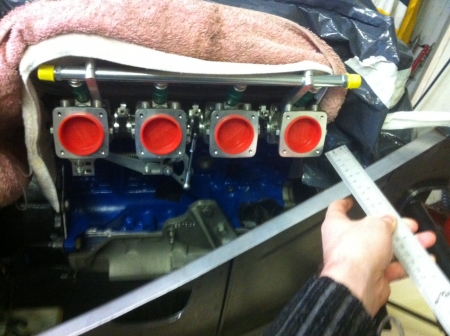
As you can see in previous pictures and the ones below, I have gone for:


  • A stubby and up-angled intake manifold
  • Use of shorter Individual Throttle Bodies rather than DCOE based TB kits


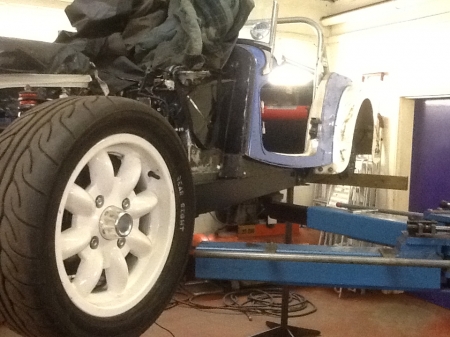
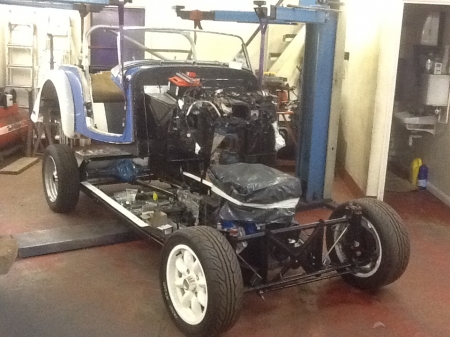
The aim was to lift the pre Throttle Body intake above the inner bay panel whilst not compromising intake performance.

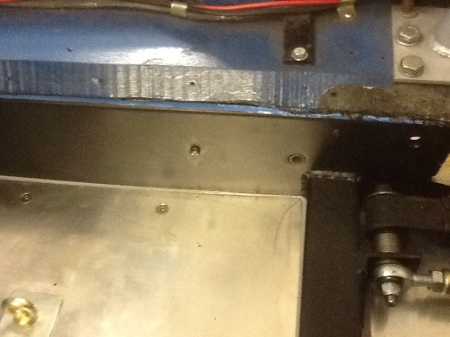
So having now positioned everything we are left with the following situation - which I see as a great result.


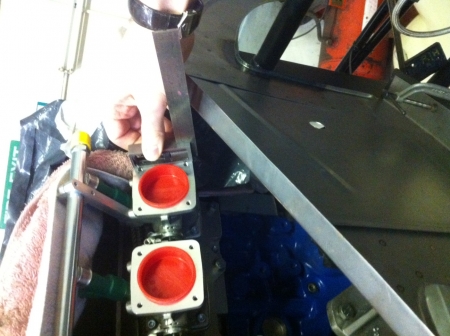
Even with the square slightly off the bottom of the TB you can see that the pesky No.1 intake will rise above the bay panel at the point off overlap. Great news - so what do we have to play with??


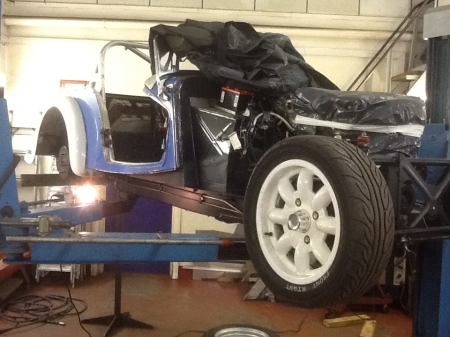
well... with a bit more focus - close-up


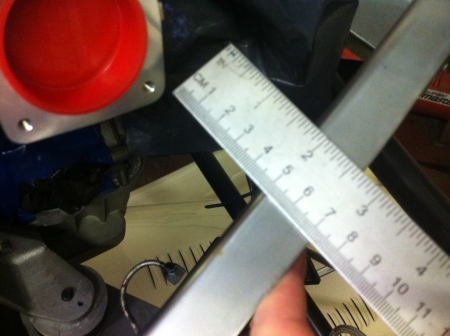
Well ~50mm (the bay panel was still only mocked up at this point).


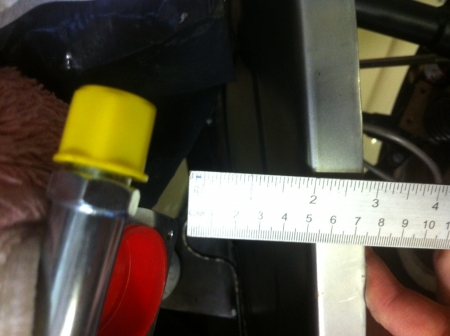
So what to put on the end of this?!

Well there is one simple choice to make - you can either:

  • Package the intake inside the engine bay
  • Bring the intake out over the wing, put a scoop in the bonnet and deal with it there.


As this is a race car, I'm going to go for a longer intake and bring the trumpets out over the wing slightly and put a scoop in the new bonnet.

I'm going to use an ITG carbon shaped filter back plate:

http://www.demon-tweeks.co.uk/motorsport/universal-air-boxes/itg-carbon-fibre-trumpet-tray

They are available in 30mm depth of 60mm depth. In both packaging options outlined above, the 30mm option is the one to go for.

Now critically the trumpet length is the next thing to consider. Shorter trumpets = more peak power but trade off mid range torque slightly. Longer trumpets promote mid range torque at the price of peak top end power. It's all due to the pulse reflection in the intake tract and cam timing.

So, the Jenvey trumpets come in sizes from 19mm upto 150mm. In an engine bay packaged scenario you can go for the 19mm option however I'm going to go for 90mm brining the trumpet opening 40mm over the wing. It's worth noting at this point a standard bonnet does not come right to the edge of the inner wing and itself has a 20-30mm overlap. So this still is not really much.

Finally there is the filter depth. The ITG JC50 (the filter needed) comes in a variety of "internal heights" and it's recommended that ~18mm is left between the trumpet opening and the inner surface of the filter.

The ITG JC series filters are also available with squared edges or sausage style. So, for the engine bay packaged option, I would go for the 25mm option which will easily fit. I'll probably be going for the 100mm option - the internal metal frame supporting the filter also allows for a little shaping which should also help me as any shaping will be behind the trumpet mouth anyhow.

http://itgairfilters.com/downloads/JC50.pdf

The curved nature of the filter surface provides the additional flexibility to get the filter past the inner bay panel given the additional size vertically of the base plate.

Well, that's the idea anyhow - all parts are on order and will be mocked up next week.


Joined: Jan 2012
Posts: 14,976
Likes: 1
Member of the Inner Circle
Offline
Member of the Inner Circle
Joined: Jan 2012
Posts: 14,976
Likes: 1
Fascinating read.


Richard
1976 4/4 4 Seater
Joined: Mar 2011
Posts: 519
Talk Morgan Regular
Offline
Talk Morgan Regular
Joined: Mar 2011
Posts: 519
Originally Posted By Richard - Aus
Fascinating read.


+1 thumbs

Yep.........it's totally another world!
Must educate myself more read


1975 4/4 4 seater, cream over blue; Q3 Quattro; Bicycle; Walking poles.
Joined: Feb 2011
Posts: 14,009
Member of the Inner Circle
Offline
Member of the Inner Circle
Joined: Feb 2011
Posts: 14,009
Fascinating account. I love all this......dreams of car building! If a spare set of bonnet halves off a 2010 4/4 are of any use to you, do let me know! They are just cluttering up a spare bedroom.


Jays
Former Morgan owner. Gone but hopefully not forgotten!
Page 25 of 41 1 2 23 24 25 26 27 40 41

Moderated by  TalkMorgan 

Link Copied to Clipboard
Powered by UBB.threads™ PHP Forum Software 7.7.5