|
8 members (Clipper, Morganmike, PaulV, RichardV6, Zach, JoeSpeetjens, DCH, teknome),
355
guests, and
92
robots. |
|
Key:
Admin,
Global Mod,
Mod
|
|
Wales
by Joske Vermeule, September 1
|
|
|
|
|
|
|
|
|
|
|
Forums39
Topics49,867
Posts837,612
Members9,596
| |
Most Online1,063
Jun 14th, 2026
|
|
|
There are no members with birthdays on this day. |
|
|
|
Joined: Dec 2008
Posts: 22,366 Likes: 354
Roadster Guru Member of the Inner Circle
|
OP

Roadster Guru Member of the Inner Circle
Joined: Dec 2008
Posts: 22,366 Likes: 354 |
Thanks Yuri. It was tough, and I could easily have given up. I'm a one man band - best working alone  But the 40 bottles of whisky would have helped 
DaveW
'05 Red Roadster S1
'16 Yellow (Not the only) Narrow AR GDI Plus 4
|
|
|
|
|
Joined: Jul 2007
Posts: 27,816 Likes: 749
Member of the Inner Circle
|
|
Member of the Inner Circle
Joined: Jul 2007
Posts: 27,816 Likes: 749 |
Dave,
stunning work. I am just building up to moving my fog & reversing ligths which seems minor compared to this.
John
JohnV6
2022 CX Plus Four
2025 Renault Scenic Alpine etech "Yvette"
|
|
|
|
|
Joined: Dec 2008
Posts: 22,366 Likes: 354
Roadster Guru Member of the Inner Circle
|
|
OP
Roadster Guru Member of the Inner Circle
Joined: Dec 2008
Posts: 22,366 Likes: 354 |
Hey John thanks. If you were 'round the corner' I'd give you a hand!
DaveW
'05 Red Roadster S1
'16 Yellow (Not the only) Narrow AR GDI Plus 4
|
|
|
|
|
Joined: Jul 2007
Posts: 27,816 Likes: 749
Member of the Inner Circle
|
|
Member of the Inner Circle
Joined: Jul 2007
Posts: 27,816 Likes: 749 |
Just done it, as always a few wrinkles but now much better.
Photos follow
John
JohnV6
2022 CX Plus Four
2025 Renault Scenic Alpine etech "Yvette"
|
|
|
|
|
Joined: Dec 2008
Posts: 22,366 Likes: 354
Roadster Guru Member of the Inner Circle
|
|
OP
Roadster Guru Member of the Inner Circle
Joined: Dec 2008
Posts: 22,366 Likes: 354 |
First time on the road today and the good news is that it stood up to the flexing!  But already it has a small stonechip.  Does it work?? well, probably psychological, but it feels well planted at speed...... But probably always did. Here are three 'outside' photos.   
DaveW
'05 Red Roadster S1
'16 Yellow (Not the only) Narrow AR GDI Plus 4
|
|
|
|
|
Joined: Dec 2008
Posts: 22,366 Likes: 354
Roadster Guru Member of the Inner Circle
|
|
OP
Roadster Guru Member of the Inner Circle
Joined: Dec 2008
Posts: 22,366 Likes: 354 |
Post Photobucket Reboot from March 2009:British Leyland Special Tuning at Abingdon designed a front spoiler for the MGB in the mid/late 60's. It may have been a fag packet design but it does reduce lift and weights the steering over 70mph. This spoiler, known as the "ST" spoiler is still available from MG specialists in white fibreglass. I bought one of the last of the original spoilers from Kennings in Sheffield in around 1981, and fitted it to my 1980GT. (I sold that car in 2003) Many years later........................................ When I bought my Roadster I idly considered if this spoiler could be made to fit the Mog. thinking I knew it was the right shape, but a shade on the narrow side - which doesn't matter. I pondered this for quite a while, and wondered how I could put this idea to the test. In the end I shelled out the £40 which these things cost and awaited delivery.............. 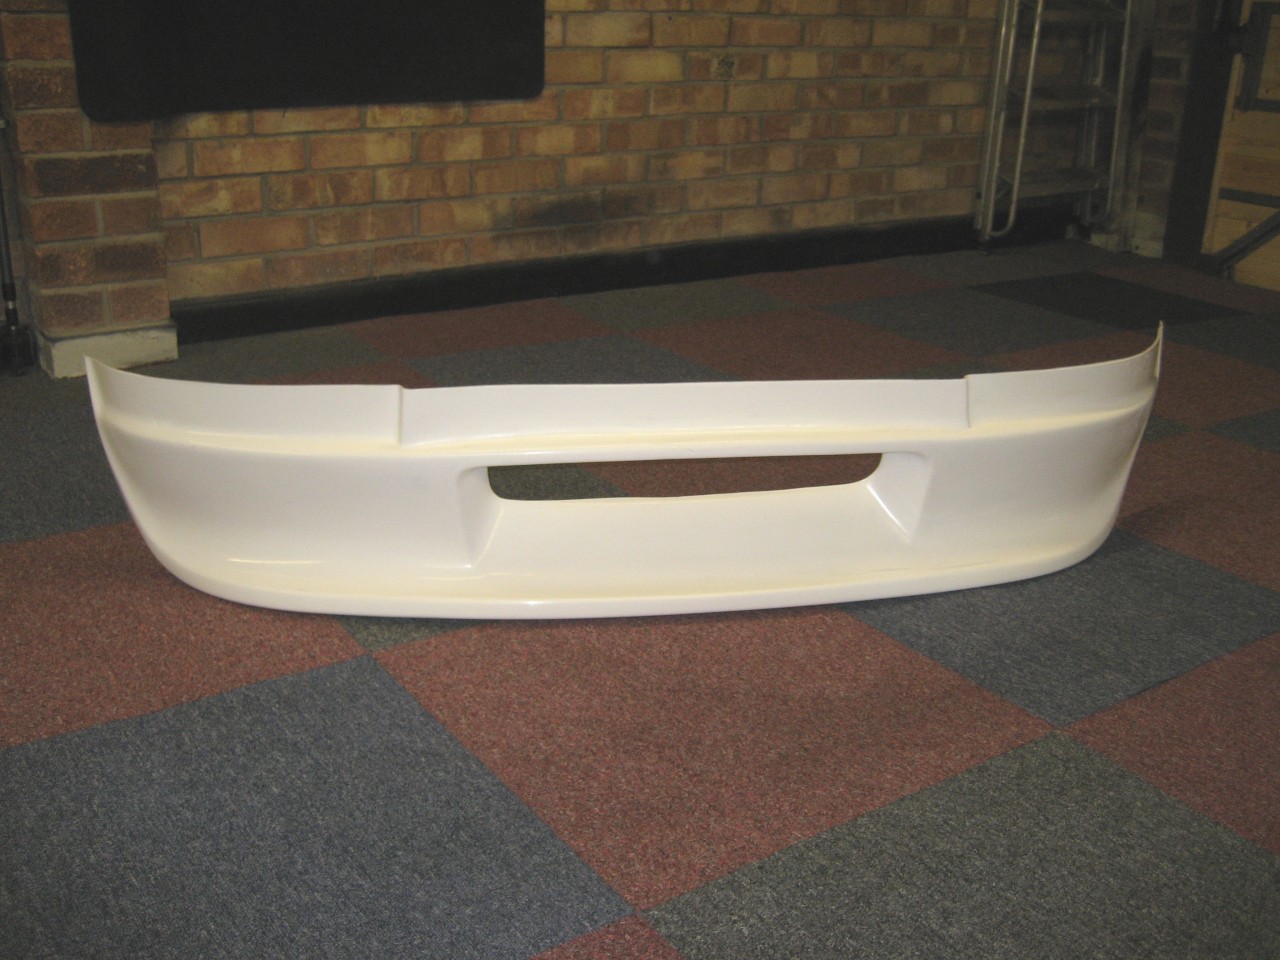 I wondered (for some time) how I could experiment with this without destroying the spoiler. Out of the blue, I hit upon a solution............. Pape Mache. So over the next ten days I relaxed in the garage with PVA glue and a pile of newspapers. 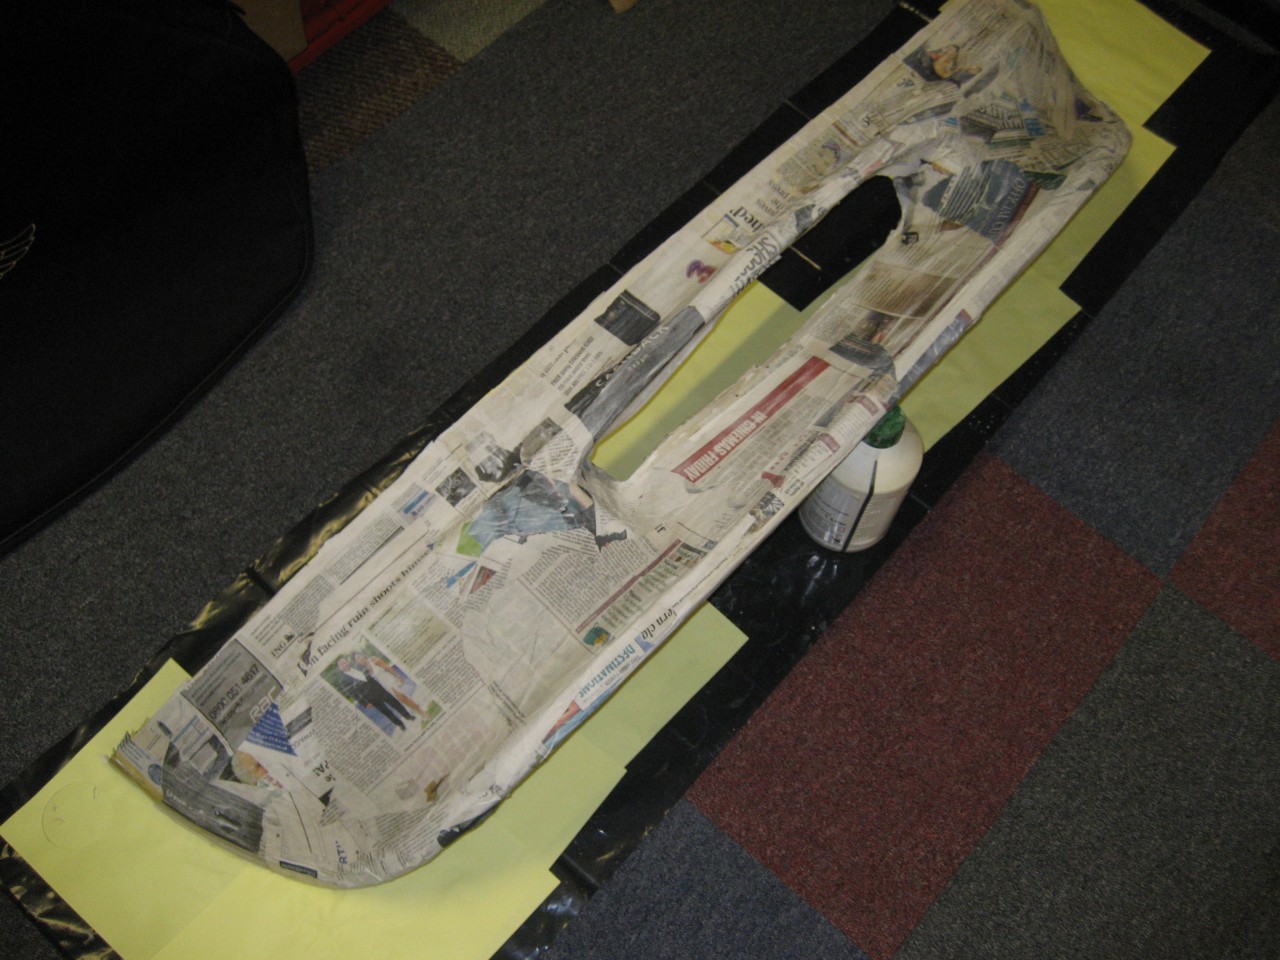 I added a layer of stiffer paper so I could see where I'd been.... 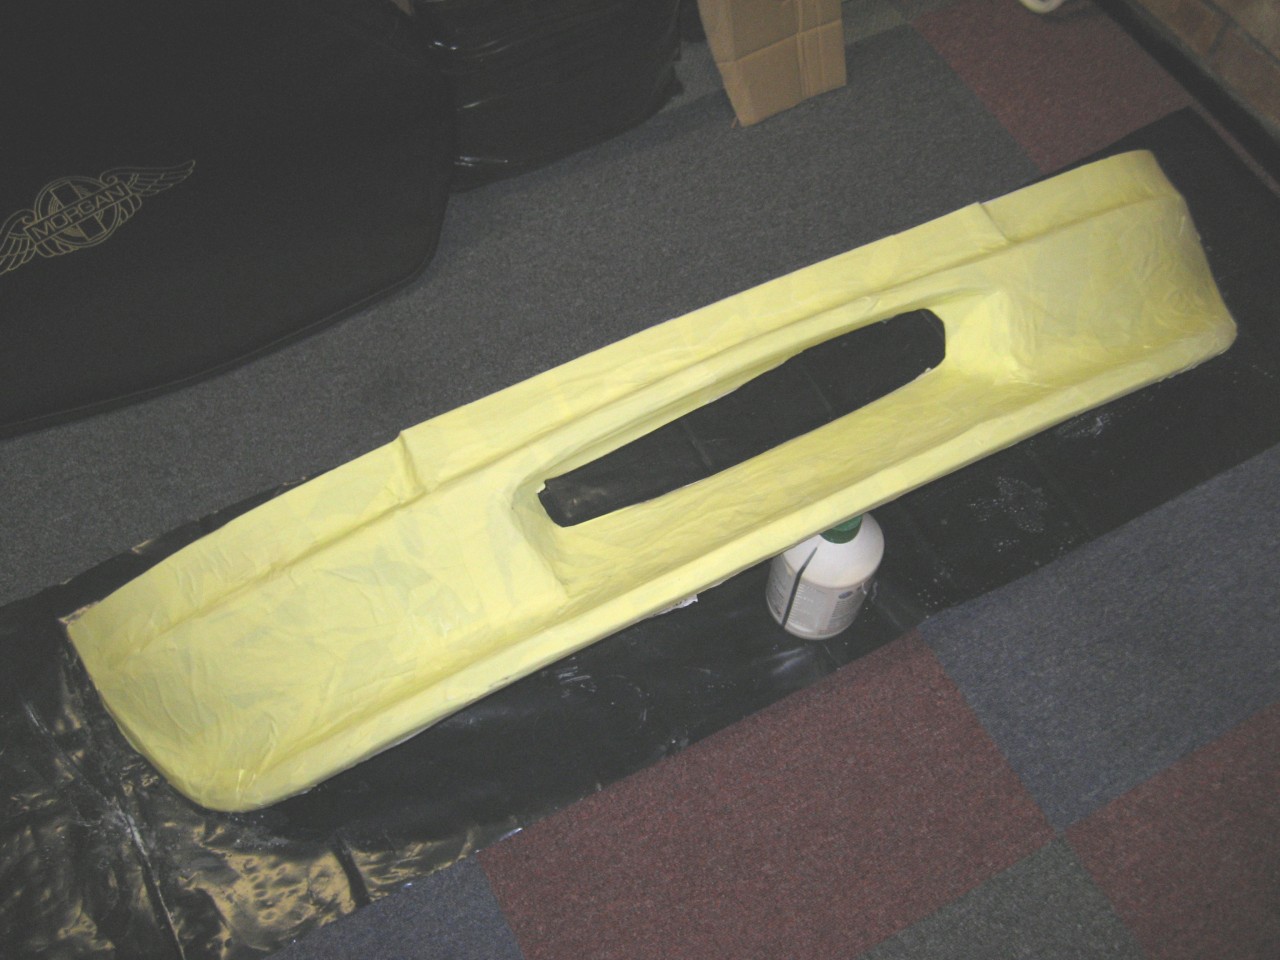 I wondered how thick to make it so that it would retain it's true shape. I needn't have worried. 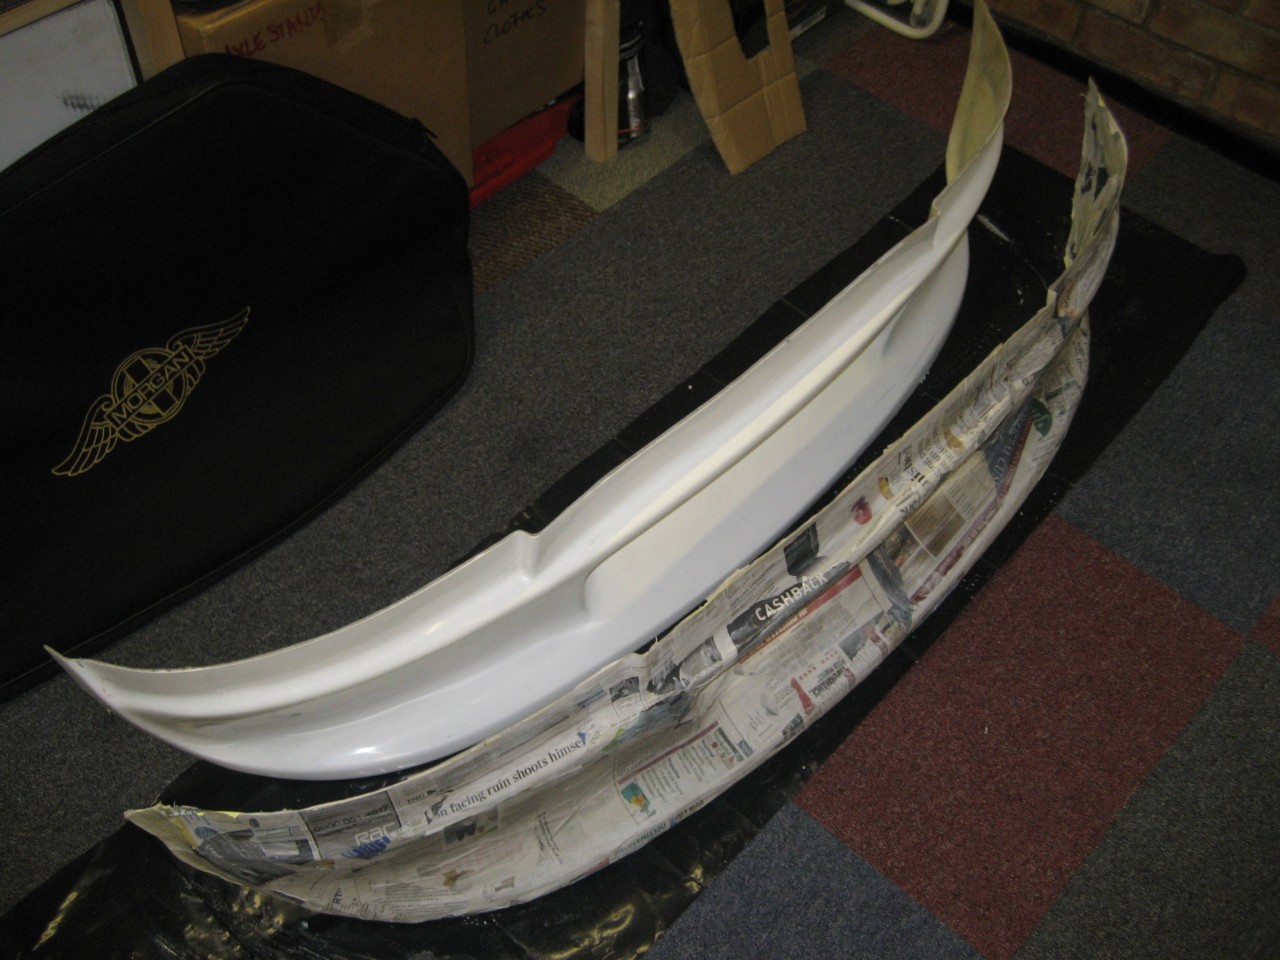 It popped off a treat and was an exact copy. More to follow tomorrow....
DaveW
'05 Red Roadster S1
'16 Yellow (Not the only) Narrow AR GDI Plus 4
|
|
|
|
|
Joined: Dec 2008
Posts: 22,366 Likes: 354
Roadster Guru Member of the Inner Circle
|
|
OP
Roadster Guru Member of the Inner Circle
Joined: Dec 2008
Posts: 22,366 Likes: 354 |
Post Photobucket Reboot from March 2009 continued...............Right then, back to the story: There is a crucial step to this process which must be done properly. That's finding the centreline of the spoiler. It sounds simple, but the curve of the moulding and the curved edges combine to make this tricky. There's an old saying about "measure twice & cut once". For this I measured and measured and measured and measured. Once I was happy with the centreline, I measured the distance between the outer edges of the overrider irons. The outer edge is flat in the vertical plane.The next step was to take a pair of scissors..... and start the carve-up of my 'lovely' pape mache spoiler. The irons are L shaped in cross section, so to allow the spoiler to slot on from below, I measured the width of the horizontal component, and made another two cuts. At the bottom of these slots, there has to be a short vertical slot - more easy to understand in the photos. The length of these cuts was trial & error. Short at first then slowly extending. At the same time I chopped each end off at a jaunty angle. This was a sort of guess. I knew that wheel clearance would be an issue on lock. More of that later. Finally in order that the spoiler would fit up around the 'hornbox', I removed a good inch or two along the top edge and removed the top of the oval intake hole. My objective was that the spoiler would sit just below the overriders. This trial fitting took a long time. It was an essential part of the process. Although had it not worked I could have started again with a new pape mache spoiler!! This was the result. I had started to mask up the fibreglass spoiler. 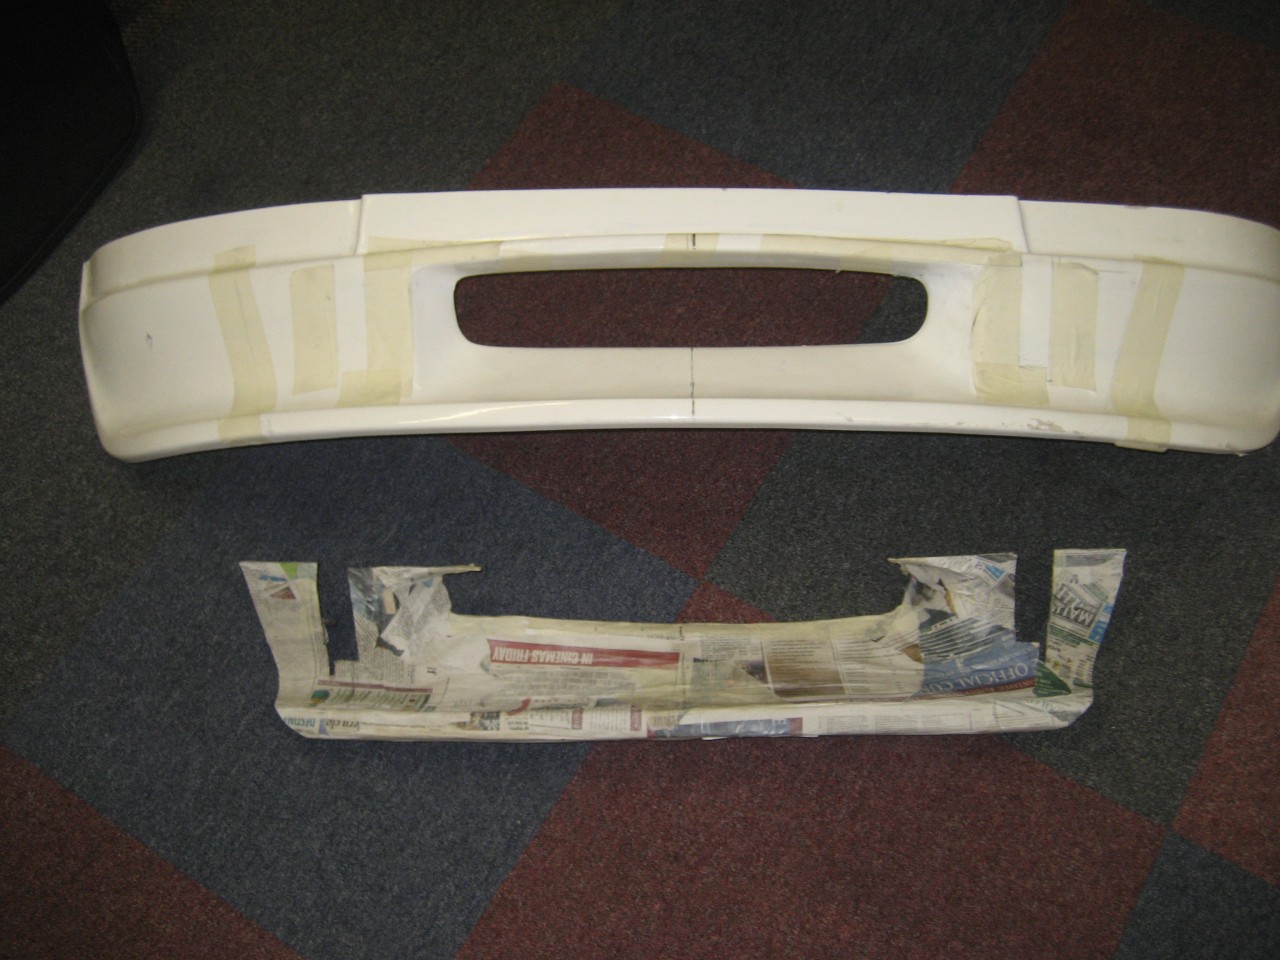 This next photo shows the processed 'real thing'. I used a hacksaw where possible. Where access was impossible I used a hacksaw blade with a masking tape handle. The horizontal cuts were drilled in the style of a dotted line, snapped off and filed smooth.The rough edges were filed or sanded smooth. You can just see the centreline mark. 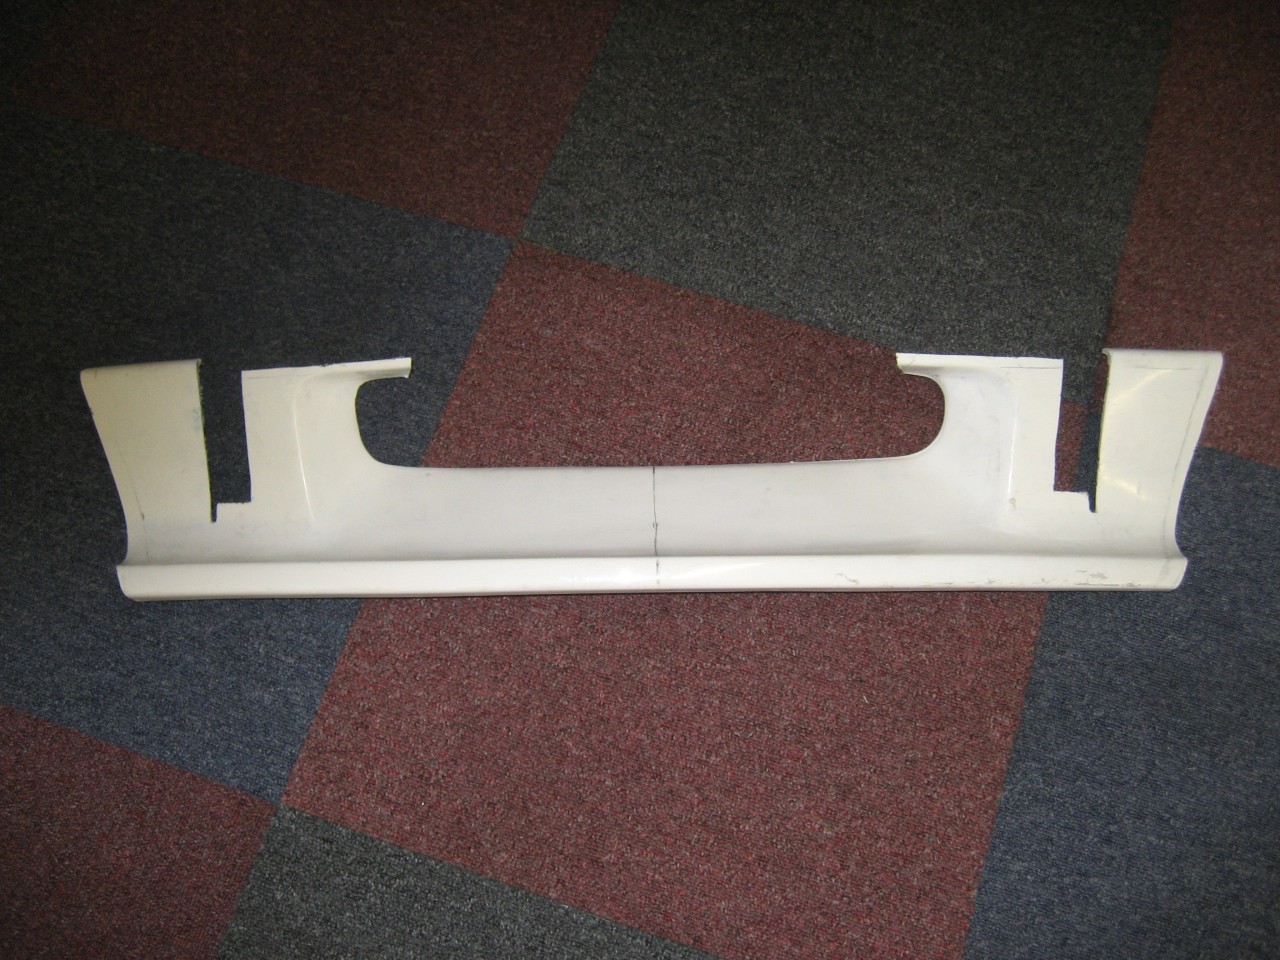 And next we have two coats of Halfords very best red plastic primer. This took a full can, doing both sides. At this stage I'd drilled the four mounting holes and araldited penny washers at the back. These were held in place with nuts & bolts which came in handy to hold it while the paint dried. 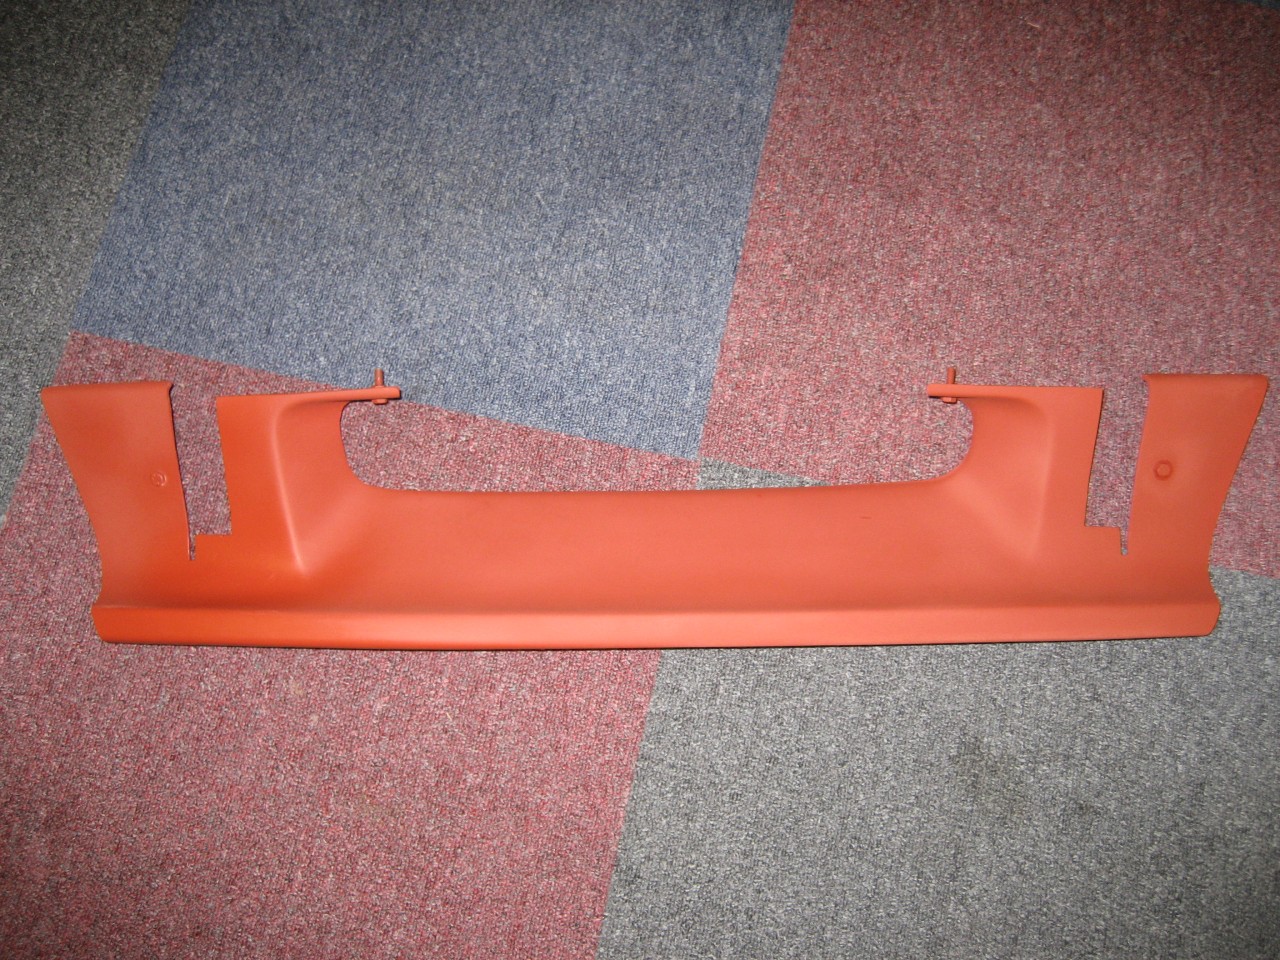 And when the primer had dried for a couple of days, the red went on. The first coats were Audi Flash Red, because I didn't want to run out of Halfords special mix Rosso Corsa at a crucial moment. 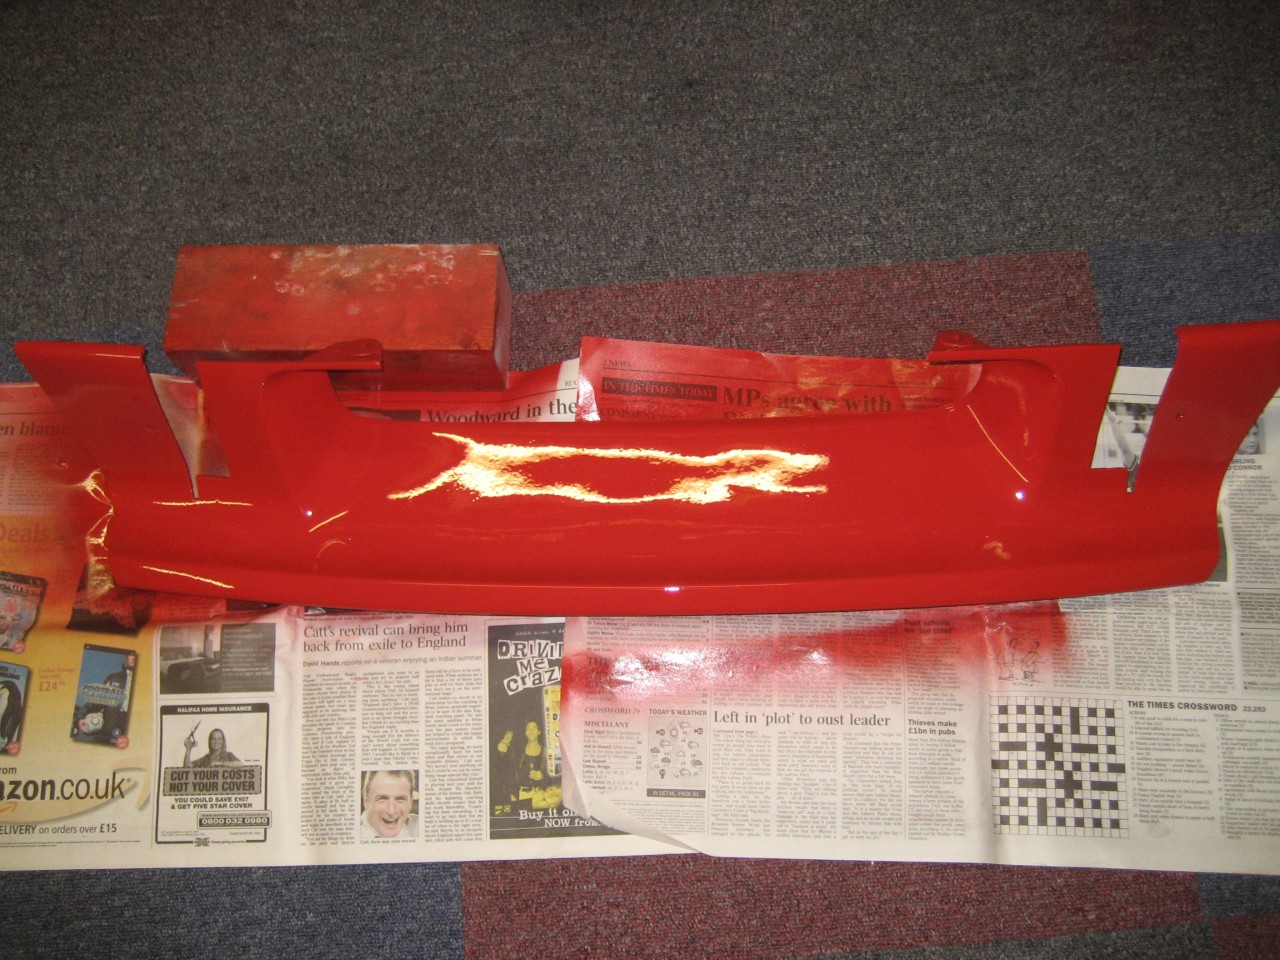 And here it is after three good coats of Rosso Corsa spread over a few days. The Halfords 'mix while you wait' cans come with a good spray head which gives a thin vertical paint pattern (it can be turned 90degrees). It's much better than the usual round spray pattern which gobs all the paint 'in the middle'. 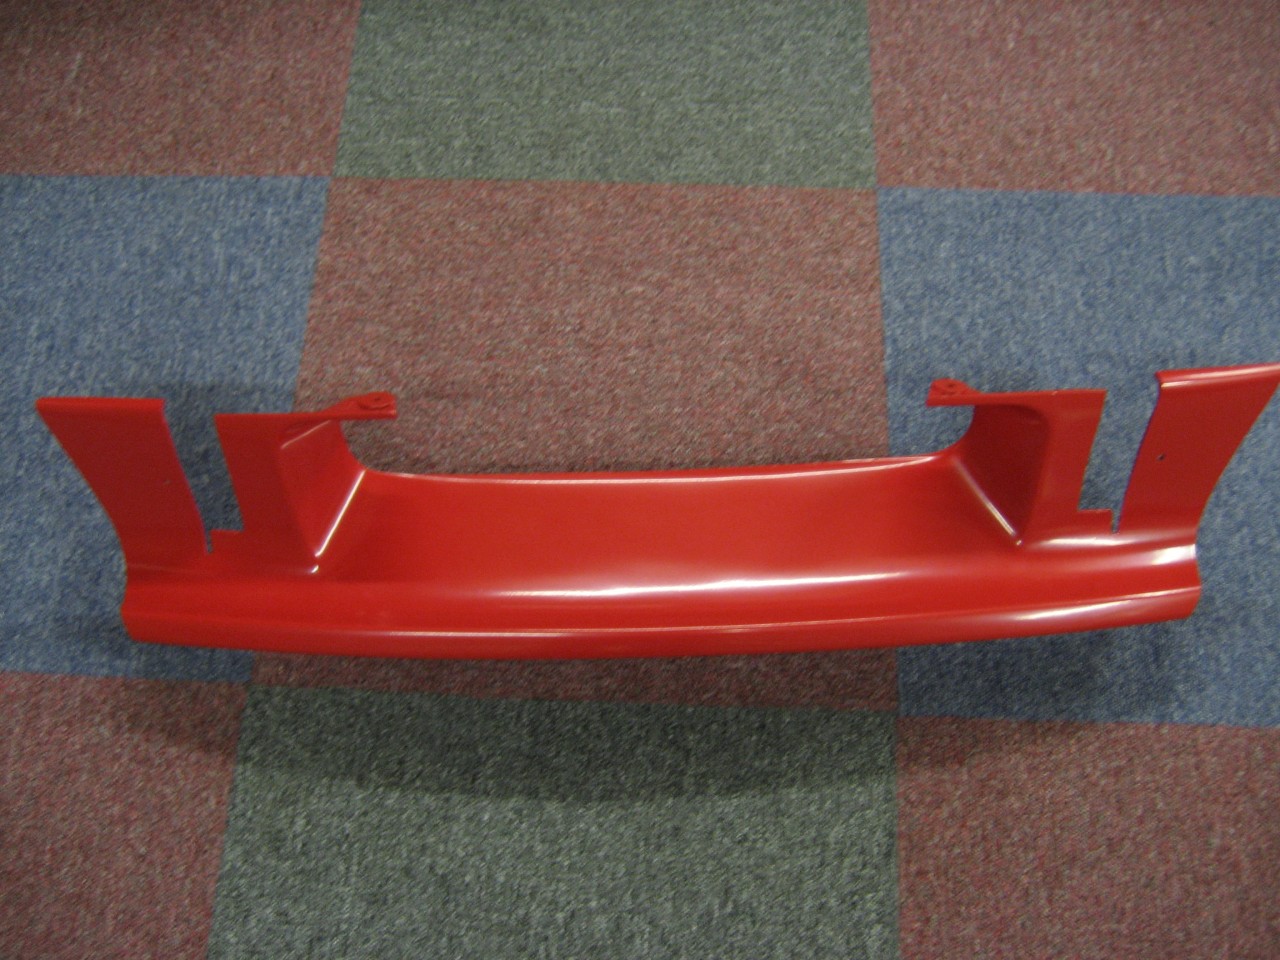
DaveW
'05 Red Roadster S1
'16 Yellow (Not the only) Narrow AR GDI Plus 4
|
|
|
|
|
Joined: Dec 2008
Posts: 22,366 Likes: 354
Roadster Guru Member of the Inner Circle
|
|
OP
Roadster Guru Member of the Inner Circle
Joined: Dec 2008
Posts: 22,366 Likes: 354 |
Post Photobucket Reboot From March 2009 continued.............The bottom of each overrider touches the spoiler, so to prevent chafing, I glued a small length of Neoprene edging on each as a buffer. 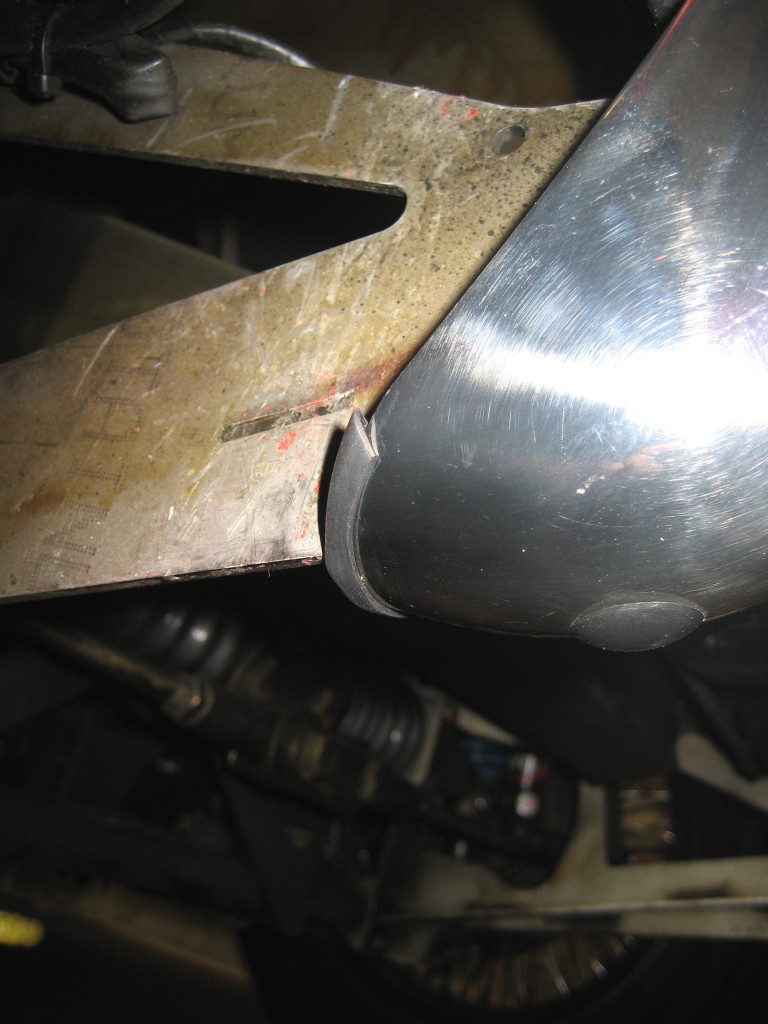 This shows the fasteners at a stage when I thought I'd sorted them. The 'yacht sail' shaped anodised aluminium pieces at the top were intended to fit on the outside of the overrider irons. A small portion is visible, and it would have smartened things up. But I tried one and it just wasn't good enough, so they were binned. The next block of fasteners are the outer fasteners and the penny washers fit either side of the irons. You'll see that I've added two wedges for extra location. At the bottom, those two angled brackets were my second attempt, but the alignment was just not right. So I ended up making some Mk3 brackets for the horn box. 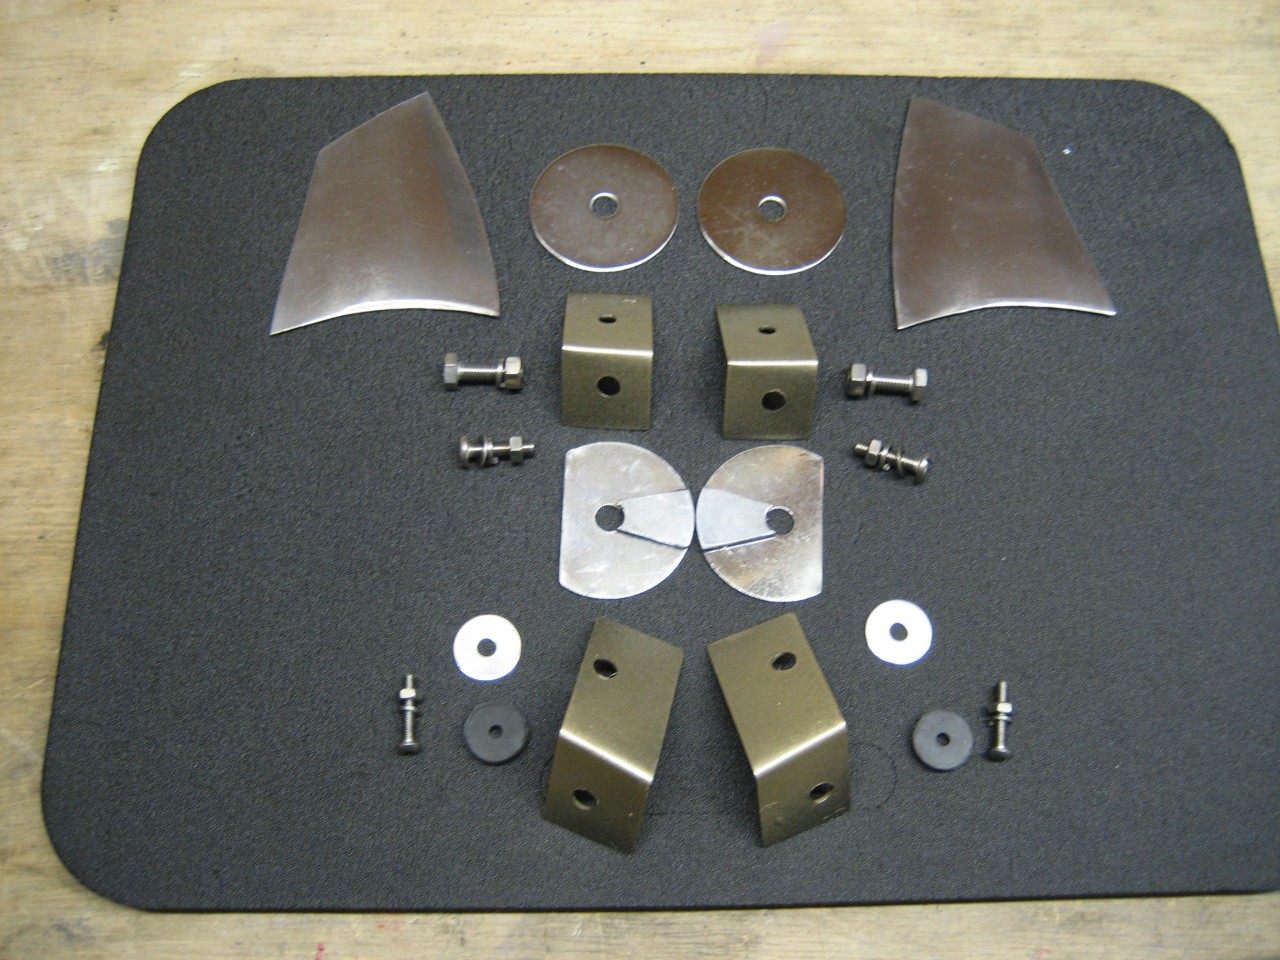 This is the nearside bracket in place on the horn box, fresh Dinitrol applied. It uses the existing bolt - remember my 'no drilling' credentials. Those two nuts & bolts are UNF. The MK3 brackets took several trial fit attempts to get proper alignment. All brackets are made from Maplins two foot stainless steel ruler. 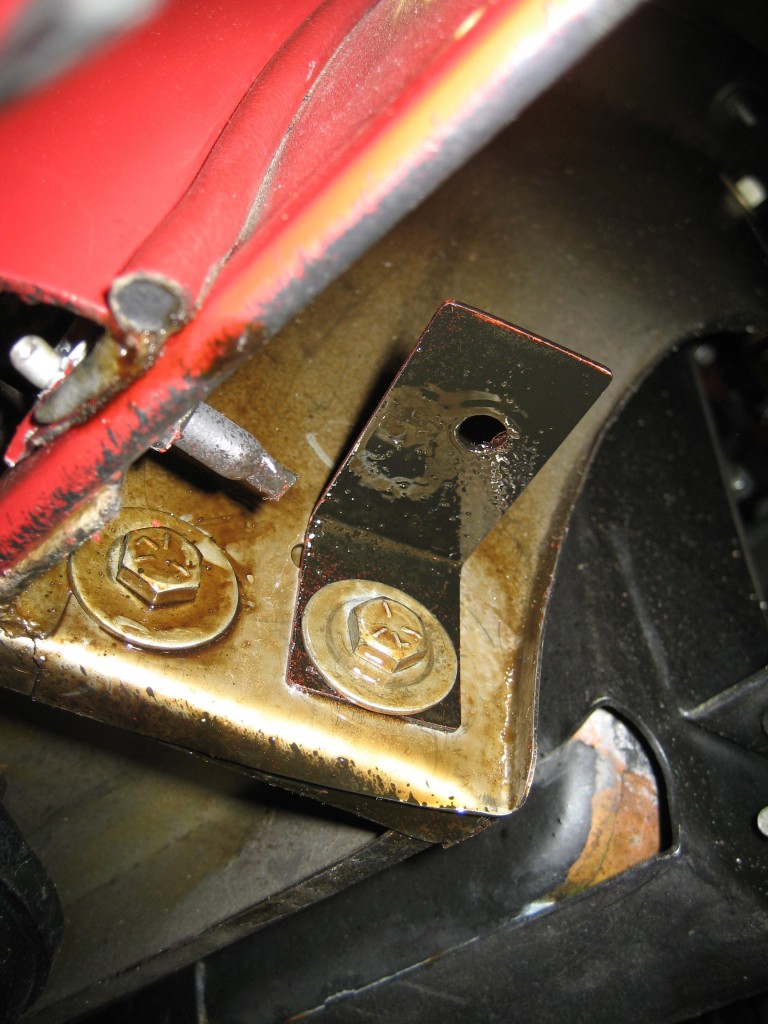 This is the complete fitting. You can see one rubber washer under the penny washer and there's another rubber washer between the washer previously araldited to the spoiler and the bracket. Hopefully this will provide a bit of 'give'. 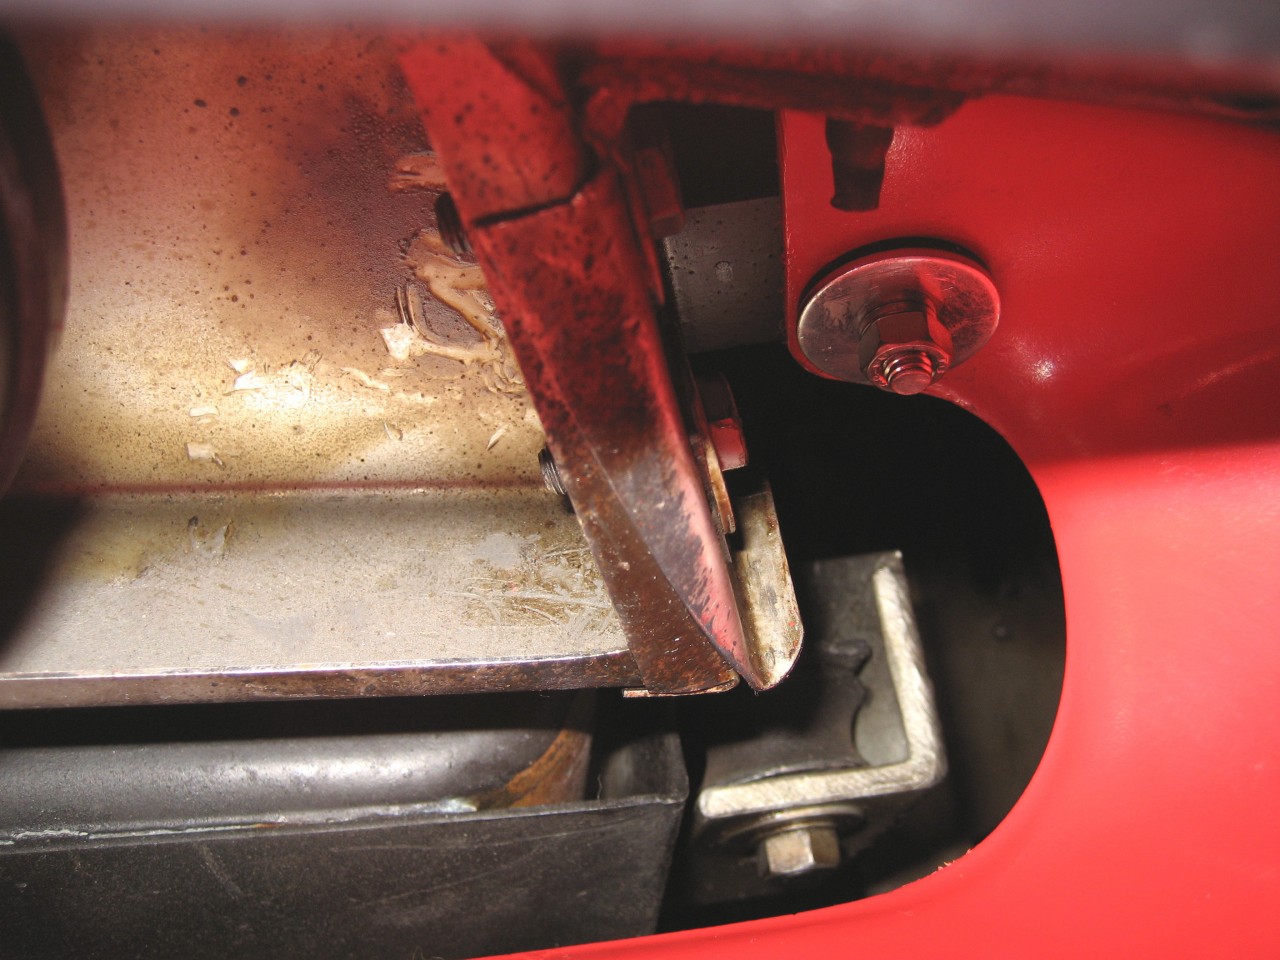 This is the offside from under the wheelarch. You can see the top of the inner mounting, (underneath of nearside in previous photo). You can also see the penny washers on the overrider irons and the detail of the outer mounting, freshly Dinitroled.You can also see the edging. More about that in the next installment. 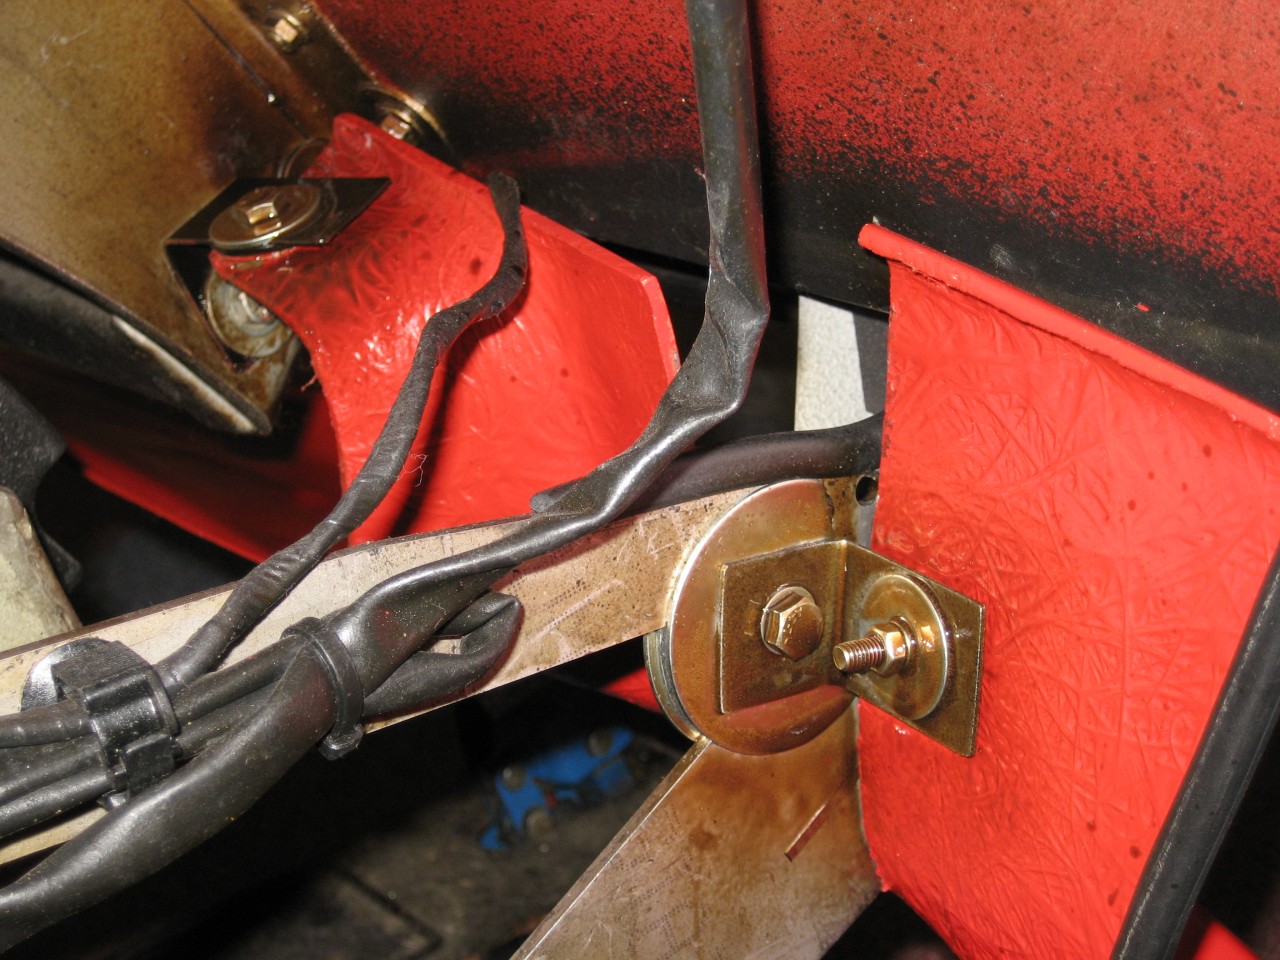
DaveW
'05 Red Roadster S1
'16 Yellow (Not the only) Narrow AR GDI Plus 4
|
|
|
|
|
Joined: Dec 2008
Posts: 22,366 Likes: 354
Roadster Guru Member of the Inner Circle
|
|
OP
Roadster Guru Member of the Inner Circle
Joined: Dec 2008
Posts: 22,366 Likes: 354 |
Post Photobucket reboot from March 2009 continued..............Nearly there! I had to take an afternoon off work to do the final fit - because it had been such a struggle. I pondered whether to fit 'end plates' to finish it off, but tried a cardboard template. It looks better 'bare' because it matches the wing edge. But it needed edging, so I referred to Baines' catalogue and selected a profile which matches the number plate box edging. The very last check was that there was clearance on full lock. So I jacked it up, and closed my eyes. There is something like 3/8inch clearance on lock. Perfick........ This picture shows the nearside on full lock. 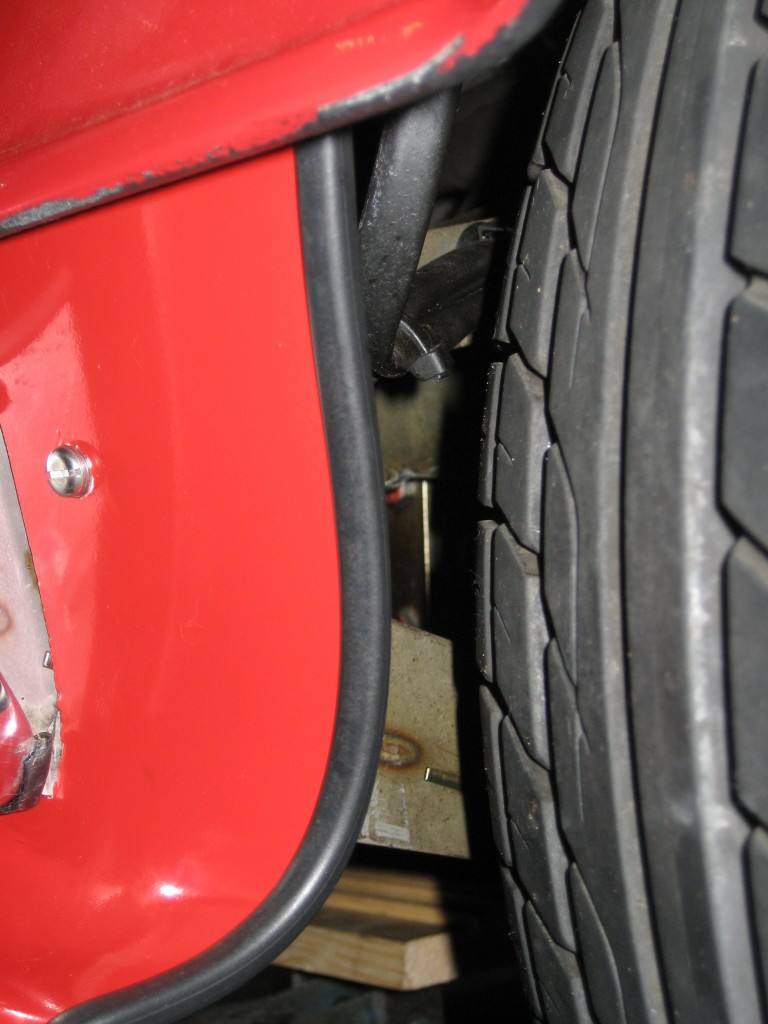 And here, by special request (1560), here are some higher level pictures. 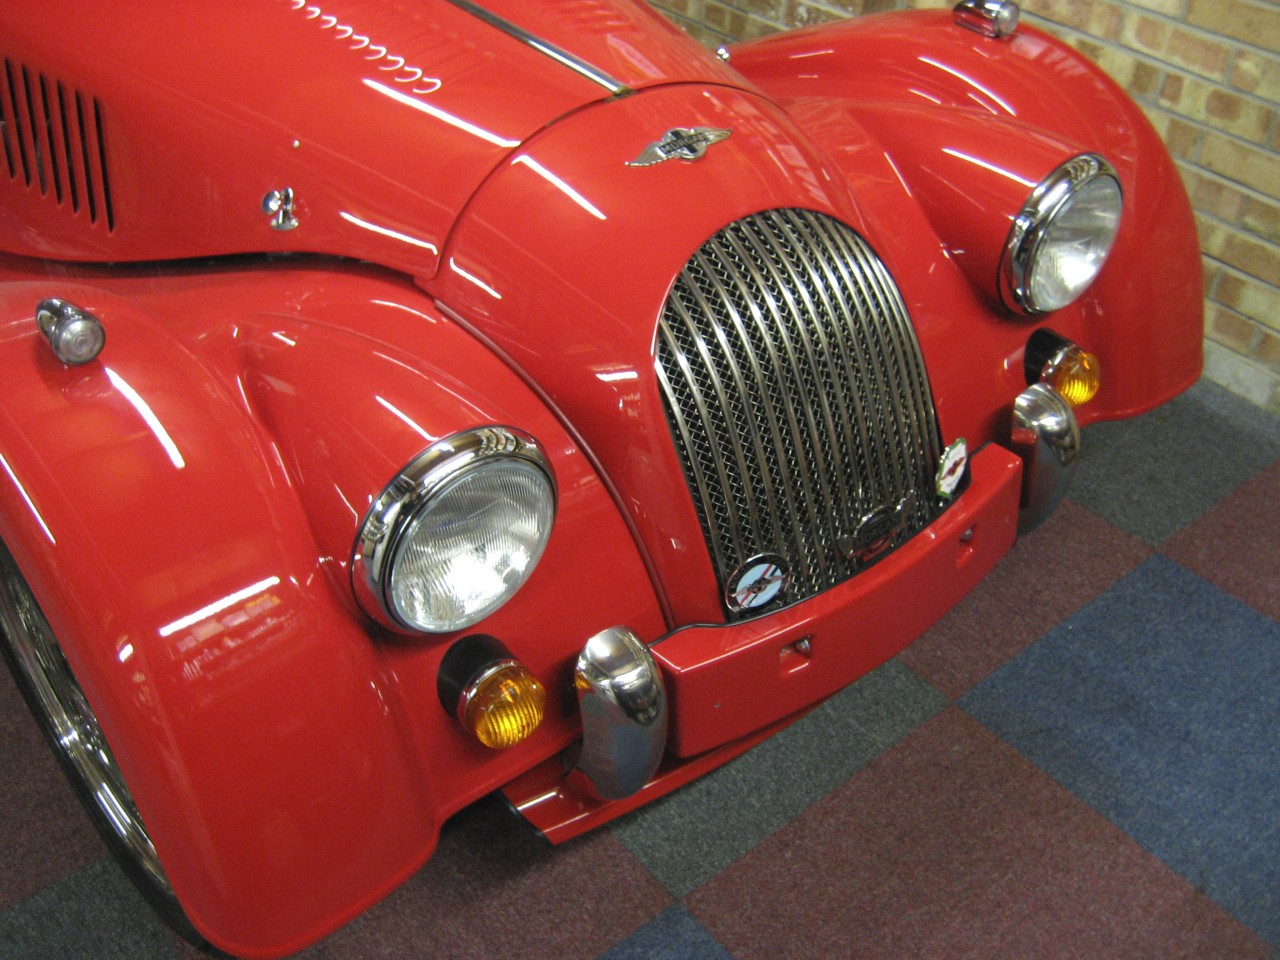 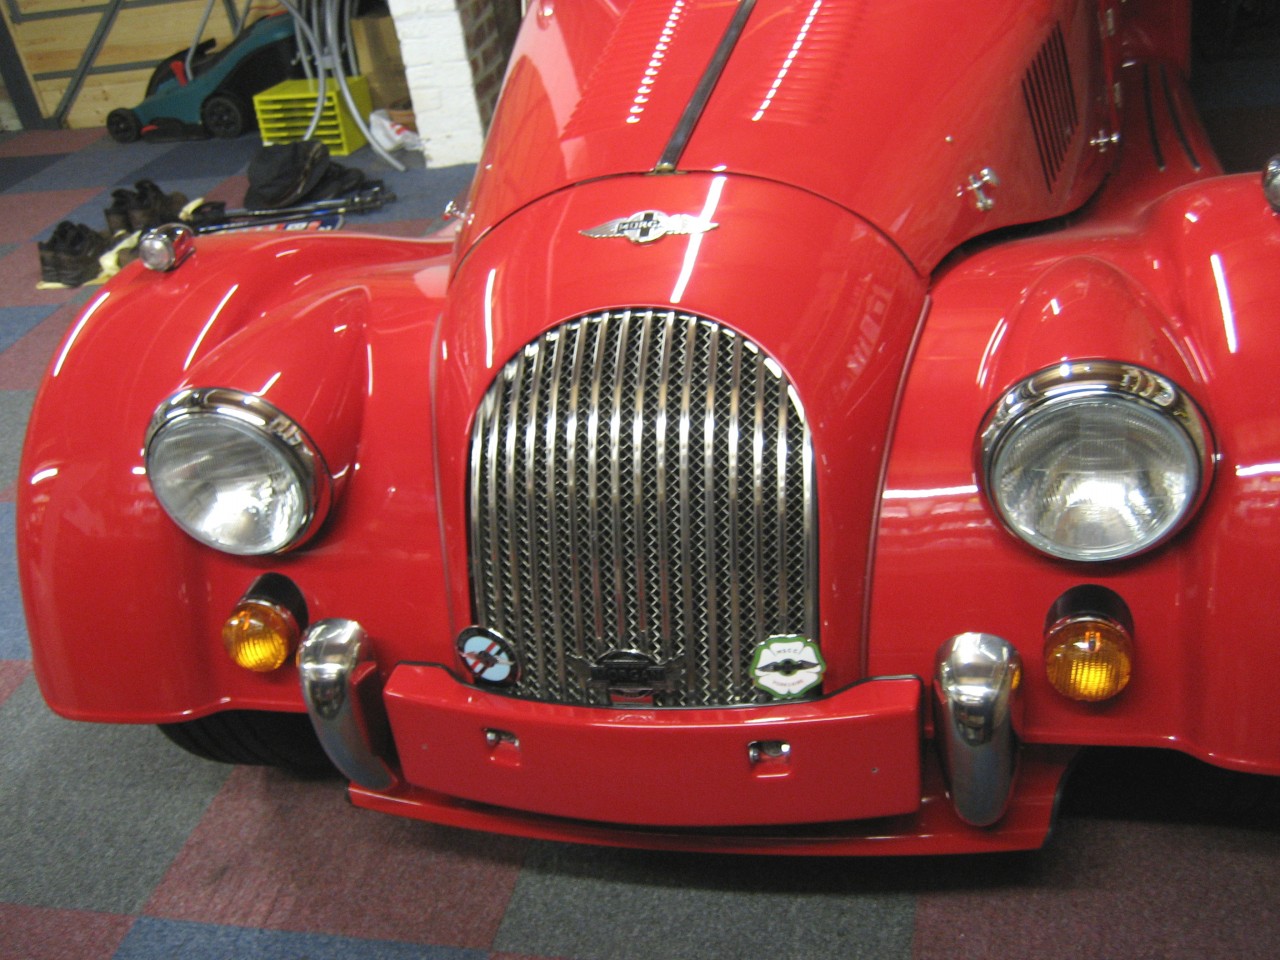 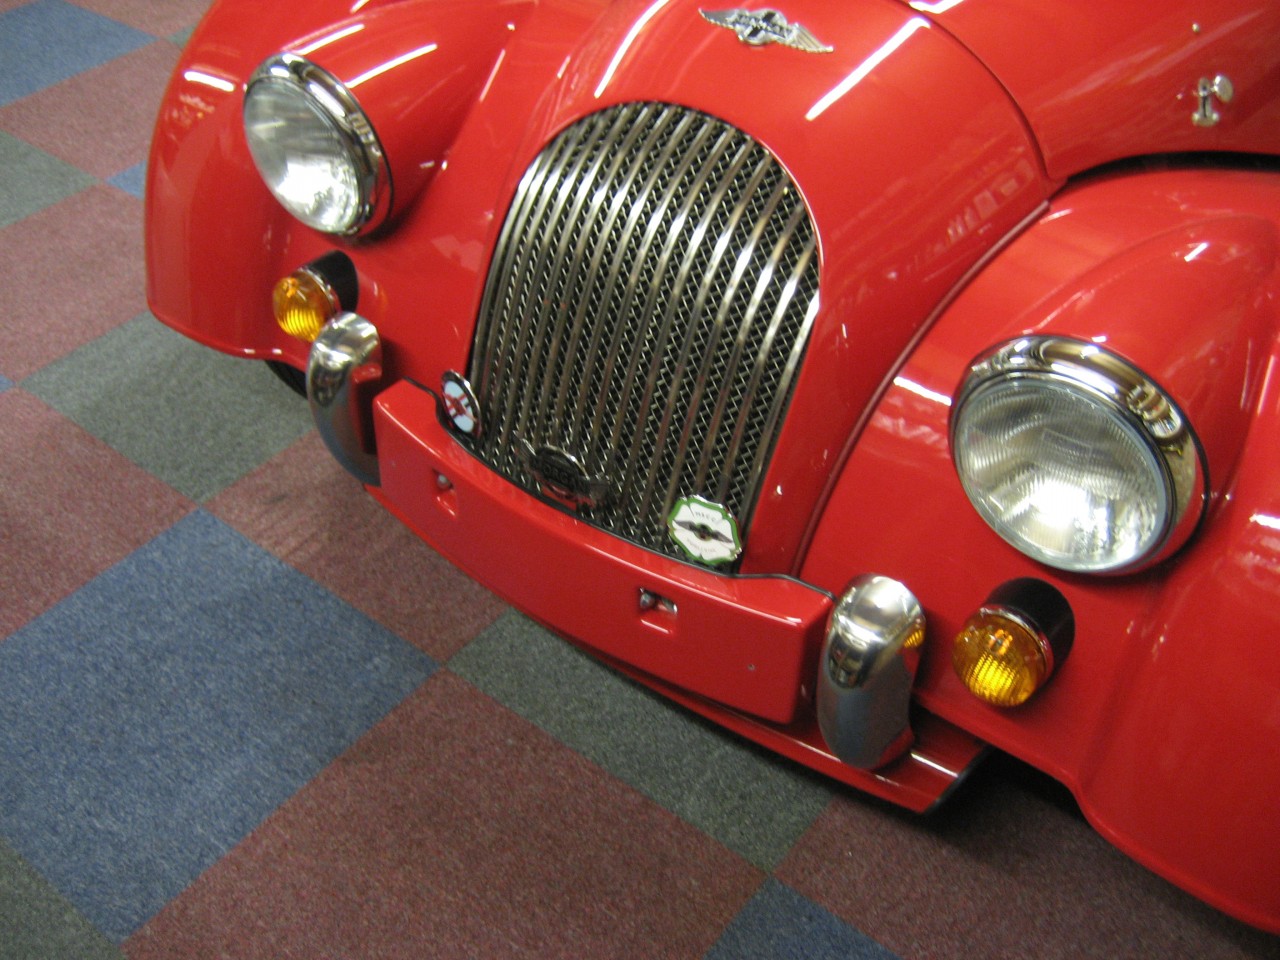 I hope you've enjoyed the story. It's been a real voyage of discovery, and at times, immensely frustrating. ************************************************************************************************************************ First time on the road today and the good news is that it stood up to the flexing! But already it has a small stonechip. Does it work?? well, probably psychological, but it feels well planted at speed...... But probably always did. Here are three 'outside' photos. 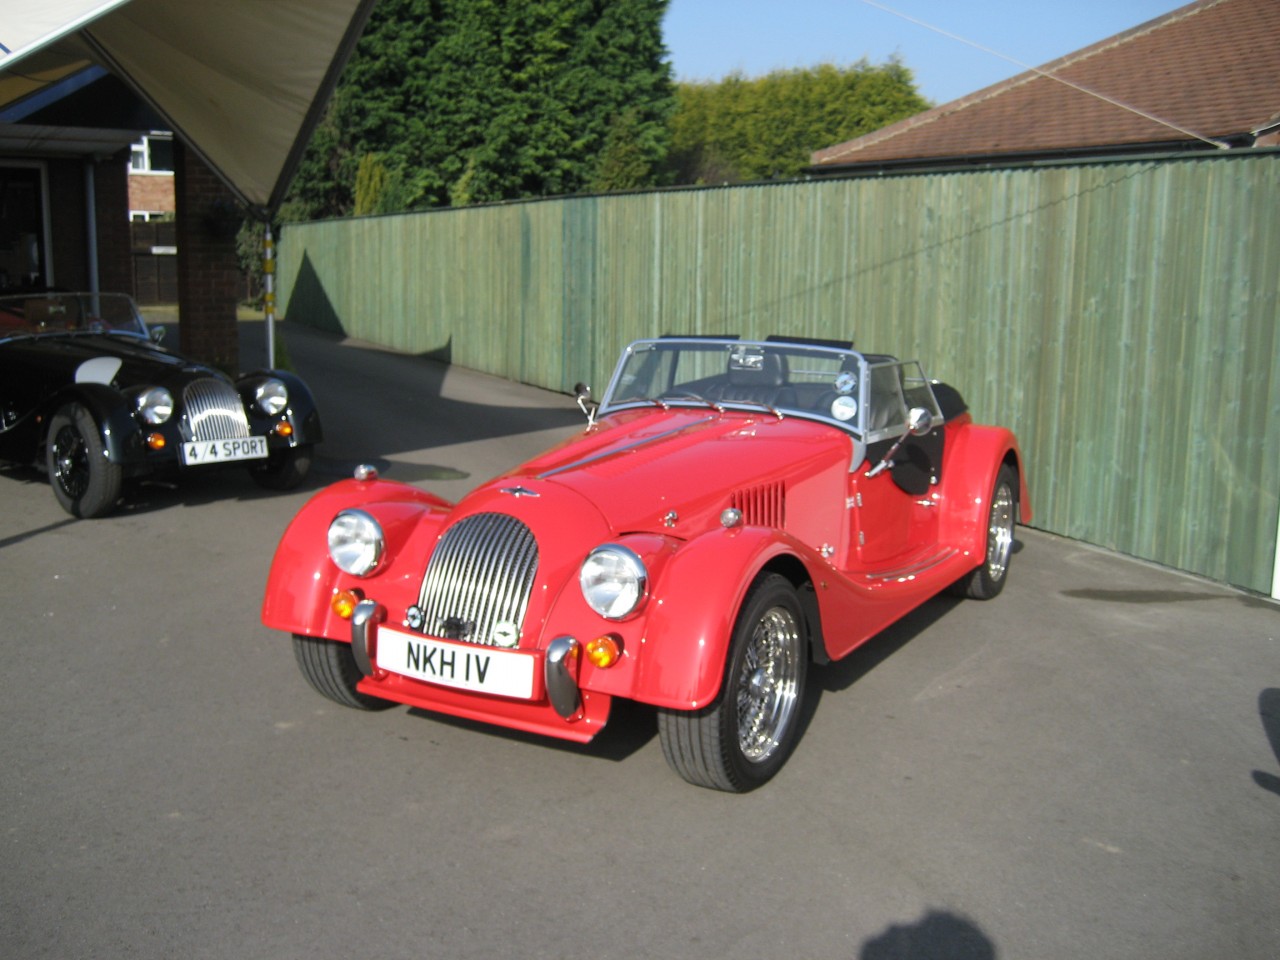 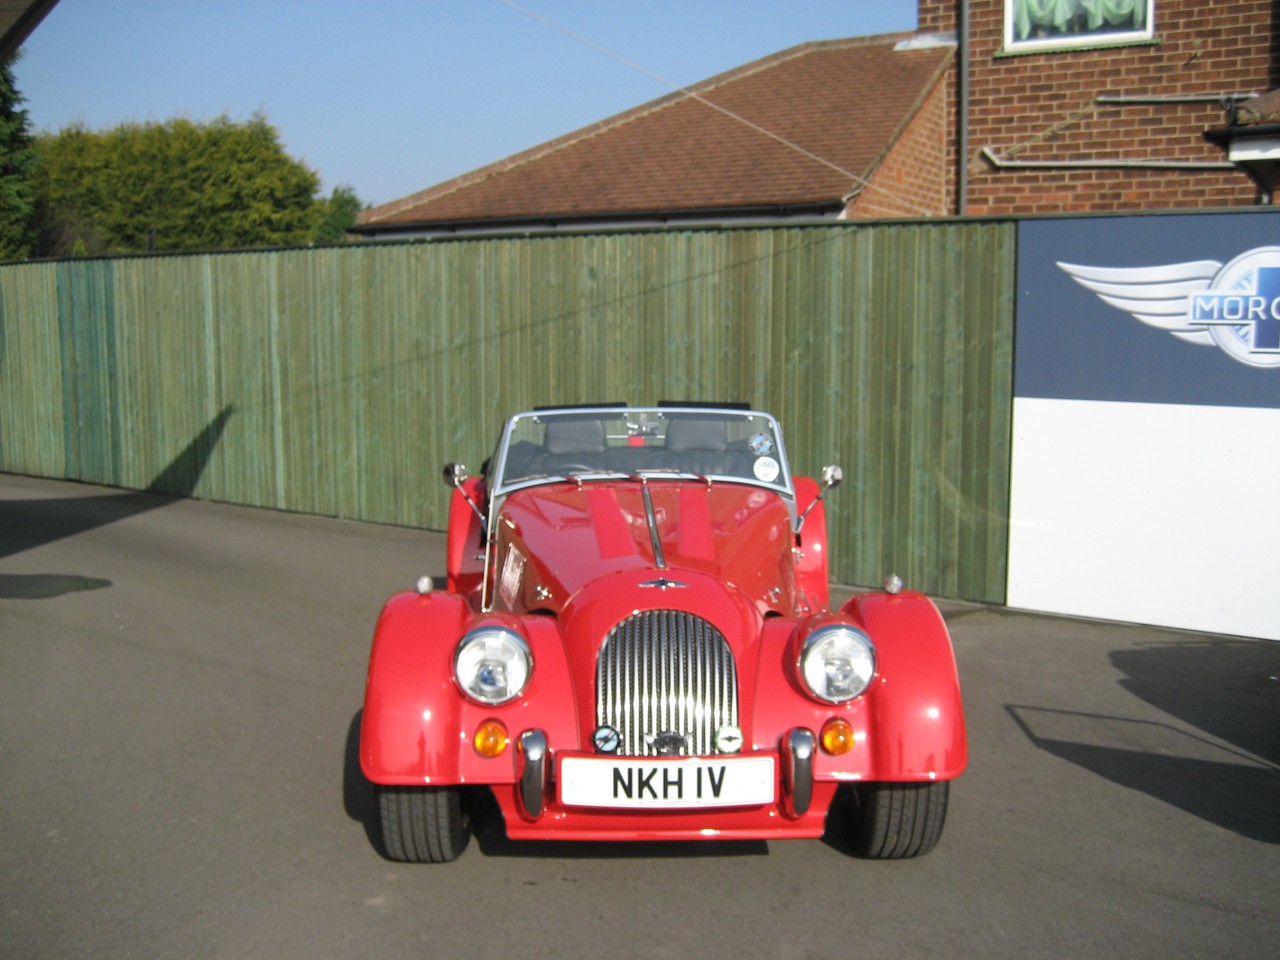 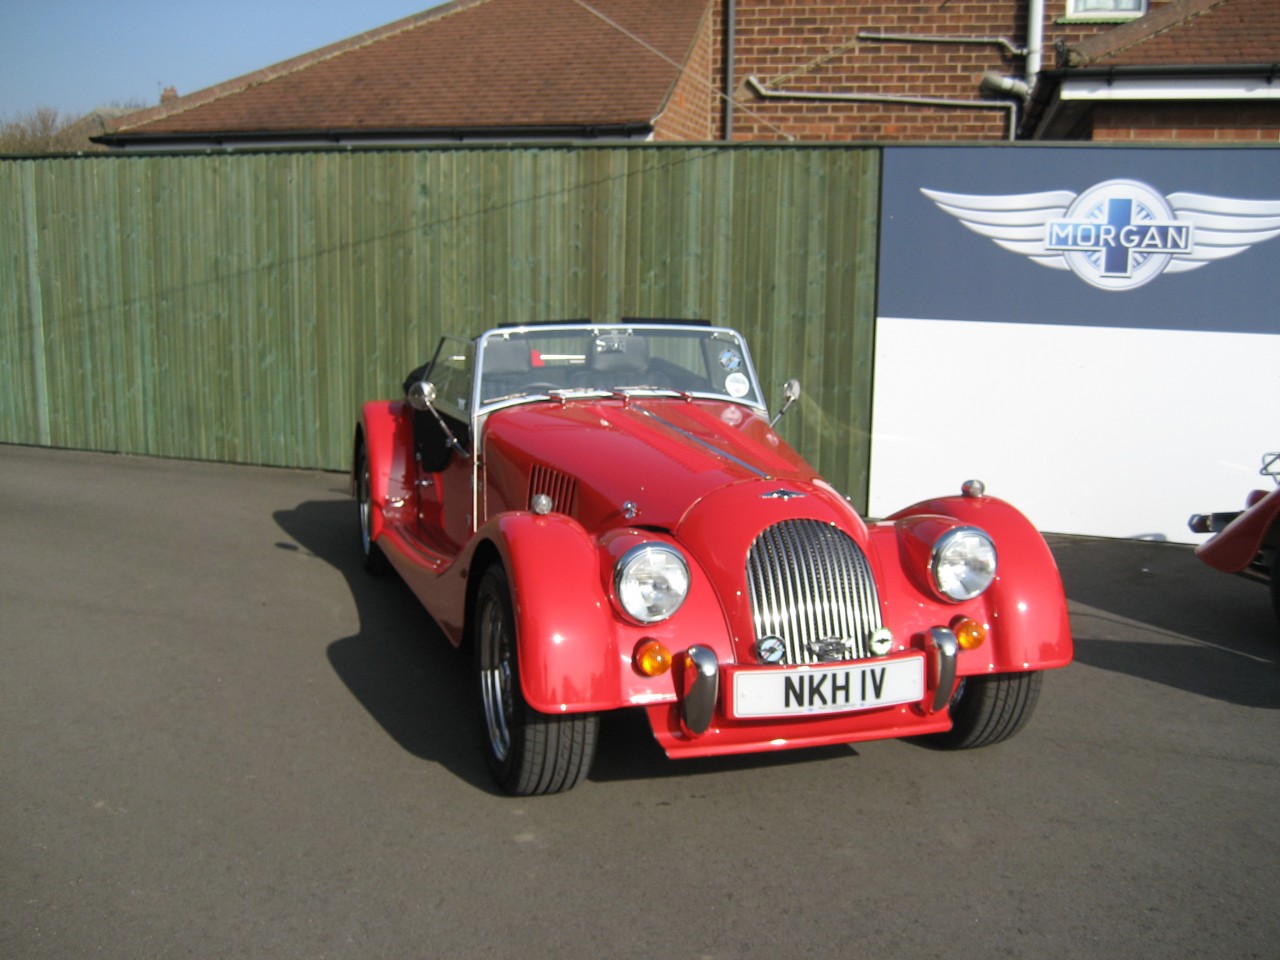 2017 Note: This year, having developed the skills to fabricate an aluminium undertray, I removed the spoiler and replaced it with an undertray. Over the eight years, the spoiler has worked well, and has now been donated to a worthy cause. 2017 Note: This year, having developed the skills to fabricate an aluminium undertray, I removed the spoiler and replaced it with an undertray. Over the eight years, the spoiler has worked well, and has now been donated to a worthy cause.
The curves of this spoiler always make it appear slightly odd in photographs - it looked much better in real life!!! 
DaveW
'05 Red Roadster S1
'16 Yellow (Not the only) Narrow AR GDI Plus 4
|
|
|
|
|
Joined: Jan 2012
Posts: 14,976 Likes: 2
Member of the Inner Circle
|
|
Member of the Inner Circle
Joined: Jan 2012
Posts: 14,976 Likes: 2 |
Don't think I've read this post before - great as ever Dave.
Richard
1976 4/4 4 Seater
|
|
|
|
|