|
10 members (mise303, B3MOG, JMcL, Soleng, Sir Percival, Jensen1960, High Hamster, Nick B, Bishmog, Rog G),
334
guests, and
19
robots. |
|
Key:
Admin,
Global Mod,
Mod
|
|
|
Forums34
Topics48,348
Posts813,084
Members9,212
| |
Most Online1,046
Aug 24th, 2023
|
|
|
|
Joined: Oct 2014
Posts: 212
L - Learner Plates On
|
OP

L - Learner Plates On
Joined: Oct 2014
Posts: 212 |
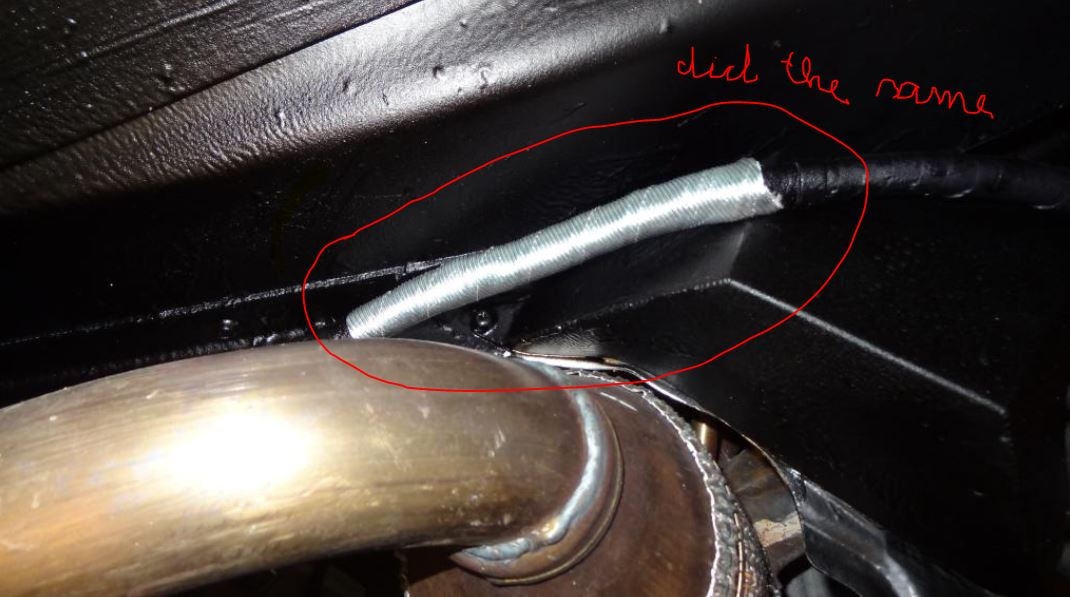
I'm new to Morgans and their idiosyncrasies (but really enjoying the Morgan experience) but thought I'd just post a few things I've noticed or done to our +4 GDI. In looking at the car in detail, pretty much for the first time, my initial impression is that I am pleased with the build quality and the way things have been done. But there are always the small things that make a difference for the owner... From the 'old days' on a Wolsley 4/44 I always had grease nipple caps on to prevent dirt getting into grease gun - so now fitted on the Morgan. Also plan to fit gaiters to the lower springs when the weather is warmer! (thanks to DaveW and others for the idea and detail though).  On the GDI there is a small primary catalytic converter in the engine compartment very near the exhaust manifold - but it just protrudes through the inner wing to the wheel arch. Within the wheel arch a cable loom runs along the top of this inner wing and passes just over the extremity of the catalytic converter. After our last run out I felt how hot this got (did this carefully as self-harm is not high on my 'to do' list). It was fairly warm - could still touch it - and while I don't think it would get so hot to cause immediate damage, the heat may well 'harden' the wiring insulation over time. To minimise this I put some reflective heatshield around the loom where it gets radiant heat from the catalytic converter/exhaust. 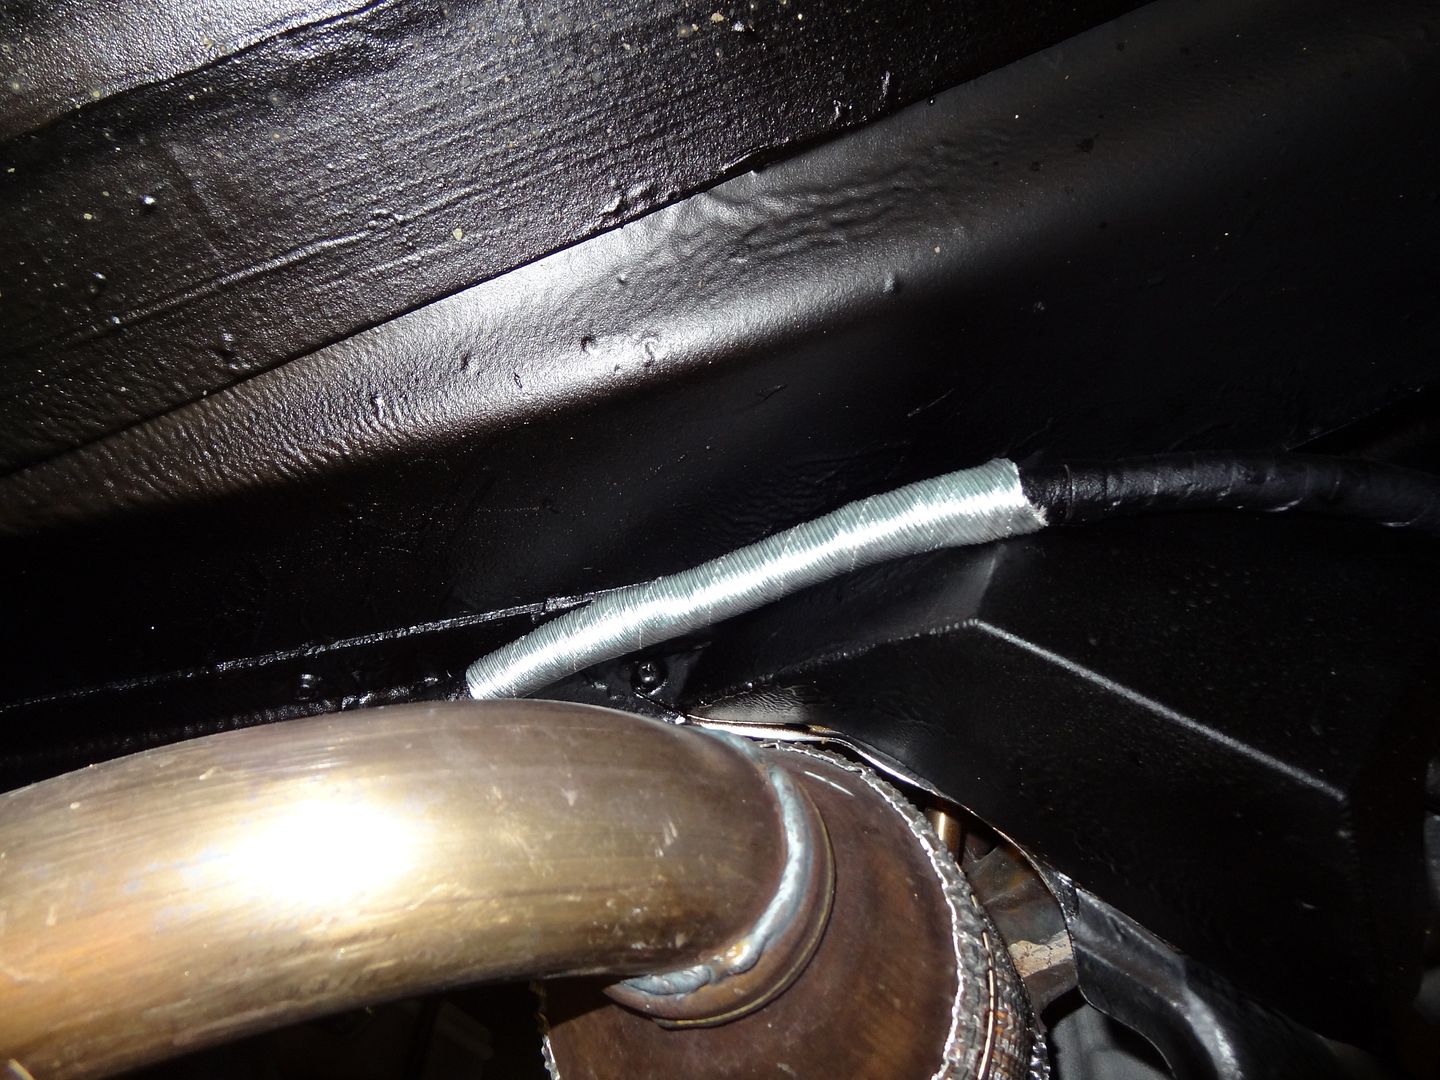 Connecting a battery conditioner (Ctek) via permanent leads would be preferable, but on investigating this it appears the battery has limited access and the +ve pole is almost impossible to connect to - very tight access. The fitted safety fuse just after the take-off (visible in picture) has moulded connections - so no access here to connect either. But with the fitted Banner battery I notice that there are two +ve poles and two -ve poles on the battery, so with another pair of battery terminals I think they can be used to separately hard-wire the plug lead to the battery charger (will put an in-line 10A fuse though, just in case....). Anyone done the same?  I noticed that on the near-side inner wing there are the holes for the steering column (for a LHD car). On the GDI the alternator is extremely near one of these large holes (see picture) and is likely to receive spray and crud from the wheel in the wheel arch. Just tried today to use the magic duct/duck tape to blank this hole off but the inner wing (in the engine compartment) appears coated with something (probably oil etc from manufacture) and the tape does not stick at all. I have looked/tried to think of a better suitable blanking grommet/arrangement but with no luck - has anyone found a successful way of blanking off these irregular shaped holes? (there are two large ones from the n/s wheel arch to the engine compartment) - I would be really interested to hear how it was done.  Any view on above be welcome - particularly if I've overlooked something!
Last edited by RichB; 08/02/15 09:25 PM.
Richard
+4 GDI Connaught Green, 2014
Magnolia
|
|
|
|
|
Joined: Feb 2011
Posts: 14,009
Member of the Inner Circle
|
|
Member of the Inner Circle
Joined: Feb 2011
Posts: 14,009 |
Richard, there is an access panel to the battery on the rear vertical bulkhead. You can see it if you take out the bulkhead/parcel shelf carpet.
The inner wheel arches are alloy and are not coated with anything internally at the factory. The outer will be covered with underseal. You could drill and bolt an alloy plate over the hole.
Last edited by Jays; 08/02/15 09:36 PM.
Jays
Former Morgan owner. Gone but hopefully not forgotten!
|
|
|
|
|
Joined: Sep 2013
Posts: 1,118
Has a lot to Say!
|
|
Has a lot to Say!
Joined: Sep 2013
Posts: 1,118 |
Richard thanks for the great pics will find this useful when picking up my GDI in May
RogT Old Git Racer ex 4/4 sand 2013
+4 GDI Royal Ivory 2015
Ford Fiesta ST2
|
|
|
|
|
Joined: Aug 2013
Posts: 163
L - Learner Plates On
|
|
L - Learner Plates On
Joined: Aug 2013
Posts: 163 |
  Hi RichB, there are several other optimization potentials you will find them all here in this great Forum. Torsten
Torsten
plus 4 MY 2014
|
|
|
|
|
Joined: Oct 2014
Posts: 212
L - Learner Plates On
|
|
OP
L - Learner Plates On
Joined: Oct 2014
Posts: 212 |
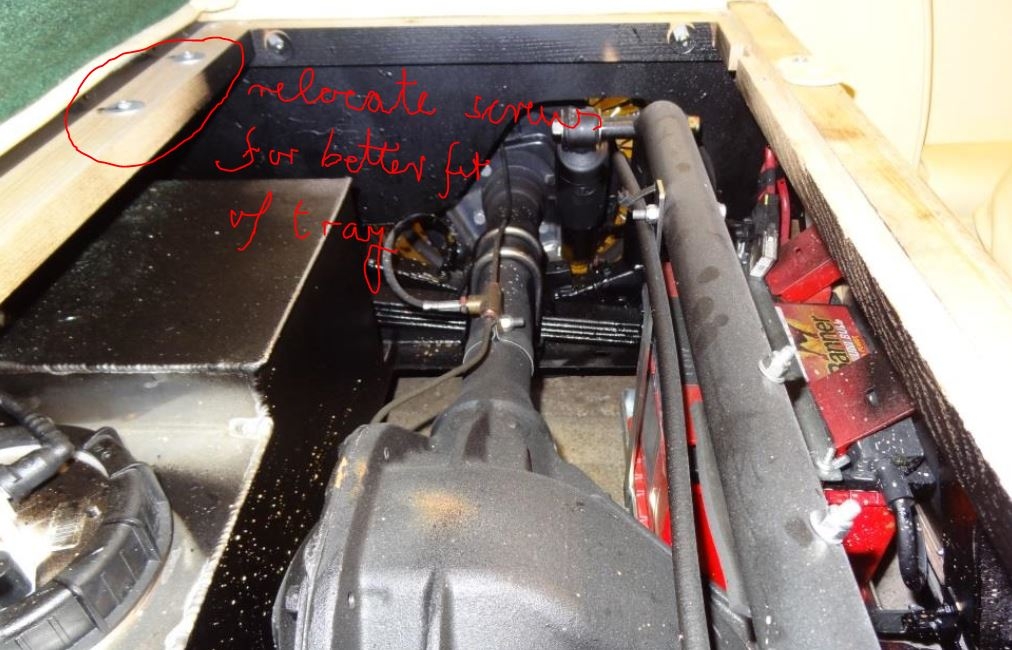
Good idea about relocating the screws - not spotted that.
Richard
+4 GDI Connaught Green, 2014
Magnolia
|
|
|
|
|
Joined: Oct 2014
Posts: 212
L - Learner Plates On
|
|
OP
L - Learner Plates On
Joined: Oct 2014
Posts: 212 |
Jay - hope you're getting better and you'll be back behind the wheel soon. Thanks for your comment on the battery compartment - I took the cover off, but space via that is limited to access the connected battery poles - on my car these are on the side of the battery closest to the bulkhead. Its also very difficult to 'lift' the plastic isolation cover on the +ve terminal because of the hinged plastic cover attached to the battery (visible in photo below). This makes it very awkward to gain access to connect another wire to the terminal. But glad Morgan fit a good quality battery - and one with double poles. The poles on the battery towards the rear of the car seem easy to access from above (well, that's the way it looks - may have different view when I attempt the connections...!). 
Richard
+4 GDI Connaught Green, 2014
Magnolia
|
|
|
|
|
Joined: Dec 2008
Posts: 21,868 Likes: 167
Roadster Guru Member of the Inner Circle
|
|
Roadster Guru Member of the Inner Circle
Joined: Dec 2008
Posts: 21,868 Likes: 167 |
The holes on the inner wings can be filled using a variety of material. I used grommets on the small ones, a mixture of heat resistant matting , some was self adhesive from Agriemach for the medium ones, and aluminium sheet for the big ones. In some cases where the panel is flat, I sandwiched two aluminium discs - one either side of the panel, with double sided tape cut to the size of the hole. This one was to reduce the size of the hole where the exhaust passes through:   Onto which I fitted a heat shield for the master cylinder reservoir: 
DaveW
'05 Red Roadster S1
'16 Yellow (Not the only) Narrow AR GDI Plus 4
|
|
|
|
|
Joined: Aug 2013
Posts: 15,794 Likes: 14
Formerly known as Aldermog Member of the Inner Circle
|
|
Formerly known as Aldermog Member of the Inner Circle
Joined: Aug 2013
Posts: 15,794 Likes: 14 |
...
But with the fitted Banner battery I notice that there are two +ve poles and two -ve poles on the battery, so with another pair of battery terminals I think they can be used to separately hard-wire the plug lead to the battery charger (will put an in-line 10A fuse though, just in case....). Anyone done the same?
Exactly what I did...!! I went to Halfords and purchased a pair of suitable caps, cost not a lot. Fitting a seperate connection for the charger was easy.... BUT on the Aero based Plus 8 the battery is under the bonnet and very, very easy to access...I'll see if I can post a photo...
Peter,
66, 2016 Porsche Boxster S
No longer driving Tarka, the 2014 Plus 8...
|
|
|
|
|
Joined: Jan 2012
Posts: 14,976 Likes: 1
Member of the Inner Circle
|
|
Member of the Inner Circle
Joined: Jan 2012
Posts: 14,976 Likes: 1 |
...
But with the fitted Banner battery I notice that there are two +ve poles and two -ve poles on the battery, so with another pair of battery terminals I think they can be used to separately hard-wire the plug lead to the battery charger (will put an in-line 10A fuse though, just in case....). Anyone done the same?
Exactly what I did...!! I went to Halfords and purchased a pair of suitable caps, cost not a lot. Fitting a seperate connection for the charger was easy.... BUT on the Aero based Plus 8 the battery is under the bonnet and very, very easy to access...I'll see if I can post a photo... Copied from a '76 4/4 4 seater? 
Richard
1976 4/4 4 Seater
|
|
|
|
|
Joined: May 2010
Posts: 9,285 Likes: 69
Needs to Get Out More!
|
|
Needs to Get Out More!
Joined: May 2010
Posts: 9,285 Likes: 69 |
I use the supplied battery connectors for my Ctek.
Attached to the battery terminals as per the instructions.
I prefer this to using the power socket in the glovebox.
The leads are simply tucked behind the battery out of the way after unplugging the charger and fitting the end cap onto the plug.
Battery is under the bonnet above the footwell so access is perfect.
Plus Four MY23 Furka Rouge
|
|
|
|
|