Click here to return to the home page.
Image of a road.
Who's Online Now
4 members (MartO, MJF, mph, Graham, G4FUJ), 173 guests, and 80 robots.
Key: Admin, Global Mod, Mod
Top Posters(30 Days)
+8Rich 85
Newest Members
Scot_SJI, Jimmers, Breen60, Davidmog, Stevecarr
9,596 Registered Users
Newest Topics
UK Government vehicle regs changes afoot..?
by Luddite - 30/08/26 09:02 AM
Wheel balance in South Devon
by AndyGoff - 29/08/26 06:24 PM
JayEmm Supersport test vid.
by Luddite - 29/08/26 11:32 AM
Grille Question
by SteveT - 29/08/26 10:51 AM
Back to Morgan!
by SteveT - 28/08/26 07:12 PM
One for howard
by +8Rich - 28/08/26 10:05 AM
Renewing the twin aero horns
by Moggo - 27/08/26 05:24 PM
Latest Photos
tow bar
tow bar
by G Walker, August 24
Prescott double anniversary
by CooperMan, August 18
Air Crash Sites: Cairngorms
by RedThree, August 13
Four-seater luggage rack
by Soleng, August 9
New M3W orange 2012
New M3W orange 2012
by jejemek, August 7
Forum Statistics
Forums39
Topics49,848
Posts837,395
Members9,596
Most Online1,063
Jun 14th, 2026
Today's Birthdays
DazMog, The Impaler, tlchzj79
Previous Thread
Next Thread
Print Thread
Page 3 of 3 1 2 3
Joined: Dec 2008
Posts: 22,358
Likes: 353
DaveW Offline OP
Roadster Guru
Member of the Inner Circle
OP Offline
Roadster Guru
Member of the Inner Circle
Joined: Dec 2008
Posts: 22,358
Likes: 353
Post Photobucket Reboot from February 2009 continued.......

You'll have seen from my first 'chapter' that the making and fitting of the rear wing protectors was very straightforward. This was because the wing stays are perfectly positioned and at the right angle.
The fronts are far from easy. The stays are too low and the upper stay of the pair each side twists twice between chassis and wing.

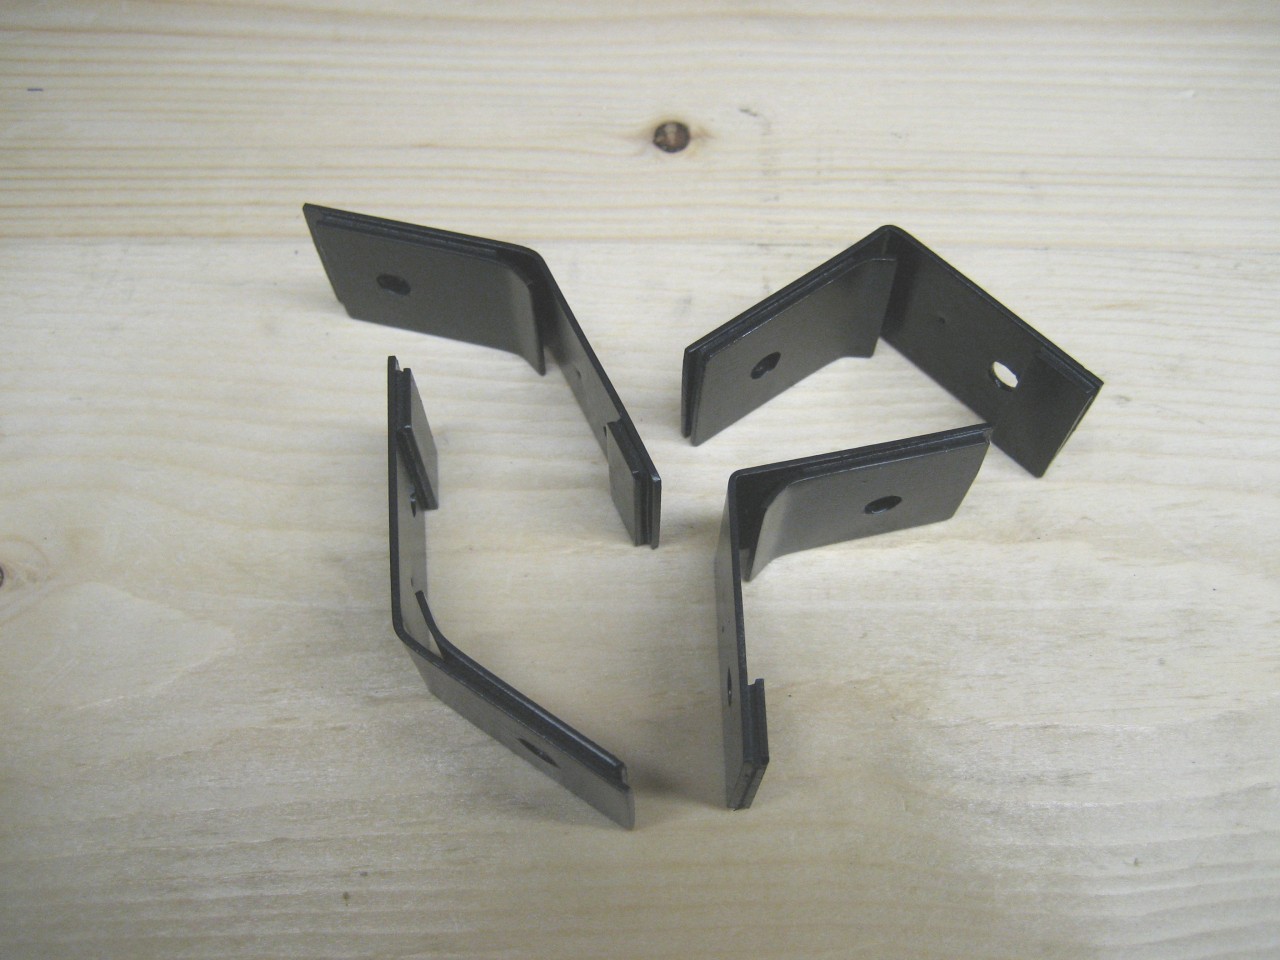
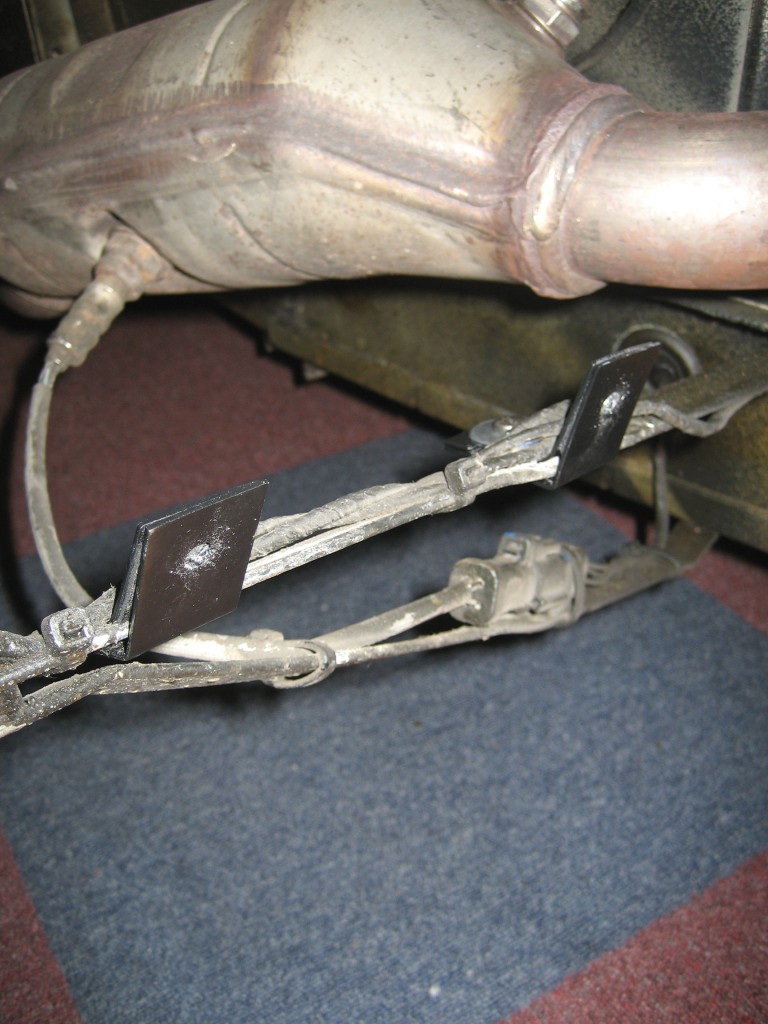
This has provided a real challenge and I've been on (and off) this problem since September. I always try to fit things without drilling if at all possible - it's too easy to get carried away with a drill!!!! My first attempt at making brackets to fit the protectors to the stays (using one penny washer on each bracket) failed dismally. The angles allowed the brackets to slip off. I tried a Mark2 version with a penny washer each side of the stays, but this looked unwieldy and clumsy. Each attempt means measuring & cutting the stainless bar, and drilling reasonably accurate holes. Stainless is a pig to work with as anyone who has done so will know. Anyway, next I tried a double skinned approach with an angled piece to allow the use of one penny washer to each bracket. This arrangement is held in place with double sided tape but once fitted is held by the bolts. I used Maplins two foot stainless ruler for this once more. It's a very handy source of stainless bar, and I'm on my third now! The first picture shows the Mk3 brackets - note the two different angles. Two are right angled and two are around 120degrees. These brackets are the original Mark1's which have had pieces of the Mark2 added.


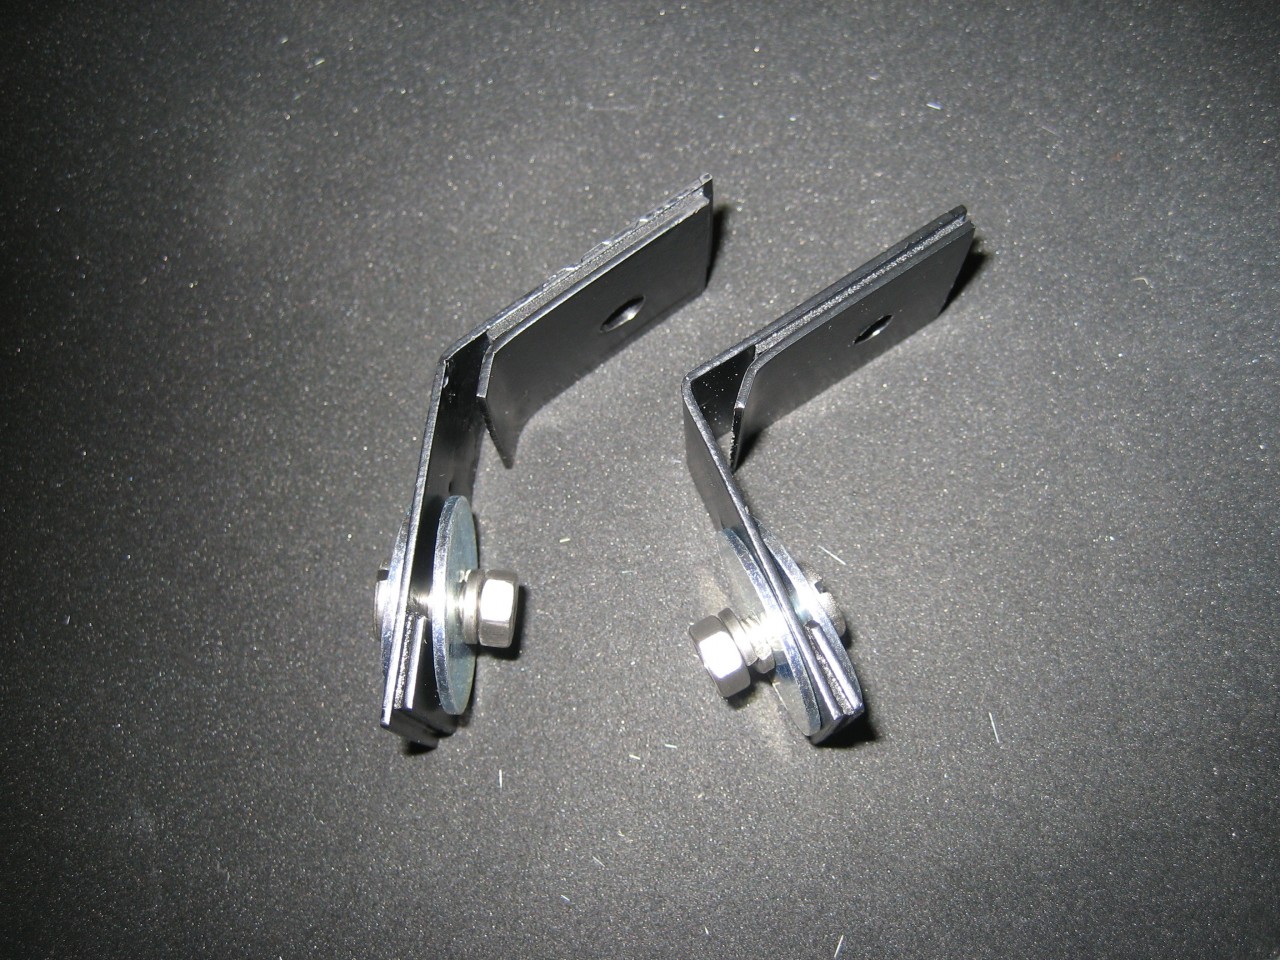
The next photo shows two brackets with nuts, bolts & washers.


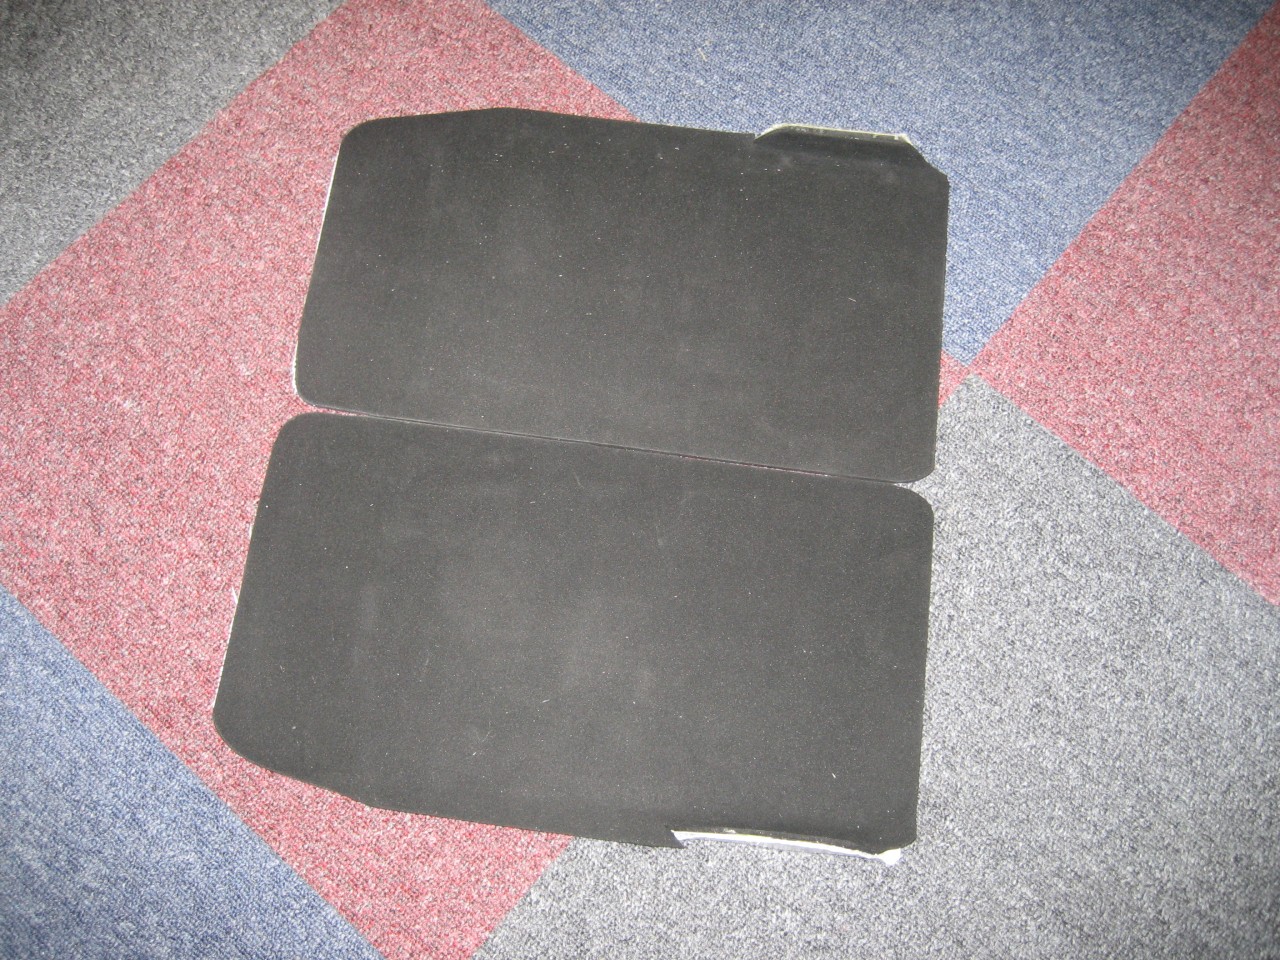
Next we have the wing protectors. Made in the same way as the rears, a large printed circuit board from Maplins, which is something like fibreglass with a thin copper layer, and exactly the right size without cutting. On the side facing the wheel is my favourite 'closed cell Neoprene', cut to shape. You can just see in this shot that I've added a small tab made from aluminium to shield the rubber from the exhaust. This is bolted on to the protector, and is more apparent in later shots.


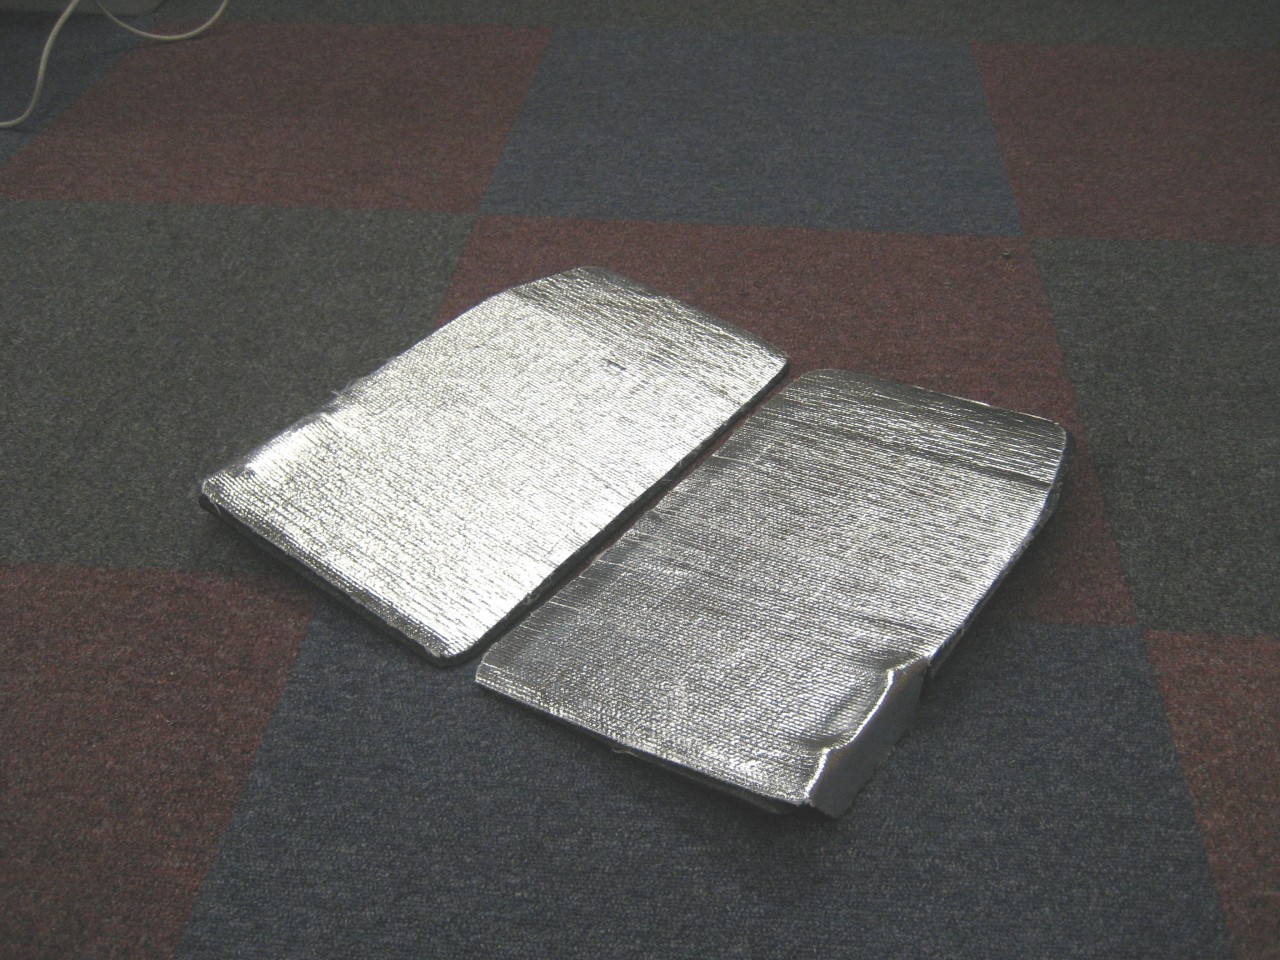
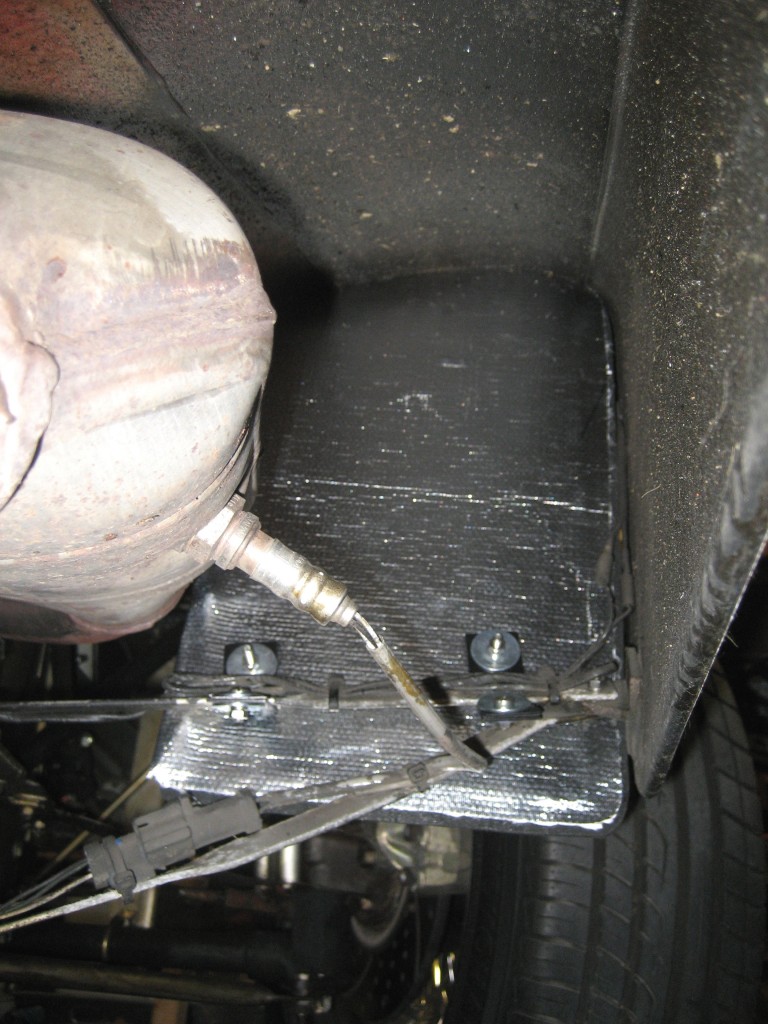
On the other side which faces the Cat, I've placed the copper side of the circuit board onto which is glued a thermal barrier silver weave from Agriemach. This is to make sure there's no potential for heat damage from the Cats - which are quite close.


Here are the two brackets fitted to the offside.


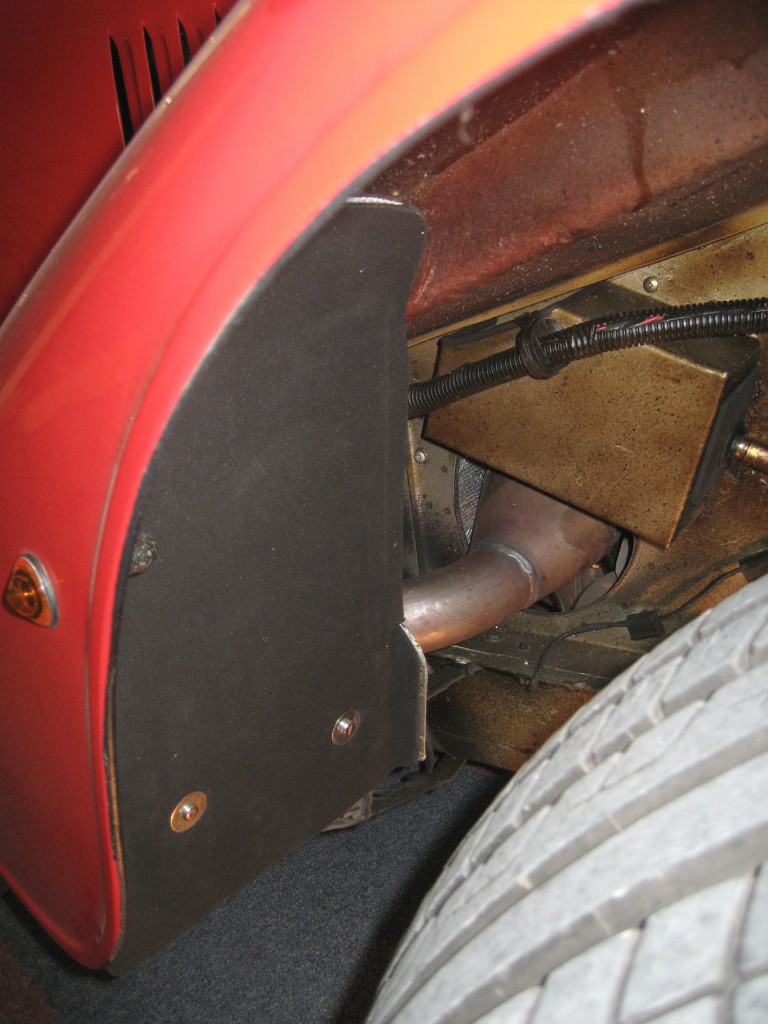
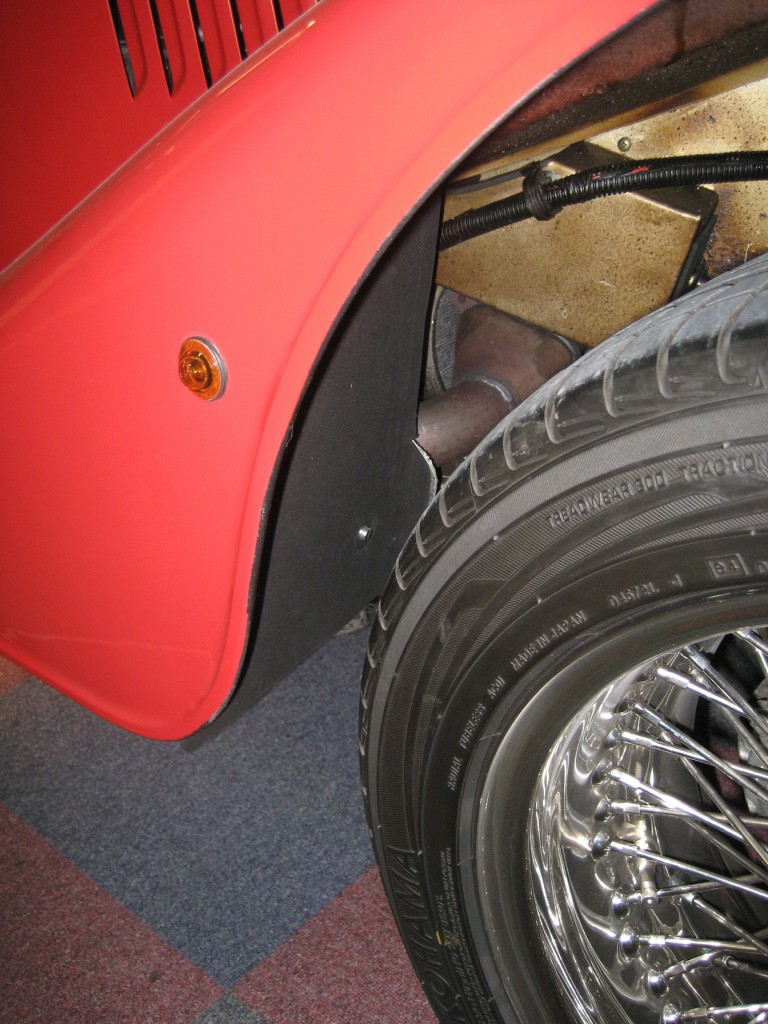
And here's the protector fitted.


You can see from this in line shot that the protector sits behind the side indicator. I wondered if a fastener would be needed higher up, but it seem OK. I'll keep an eye on it for a while just to be on the safe side.


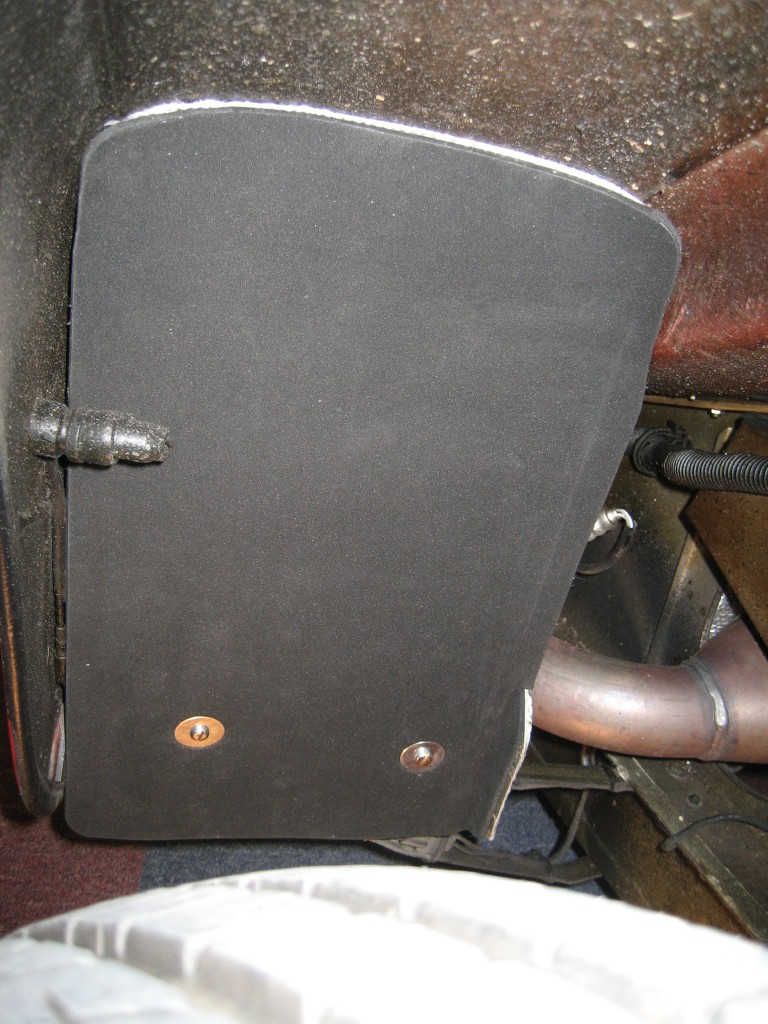
This is how it looks from behind. The camera angle makes it look sloped, but it is horizontal. Note the proximity of the Cat.


Here's a photo of the finished product. Still jacked up, hence the larger than normal gap from tyre to arch.


DaveW
'05 Red Roadster S1
'16 Yellow (Not the only) Narrow AR GDI Plus 4
Joined: Dec 2008
Posts: 22,358
Likes: 353
DaveW Offline OP
Roadster Guru
Member of the Inner Circle
OP Offline
Roadster Guru
Member of the Inner Circle
Joined: Dec 2008
Posts: 22,358
Likes: 353
Post Photobucket Reboot from February 2009 continued.......

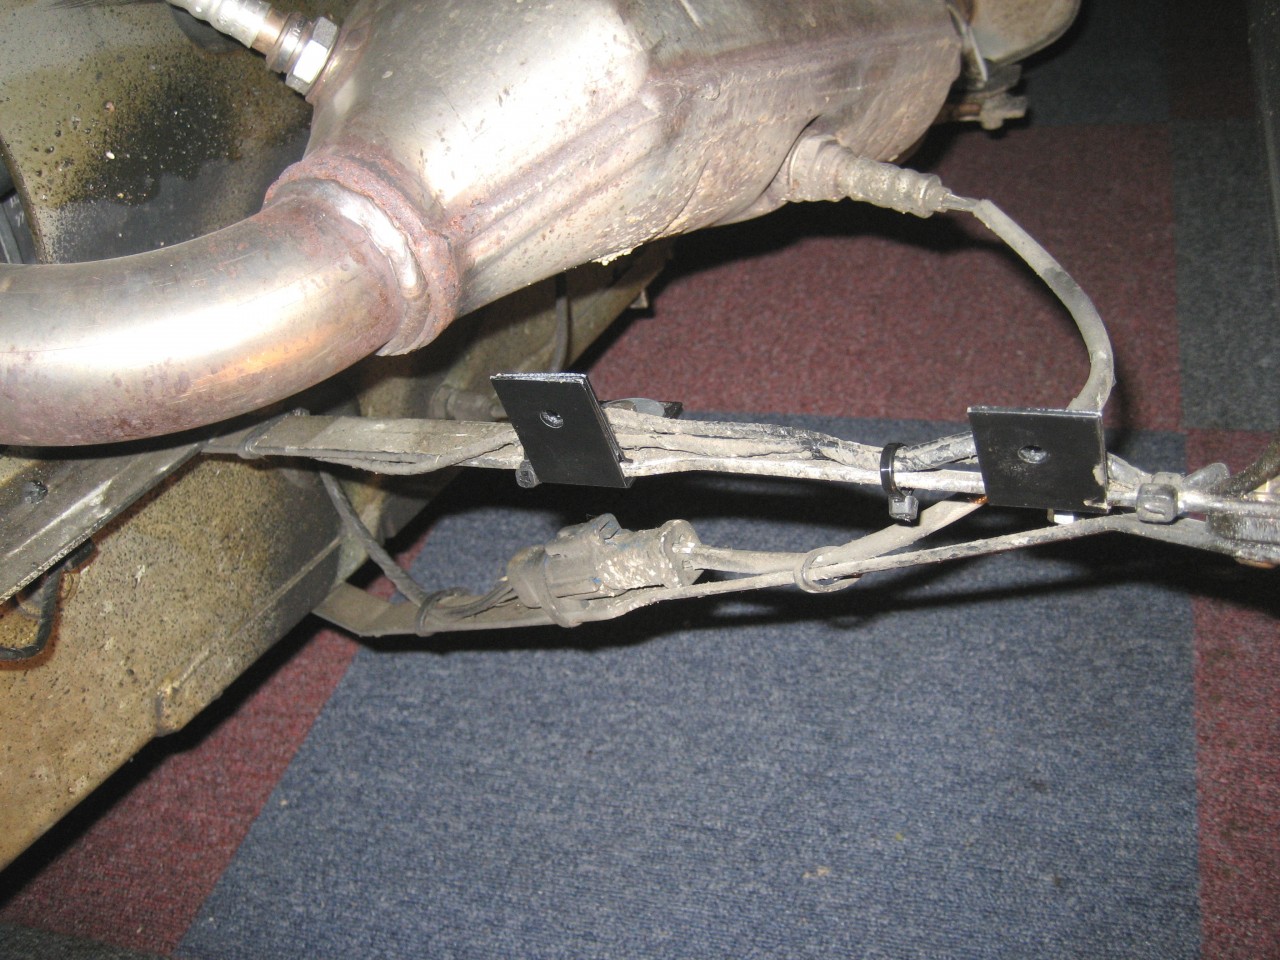
And here's the Nearside:
( I couldn't get the last two photos to show in previous post - probably size limit!!)
First the brackets in position.


Next the fitted protector.
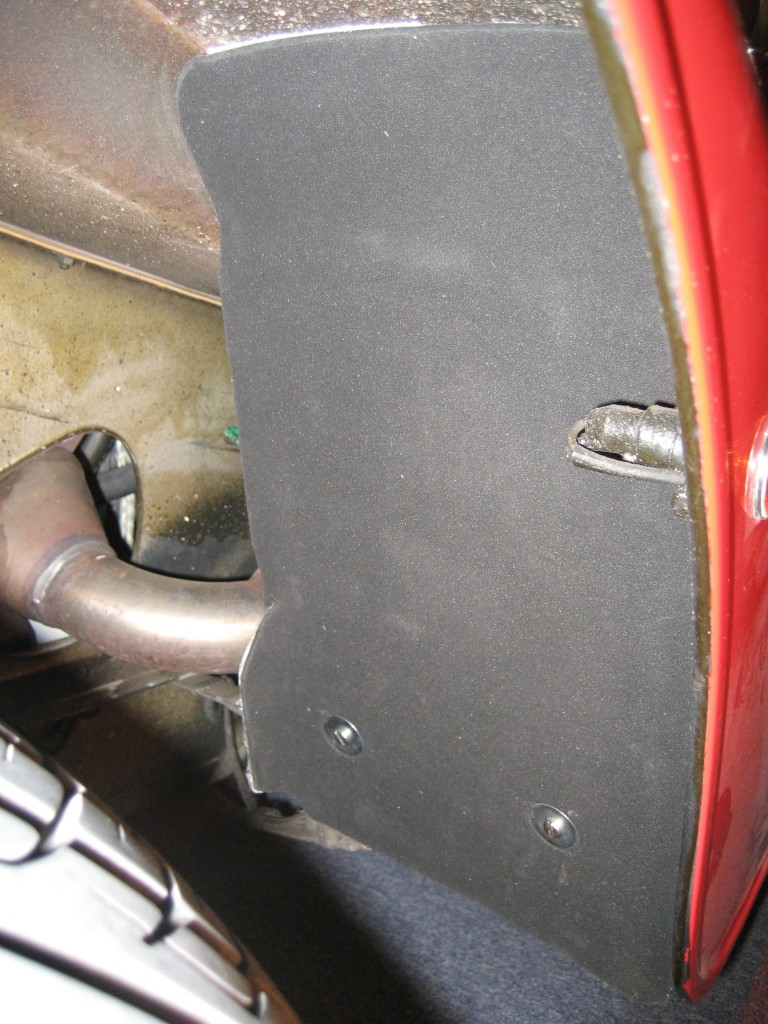


And finally the inside.
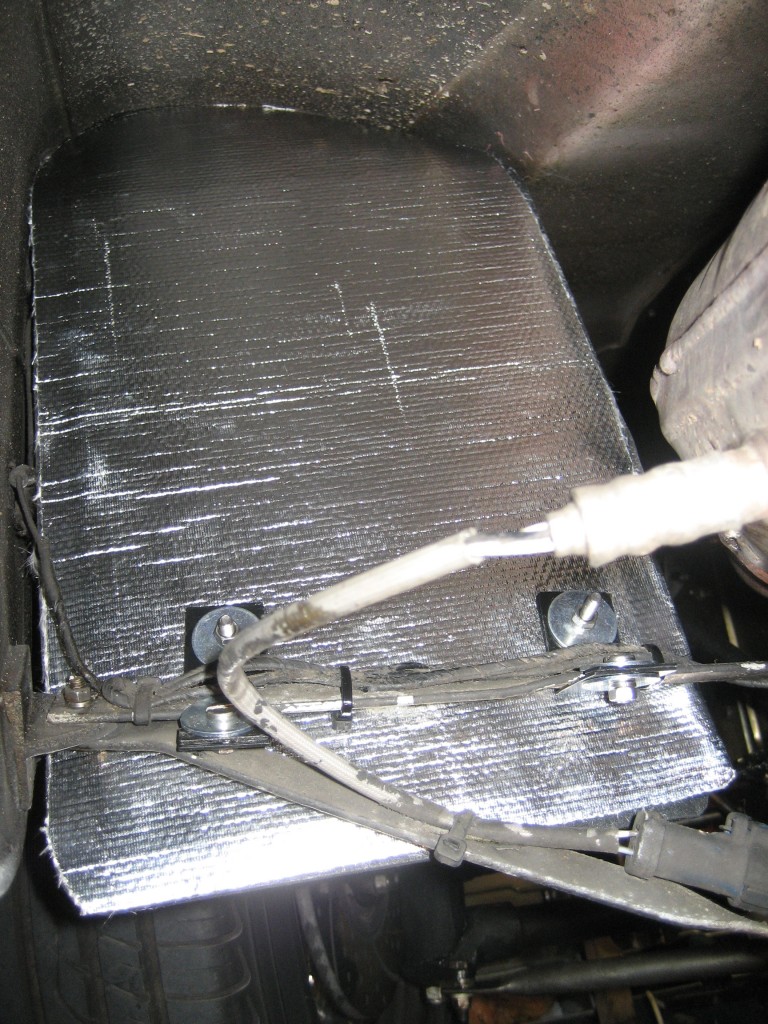


You know, what amazes me about all this, is that most of the stuff I'm messing with is not available commercially. You'd think after all the years the trad body design has been around, things like this would be off the shelf.

More is planned but for now, that's all Folks.

***************************************************************************************************

Here's a follow-up to the rear lamp alternatives mentioned at the beginning of this thread.
Since fitting front indicators to the rear to get better light intensity, I've been wondering whether to fit L795 red lens covers to the stop/tail lights. This is the same lens cover as the foglamp on later Morgans. Be aware that the foglamp lens (and the reversing lamp lens) is riveted to the bezel and the whole thing rotates and unscrews from the housing. The other rear lamps are retained conventionally with two crosshead setscrews, which locate into a brass 'female' T shaped block fitted from behind the bezel and held in place with black tape.
The replacement lenses subject to this note need longer setscrews, and the threads of the longer screws are much finer than original. This means a bit of a fiddle to change the brass female blocks. The reason that these lenses produce a bit more light is that they have a shiny plasic reflector around the bulb, and an improved lens design. Front indicators are already like this, and clear indicator lenses come fitted with these reflectors. The orange and clear lenses are both L794 by the way. So to change the red relectors, you'll need two lenses, two silver reflectors, and four setscrews with matching brass blocks.
This is how it looks.
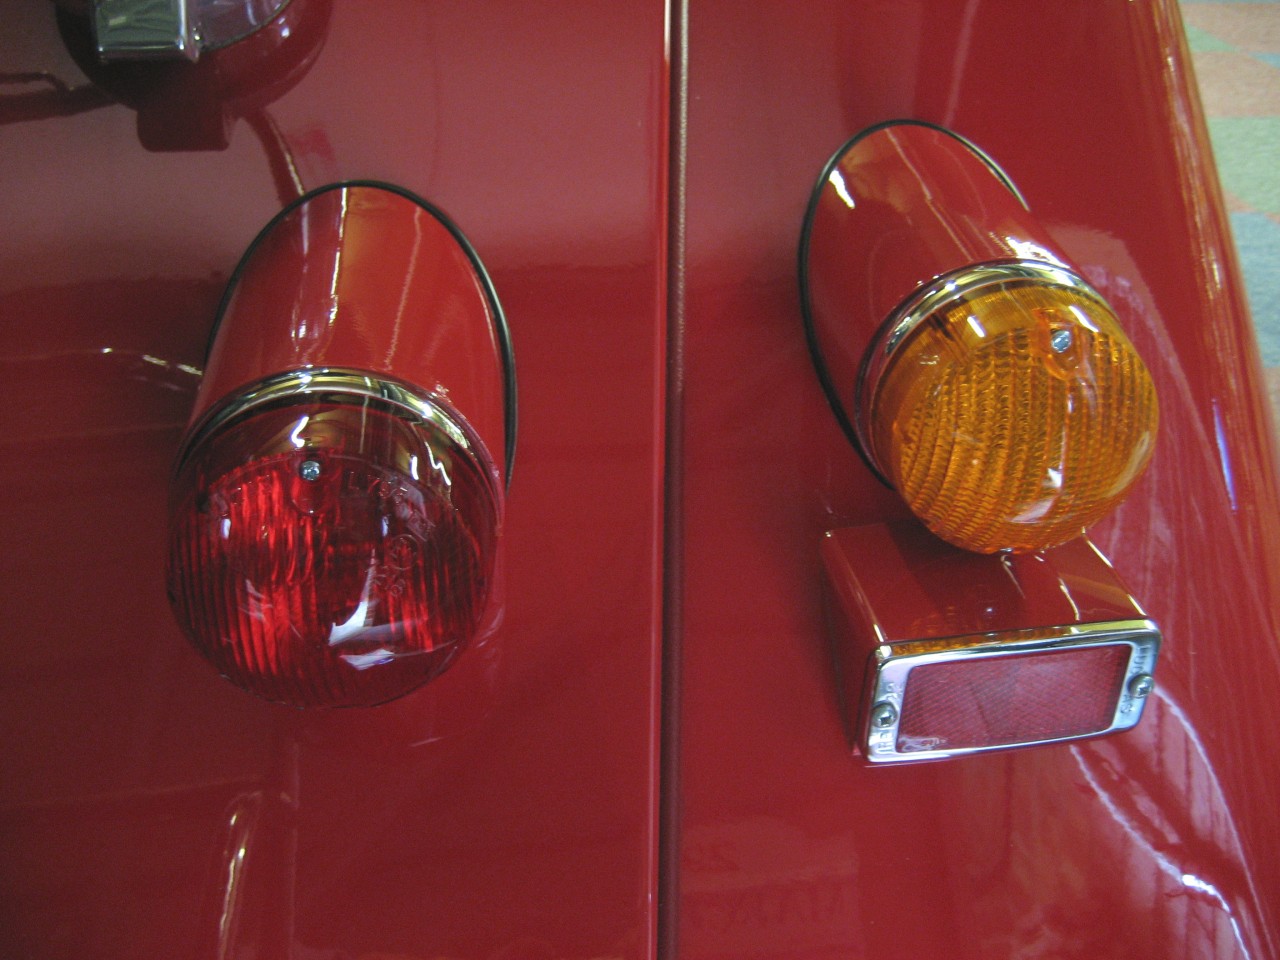


Thanks to Graham at Rutters for sorting me out with the lenses & screws. I already had the silver reflectors from the clear lenses I removed last year.

******************************************************************************************************************
A final quick win on this thread - I've just tidied the rear plastic skirt with some edging.....which matches the number plate box and spoiler.
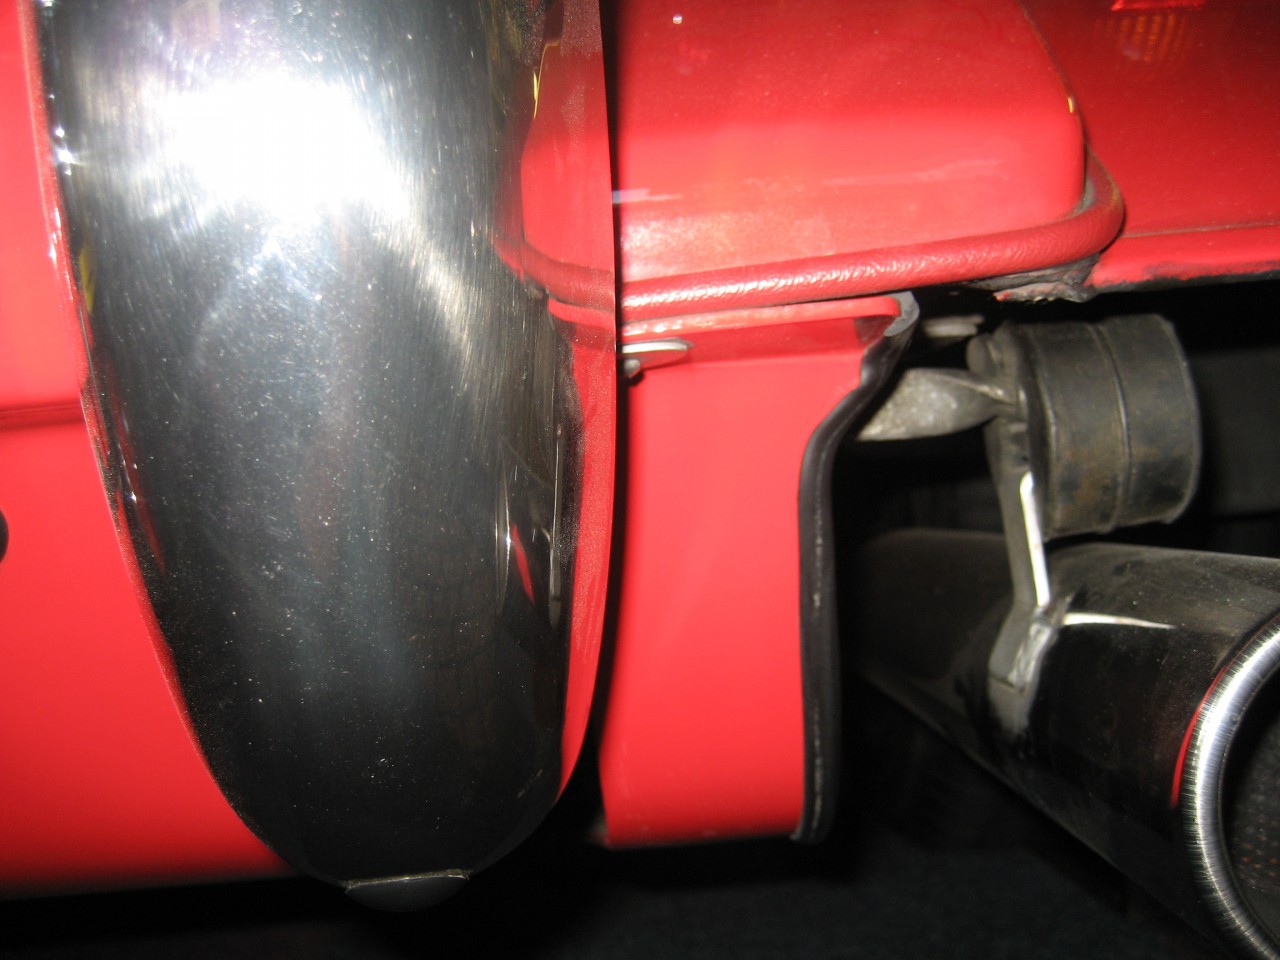


I also discovered that the plastic skirt is off centre by about a half inch. Handmade cars eh????



DaveW
'05 Red Roadster S1
'16 Yellow (Not the only) Narrow AR GDI Plus 4
Joined: Jul 2014
Posts: 1,767
Likes: 21
Talk Morgan Enthusiast
Offline
Talk Morgan Enthusiast
Joined: Jul 2014
Posts: 1,767
Likes: 21
- some very worthwhile upgrades there Dave thumbs

James


Aero8 , Series 1 - Boston Green
RR Evoque P300E Autobiography
Smart Brabus Convertible
Monkey Z125
Joined: Nov 2015
Posts: 4
Pud Offline
New to Talk Morgan
Offline
New to Talk Morgan
Joined: Nov 2015
Posts: 4
Hello I like your posts is it possible to post photos please. Thank you


if it was put together by hand I can repair it.

+4 x 2
Joined: Dec 2008
Posts: 22,358
Likes: 353
DaveW Offline OP
Roadster Guru
Member of the Inner Circle
OP Offline
Roadster Guru
Member of the Inner Circle
Joined: Dec 2008
Posts: 22,358
Likes: 353
Hello Pud. Scroll up from here!


DaveW
'05 Red Roadster S1
'16 Yellow (Not the only) Narrow AR GDI Plus 4
Page 3 of 3 1 2 3

Moderated by  TalkMorgan 

Link Copied to Clipboard
Powered by UBB.threads™ PHP Forum Software 7.7.5