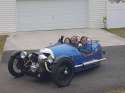
Wales
by Joske Vermeule, September 1
|
|
|
|
|
|
|
|
|
|
|
Forums39
Topics49,871
Posts837,681
Members9,596
| |
Most Online1,063
Jun 14th, 2026
|
|
|
|
Joined: Feb 2019
Posts: 1,889 Likes: 16
Talk Morgan Enthusiast
|

Talk Morgan Enthusiast
Joined: Feb 2019
Posts: 1,889 Likes: 16 |
I recall when I had the turn lamp interfere, I spoke with Bill Fink who suggested the idea of persuasion.
Rodger
2018 M3W "Dreamers on the Rise"
2004 Plus 8 (wife's)
old Goldwings and a couple of Harleys
|
|
|
|
|
Joined: Nov 2017
Posts: 101
L - Learner Plates On
|
|
OP
L - Learner Plates On
Joined: Nov 2017
Posts: 101 |
Try slackening the exhuast manifold bolts and treaking round the pipes if you need more clearance - they rotate in the manifold when loose.
You will have to loosen the coupling to the baffle as well to let that end rotate. I hadn’t thought of that - If I’m bored sometime I may explore that. For right now I’m happy with it in its current state 
Scott
2018 M3W
1995 Porsche 993
|
|
|
|
|
Joined: Aug 2009
Posts: 557
Talk Morgan Regular
|
|
Talk Morgan Regular
Joined: Aug 2009
Posts: 557 |
Got the headlamps moved outboard, and I have to say it was about 5x the PITA it should have been. As a former design engineer, I can tell you Manufacturing would have had me hung if I gave them a design like that. I got motivated and got some longer bolts and attempted mount the outboard brackets while retaining the inboard bracket for chassis strength as suggested by Dan Lockwood above. When you get them all bolted up, the outboard bracket was in contact with the exhaust on the RH side. I could not get a piece of copy paper between them. ![[Linked Image]](https://www.tm-img.com/images/2020/07/29/IMG_0864.jpg) So, back to Plan A with just the outboard brackets. Mounting the brackets was reasonably straightforward. The holes did not line up perfectly, so had to assemble loosely at first and then tighten. Then had to cut the wires to get the lights off the inboard bracket and into the outboard bracket. As I was moving them around, I had a moment of panic as the red wire came out of one of the headlights. Opened both headlights up and saw in the other headlight that the red wire was just electrical taped to the empty socket for the parking lamp - phew. Thought it had come off of the connector and I was going to have to pull out terminals and reattach wire, and it was already pretty short... Soldered and shrink wrapped all 10 wires and bolted them in place. As Rodger had warned, the turn signal lamp interfered with the upper suspension A-arm on the passenger side. ![[Linked Image]](https://www.tm-img.com/images/2020/08/03/IMG_0868.jpg) Had to get the persuader and bend the headlamp bracket forward slightly. Finally got it all reassembled and SUCCESS! ![[Linked Image]](https://www.tm-img.com/images/2020/08/03/IMG_0870.jpg) She's looking the way she should have from the start As a side note, I was very surprised how fine the wires were for the headlamps. I has to be 22 gauge or something. You'd expect something a bit heavier for an incandescent headlight - LED maybe. Looks excellent! Make sure you support your Air Cleaner, morgancustom.net sells special brackets. Alex.
2016 M3W, Army Green Matte/Tan Leather, 17k miles
|
|
|
|
|
Joined: Nov 2012
Posts: 242 Likes: 10
L - Learner Plates On
|
|
L - Learner Plates On
Joined: Nov 2012
Posts: 242 Likes: 10 |
Now it looks like a proper machine. Around my shop, I call the persuader the "hot wrench"... powered by oxyacetylene.
|
|
|
|
|
Joined: Nov 2017
Posts: 101
L - Learner Plates On
|
|
OP
L - Learner Plates On
Joined: Nov 2017
Posts: 101 |
Now it looks like a proper machine. Around my shop, I call the persuader the "hot wrench"... powered by oxyacetylene. I’m not that sophisticated - I just took the handle off my floor jack.
Scott
2018 M3W
1995 Porsche 993
|
|
|
|
|
Joined: Jul 2013
Posts: 492 Likes: 11
Learner Plates Off!
|
|
Learner Plates Off!
Joined: Jul 2013
Posts: 492 Likes: 11 |
A question for Scott, or anyone else who successfully removed the headlight bucket. What is the release mechanism that releases the wiring harness wires from the female headlight plug? I know I need to get that off to feed the wires back through the bottom of the headlight bucket to get it completely off. When trying to remove all I wound up doing was jerking my hand back and slicing my finger on a nice sharp stamped metal edge. The blood trail dripped into the kitchen, which would have been better scene for Halloween. As it is, my bandaged finger just slows down typing.  My headlight canister/bucket has a stress crack that goes about 40% around the base. I will need to replace it. Anyone else have this problem? I guess it is simply the vibration. I'm trying to remove it now. These machines always give you plenty of opportunity for learning. Thanks, Craig
Craig - Texas, USA
2026 Plus Four
2021 M3W
|
|
|
|
|
Joined: Feb 2016
Posts: 8,684 Likes: 413
Needs to Get Out More!
|
|
Needs to Get Out More!
Joined: Feb 2016
Posts: 8,684 Likes: 413 |
If I understand your query correctly Craig the answer is removing the four individual pins from the Econoseal connector. The four wires with attached pins can then be carefully passed though the hollow headlamp mountings.
Whether male or female the pins click into place on the main body of connector and can be released with the use of a narrow blade tool. Such are available as a bunch to suit variety of similar connectors. I managed with a narrow blade instrument screwdriver though.
Once cables are re-routed to new location they can be clicked back into main body of connector and waterproof plugs pushed back into place. There are YouTube videos illustrating what's involved.
Richard
2018 Roadster 3.7
1966 Land Rover S2a 88
2024 Royal Enfield Guerrilla 450
1945 Guzzi Airone
|
|
|
|
|
Joined: Nov 2017
Posts: 101
L - Learner Plates On
|
|
OP
L - Learner Plates On
Joined: Nov 2017
Posts: 101 |
Hi Craig,
It’s been 3 years since I did this, but I believe I cut the wires about an inch or two inboard of where they pass through the headlight bracket. Pulled the headlight off the US inboard headlight bracket, mounted it on the outboard bracket, tightened things up and soldered and shrink wrapped the cut wires back together. Not the most elegant solution, but it worked…. If you have the right tools to remove the pins, that would be preferable. Like I said, it’s a much bigger PITA than it needed to be. Good luck
Scott
Scott
2018 M3W
1995 Porsche 993
|
|
|
|
|
Joined: Jul 2013
Posts: 492 Likes: 11
Learner Plates Off!
|
|
Learner Plates Off!
Joined: Jul 2013
Posts: 492 Likes: 11 |
Richard, thank you for the tip. Having also looked up a couple of videos, and realizing that I didn't have to have the exact name, I think I know what I am doing now. However, I lack the proper small tool, as my screwdrivers are a bit too big. I'll get some proper tools tomorrow and retry. Scott, thanks to you as well. That was "Plan B", but I knew there had to be a proper disconnection method. I could esily cut and splice things as well. However, as I have installed the Krazy Horse blackout LED headlights as well, it is always a little bit of a PITA to get in there, so I didn't want to have a bad connection that would require me to get in there again anytime soon. I don't know if you noticed, but these little cars tend to vibrate a bit and any poor connection is quickly exploited! Next step, obtain a replacement headlight bucket. Thanks both.
Craig - Texas, USA
2026 Plus Four
2021 M3W
|
|
|
|
|
Joined: Feb 2016
Posts: 8,684 Likes: 413
Needs to Get Out More!
|
|
Needs to Get Out More!
Joined: Feb 2016
Posts: 8,684 Likes: 413 |
I will be the first to admit it's a fiddly job but it gets easier with practice. Having a spare set of connectors to practice on helps. Whether male or female the securing tang is the same width. A thin bladed tool of no more than that width is needed. Once inserted at a shallow angle on tang side of pin it will allow release, the pin via attached cable can then be gently pulled out with its weatherproof seal. Suggest taking a photo before disassembly to ensure colour coded cables go back into same positions.. Image shows component parts of a range of connectors with differing pin options. The main bodies vary but the pins, male or female are common to all types. ![[Linked Image]](https://i.ebayimg.com/images/g/zwIAAOSwA3tXoLag/s-l1200.jpg) Note the yellow pin aligning cover, male or female which needs to be picked out to give access for tool.
Richard
2018 Roadster 3.7
1966 Land Rover S2a 88
2024 Royal Enfield Guerrilla 450
1945 Guzzi Airone
|
|
|
|
|