Click here to return to the home page.
Image of a road.
Who's Online Now
10 members (+8Rich, Image, Trim, Ritchie B, RichardV6, Tweed19er, Oskar, Ulfulf, IcePack, martin leuppi), 525 guests, and 38 robots.
Key: Admin, Global Mod, Mod
Top Posters(30 Days)
John V6 80
+8Rich 71
DaveW 67
Luddite 57
Newest Members
Ulfulf, Wilfried, Classic-Line, BrunswickGreen44, Franco Morgan
9,203 Registered Users
Newest Topics
Technical drawings, dimensions, 3D model M3W
by Oskar - 20/07/25 04:13 PM
Goggle eyed
by Roady - 19/07/25 06:16 PM
FOR SALE AERO8 series 1 WHEELS
by t50 - 19/07/25 12:07 PM
Lions Tour
by OZ 4/4 - 19/07/25 11:55 AM
Morgan rebuild on Facebook
by TBM - 19/07/25 10:50 AM
Ride Comfort & Tyre Age – Plus 4 Duratec
by Nick B - 19/07/25 10:22 AM
Super3 Accessory Rails for Side Blades
by BillHart - 18/07/25 11:59 PM
Latest Photos
Motorworld München
Motorworld München
by Oskar, July 20
visit to Classic Remise Düsseldorf
my book
my book
by Oskar, July 20
More Pictures of the MHR Visit
by DaveK, July 19
Visit to the Factory- Historic Morgan Group
Forum Statistics
Forums34
Topics48,335
Posts812,894
Members9,203
Most Online1,046
Aug 24th, 2023
Today's Birthdays
kamo30
Previous Thread
Next Thread
Print Thread
Page 7 of 41 1 2 5 6 7 8 9 40 41
Joined: Oct 2006
Posts: 2,403
C
Talk Morgan Expert
OP Offline
Talk Morgan Expert
C
Joined: Oct 2006
Posts: 2,403
Well that didn't last long...!

Front wheels off to drop the original radiator out. To do this I dropped out the steering rod.


The new radiator is for a +8, this is more handy due to the enhanced cooling I think we are going to need and also the location of the pipe spigots is more ideal.


After a series of installs and removals, adjustments of the car brackets and spacers on the top spindles, cleaning up the existing fan etc.. the new radiator in installed.


We wired in the fan switch as it's only a resistance fit and has been known to pop out under pressure. You can just see it in the bottom of the picture above.

The new tank install looks pretty smart.


You can just see the water rail return pipe from the thermostat housing just at the right of the picture below. The N/S radiator return pipe is almost ligned up just in front.


The final state of the engine bay.....


Now onto the fuel system at the back of the car. We cleaned up the fuel sender unit and adjusted the float to the correct height. A bit of a trim of the rubber gasket and the sender unit bolted in. A provisional location of the swirl tank was also tested, we needed to make a small tab extension to the mounting bracket so some measuring required.


After a lot more time, locating the lift pumps, attaching the swirl pot, bending the fuel lines and cleaning up the donor Volvo rotory fuel feed pump we are all finished for the weekend.... who needs a shed!


A few more sensors, samco water hoses and get the fuel lines cut and crimped those systems will be ready.

I was hoping to get the exhaust fabricated and jig made by Librands supplier, but time is running out and so I'm beginning to think about searching around for someone more locally. Simpsons is only just up the road and they are one of the best - if somewhat expensive (and it would be a one-off rather than a repeatable off-the-shelf unit).

The measurements are pretty big,

Headers 1" 7/8 - 28" Long (to 1st join)
Secondaries 2" 12" Long (from front of 1st join to front of 2nd join)
Outlet - 2" 1/2
Included angle of mergers no more than 18 Degrees

Getting there... still a lot to do though!!


Joined: Jul 2007
Posts: 28,413
Likes: 177
Salty Sea Dog
Member of the Inner Circle
Offline
Salty Sea Dog
Member of the Inner Circle
Joined: Jul 2007
Posts: 28,413
Likes: 177
Fantastic progress.

Waiting for next weekend's installment smile


Graham (G4FUJ)

Sold L44FOR 4/4 Giallo Fly
'09 Gen2 MINI Cooper ragtop
'90 LR 90 SW
Joined: Feb 2010
Posts: 1,415
Has a lot to Say!
Offline
Has a lot to Say!
Joined: Feb 2010
Posts: 1,415
For the exhaust try Chris Tullett in Aylesbury
I know Matt Simpson well and Chris is on a par if not better, and in my experience a smidge cheaper


Simon @ Sifab.co.uk

Sifabtemporary@gmail.com
Joined: Oct 2006
Posts: 2,403
C
Talk Morgan Expert
OP Offline
Talk Morgan Expert
C
Joined: Oct 2006
Posts: 2,403
Originally Posted By SimonH
For the exhaust try Chris Tullett in Aylesbury
I know Matt Simpson well and Chris is on a par if not better, and in my experience a smidge cheaper

Having rung around today, you can imagine not a lot of luck. I've tried Rob Wells over at Librands a few times.... But I'm guessing he's away.

In the end Hayward and Scott were able to re stack some work and fit me in. I was so thankful, I was getting worried this was going to be a challenge too far!


Joined: Oct 2006
Posts: 2,403
C
Talk Morgan Expert
OP Offline
Talk Morgan Expert
C
Joined: Oct 2006
Posts: 2,403
Another weekend and another update

So.. outstanding jobs to do

  • Source & Install alternator
  • Swap miss-labelled starter and install
  • Trim ignition leads and install
  • Final fit fuelling lines
  • Swap out the 36mm chokes for 40mm chokes
  • Remove old (RaceTech Coil) and re-wire for Ford Coil (they provide a replacement plug for this)
  • Sort out coolant pipes
  • Fabricate Idler pulley bracket and install idler


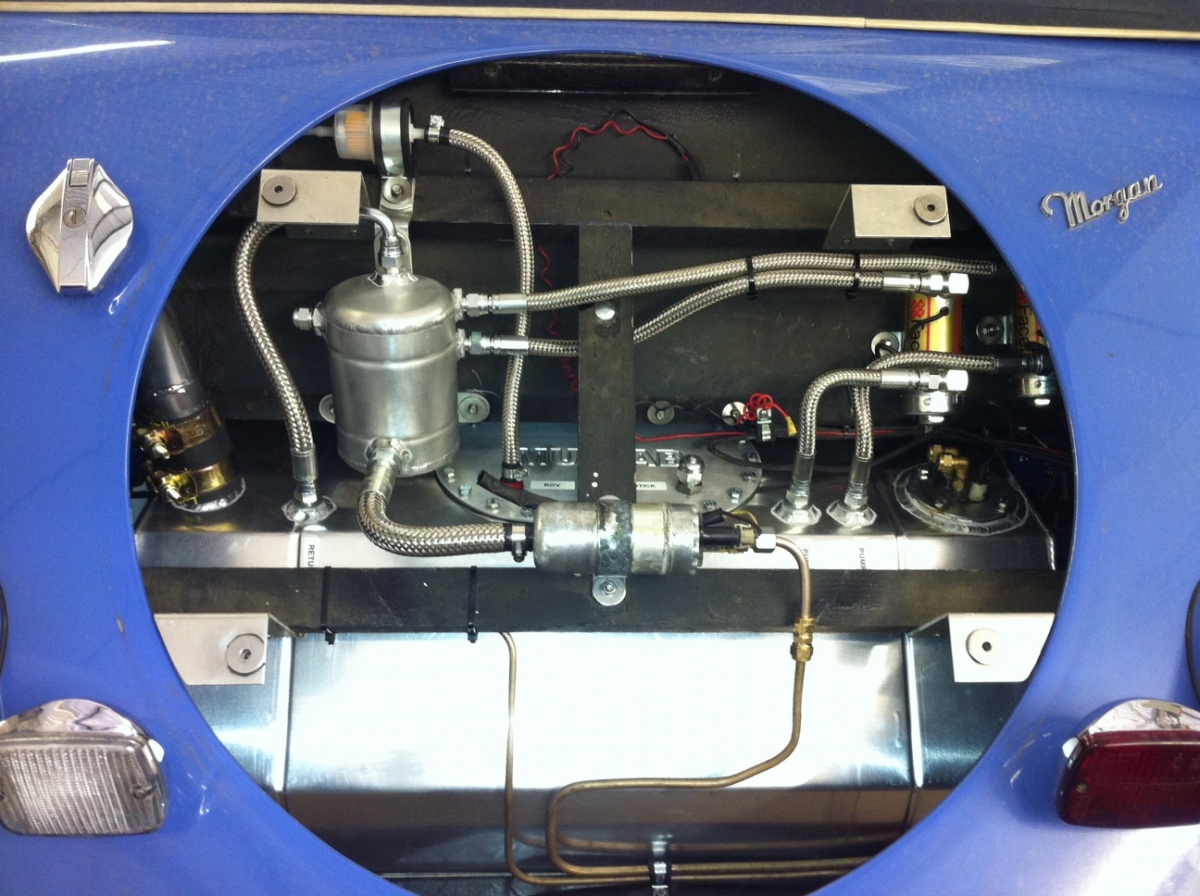
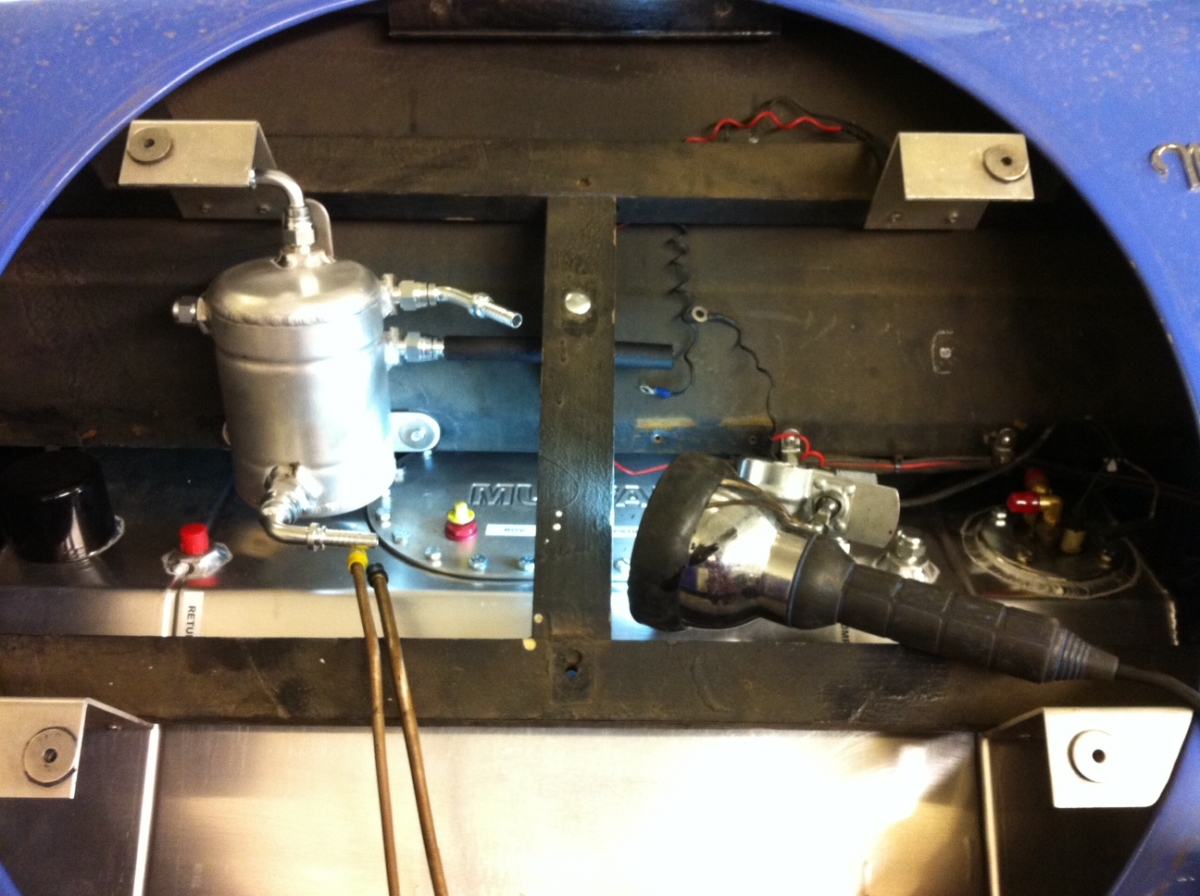
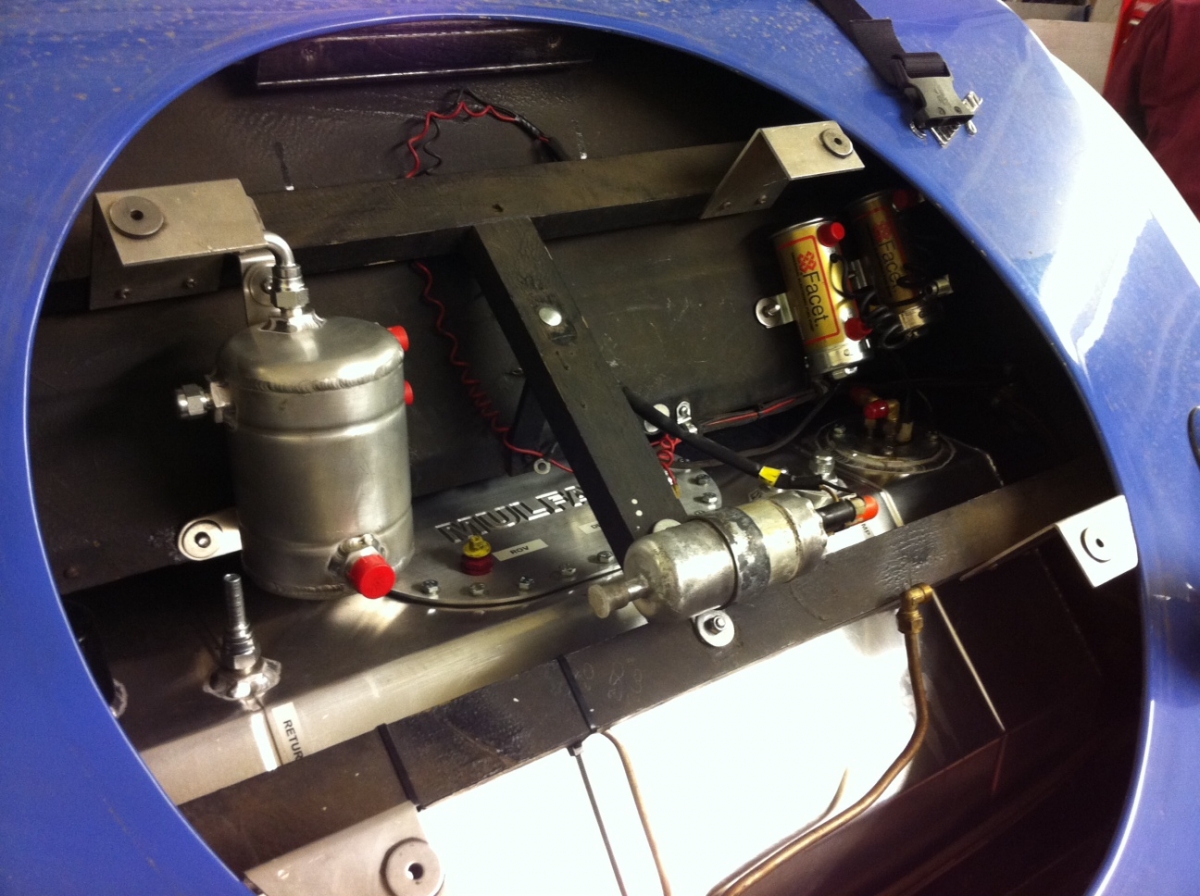
So first-up Fuel plumbing.
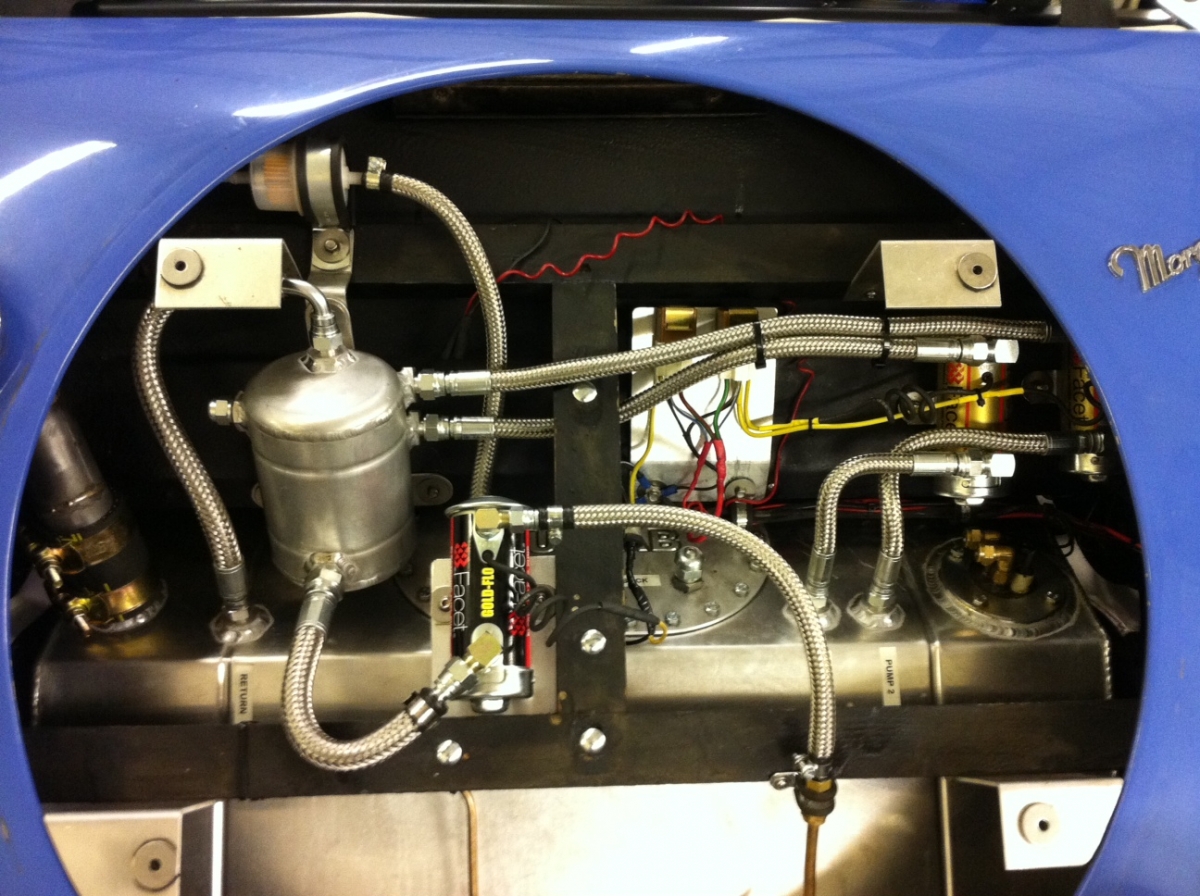
So you've seen the layout before, we decided to down-size the bore of the piping to keep the flow rate up. Using the connectors I had sourced we were also able to confirm routing and final combinations of ends. Having measured the routing we bagged up one pipe package at a time and popped down to the hose company and had them made up. You can see the result below. All we need to do now is use the switched feed (from the fuel toggle switch on the dash) to a local relay to power up the pumps. But it looks great. You can also just see we had to fabricate a fuel filler neck.. otherwise we would be hunting around for a pipe for ages.


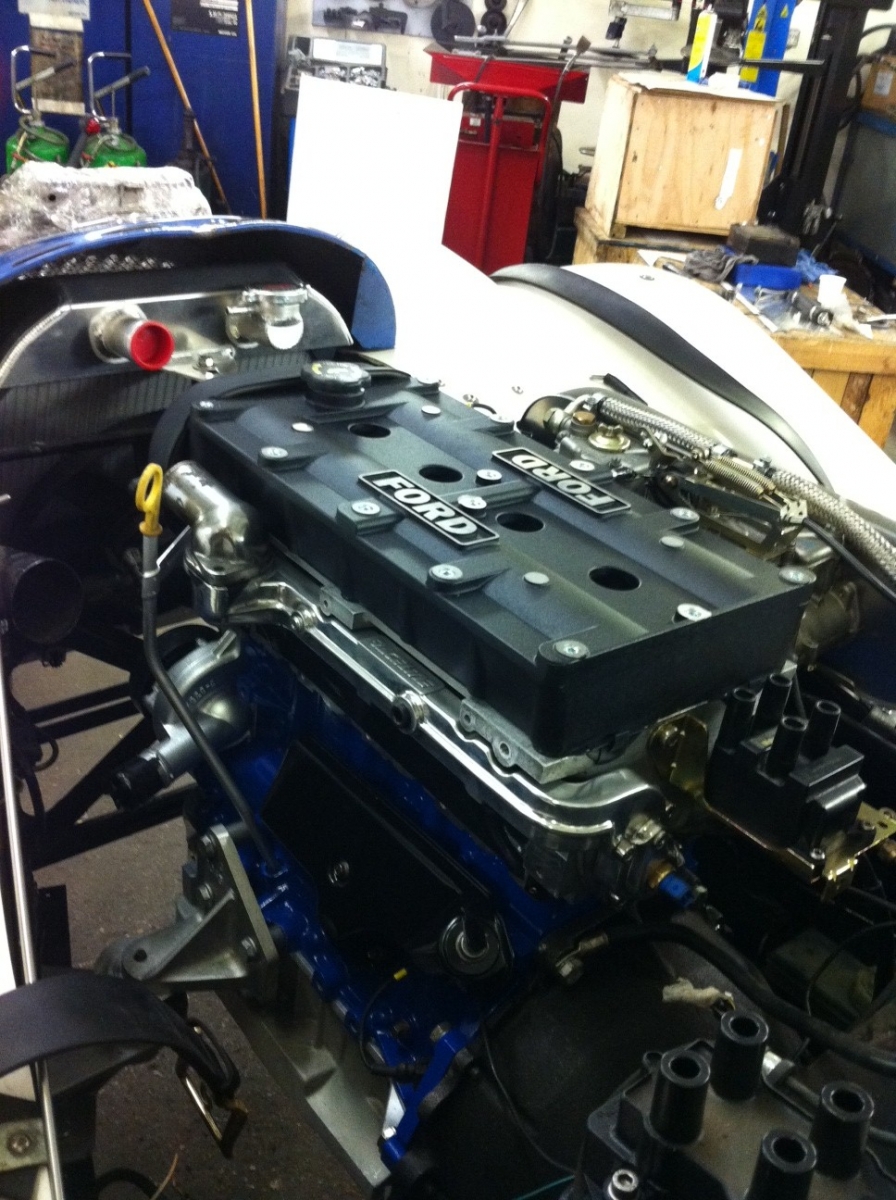
Next up fabricating the idler pulley bracket.

I've looked at all the options on the market for this and seen most of them in situ on cars. All have pro's and con's. I'm a big fan of keeping the cam wheels & timing belt covered. After all you don't want a stone killing an expensive engine. You'd be pretty disappointed. Luckily on the CVH Perspex versions had been made and I managed to get my hands on one. For the Zetec E this has not been so easy. Possibly because on Ford installations the lower part of the pulley cover is actually the engine mount.

Anyhow, one school of design option uses one of the bolt holes just above the water pump to secure the pulley wheel in the correct position. Unfortunately this means you need to removed the cover - looks fancy - not very practical.

Second school of design uses the bolt holes on the engine mount to put a horizontal bracket across - advantage is you get to keep the cover on, down-side is that it bends and squeals like hell, even when re-enforced.

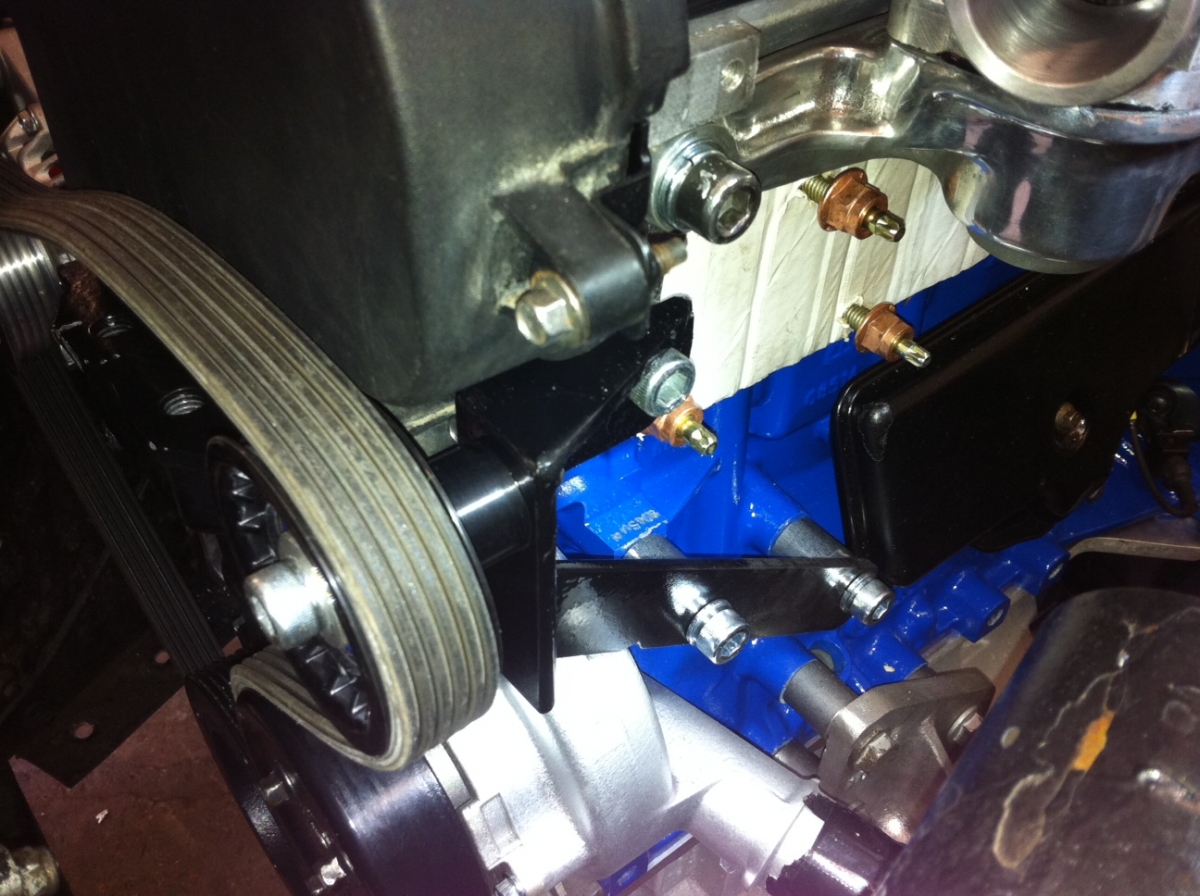
So our decision was to use the Raceline bolt mounted approach (school 1) and mount it on a bracket (but not how School 2 do). So we decided fabricate a bracket which uses several spare threaded bolt holes already on the engine using 5mm steel. Having come up with the design I popped up to the local Forge (yes we have a old-school village forge locally to us) who do heavy custom engineering jobs (like make beacon tower tops from the old Armada warning system). Anyhow.. they are a local metal supplier and they've been friends of the family for ages.

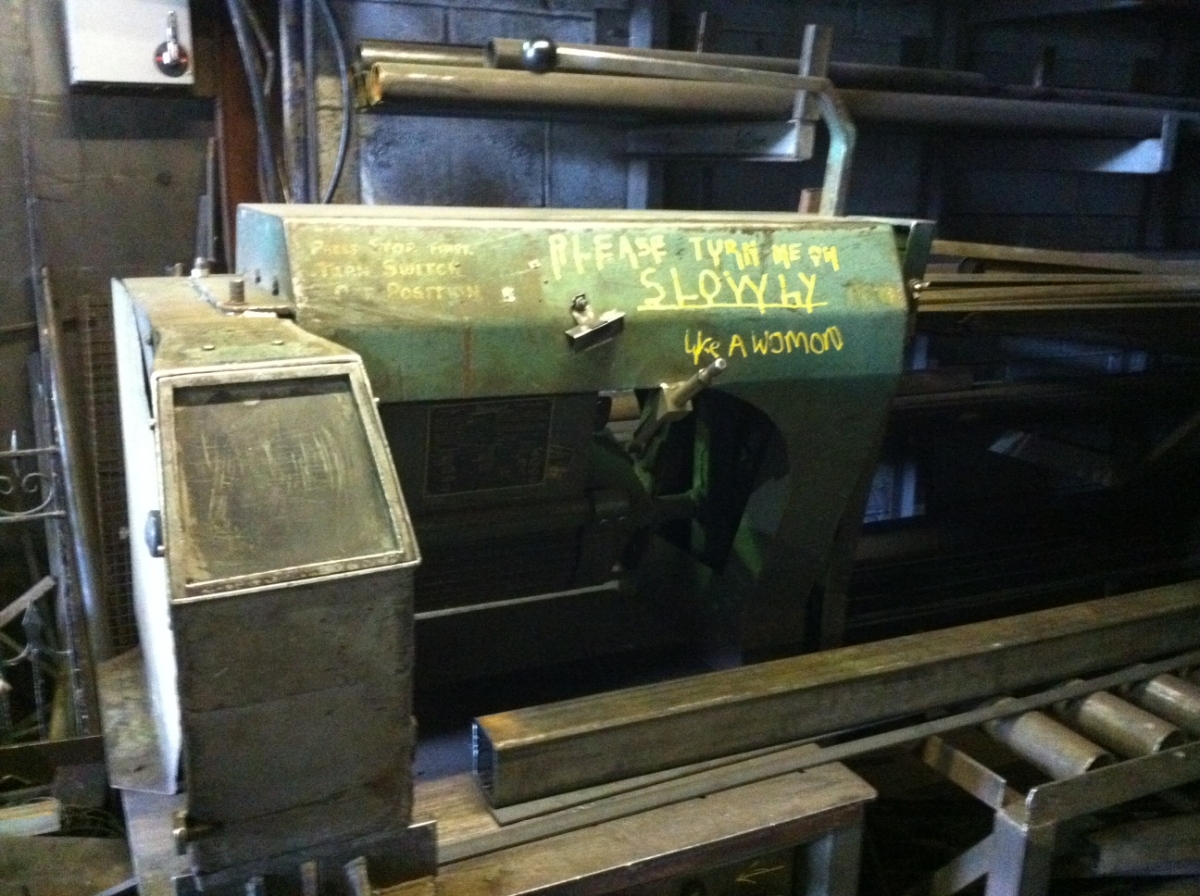
So whilst I was up there getting some steel lengths I saw their friction saw (this place is full of serious metal tools). Given the friction saw blade is about 8mm thick and about 50cm diameter I though you'd find this funny... it clearly takes some getting going.


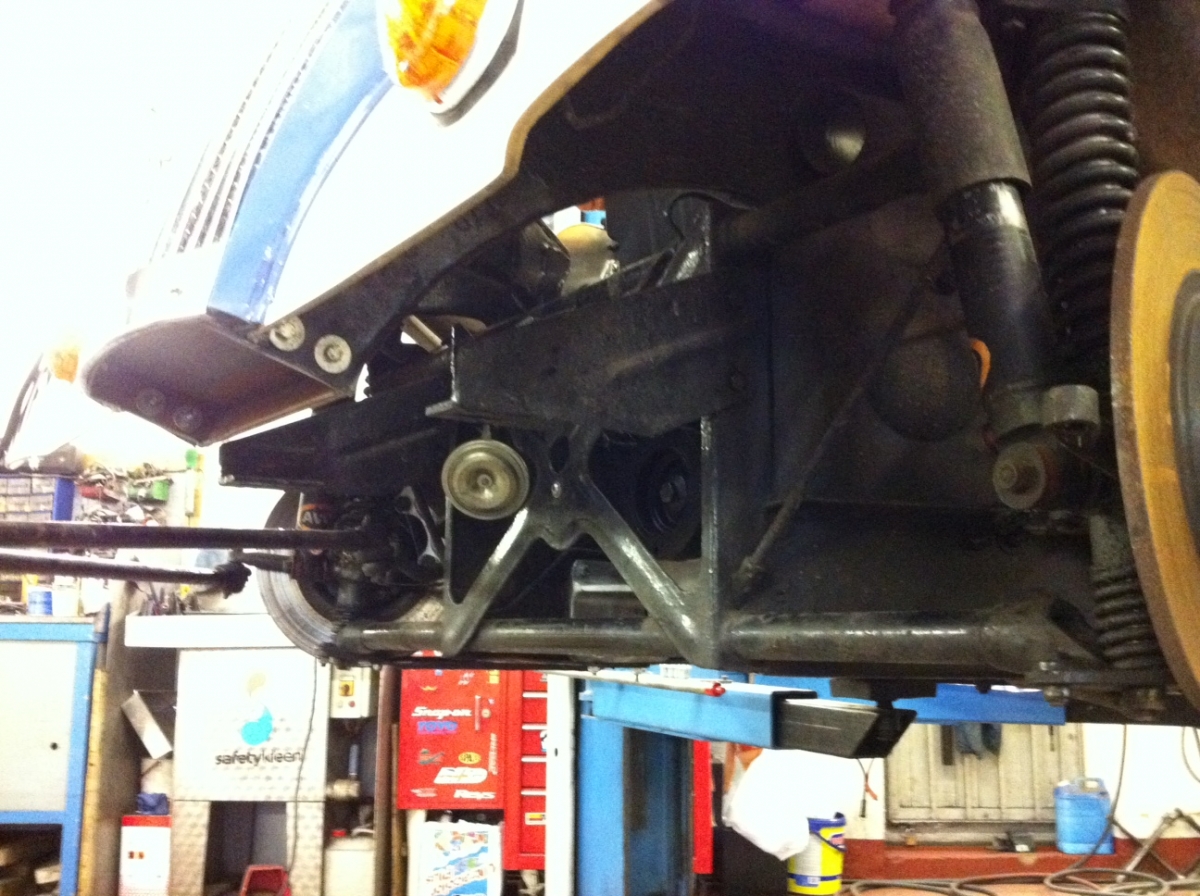
Once back after some work we came up with the following... I don't think this is going to bend. Look top left of the engine.


I don't have a photo of the Alternator install.. in the end I used a Raceline Alternator mount and a Brise Mitsubishi small form factor Alternator (which self disengages) designed for a BDA with an 80mm lightweight Aluminium pulley to gear it down. I suspected that the top mount could be a problem as I'd read about install problems on the net.. the recommended Alternator from Raceline is just too big for a Morgan.

In the end, the bottom mounts were ok and the unit was perfect in size. The top adjuster bracket from the kit was a waste of time though.. luckily we have a load of old arced adjusters from old Alternator installs which fitted perfectly as they have a dog leg in them. Sorted.

It looks a really smart install.. just need to run the wiring from the N/S to the O/S to get it connected.

Whilst on this side of the car I also whipped the carbs apart to put the larger chokes in.

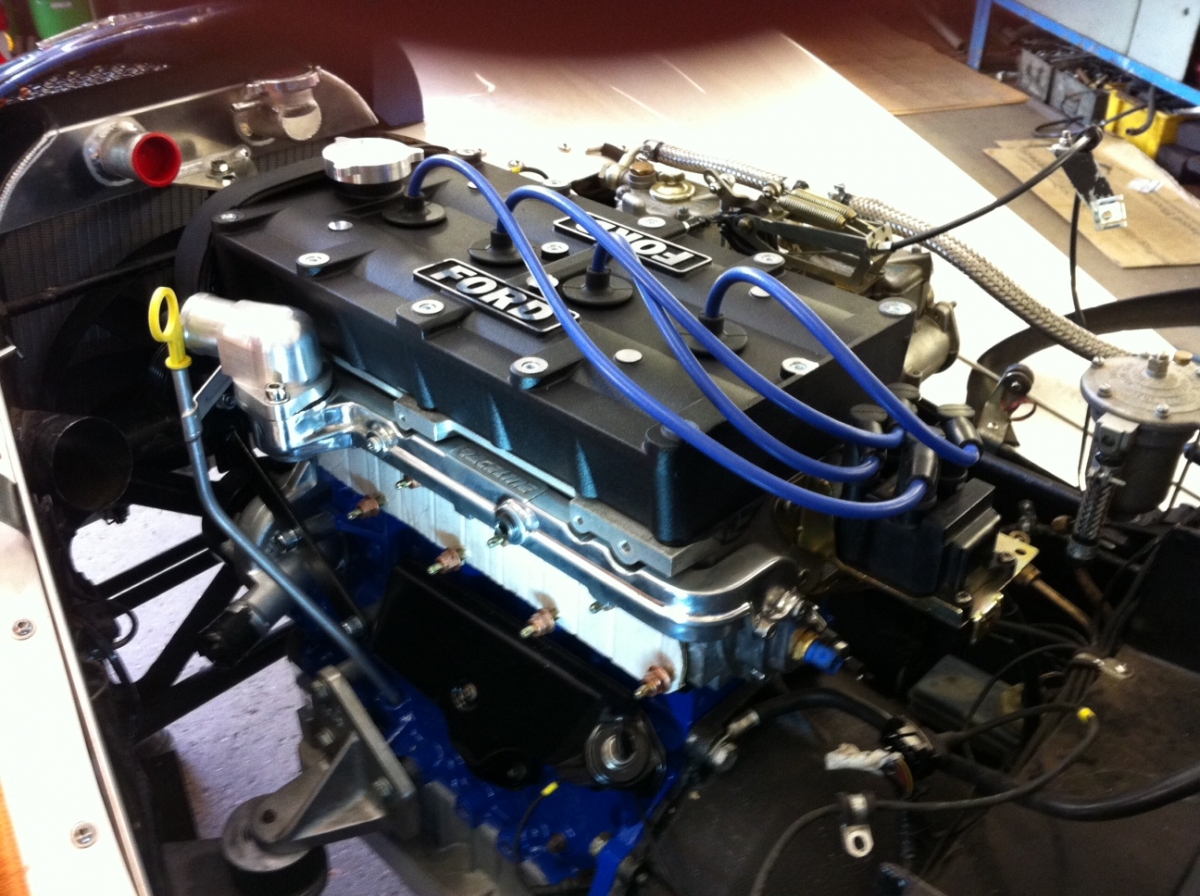
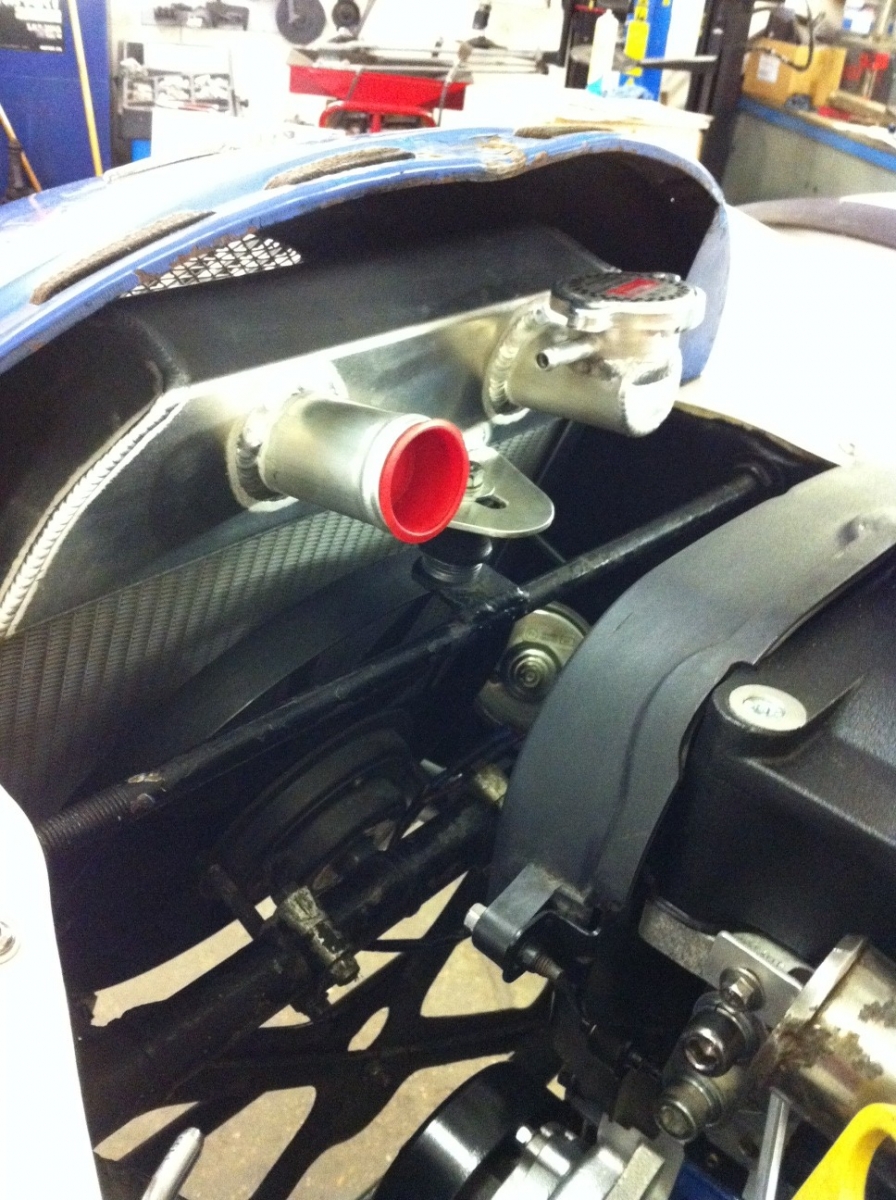
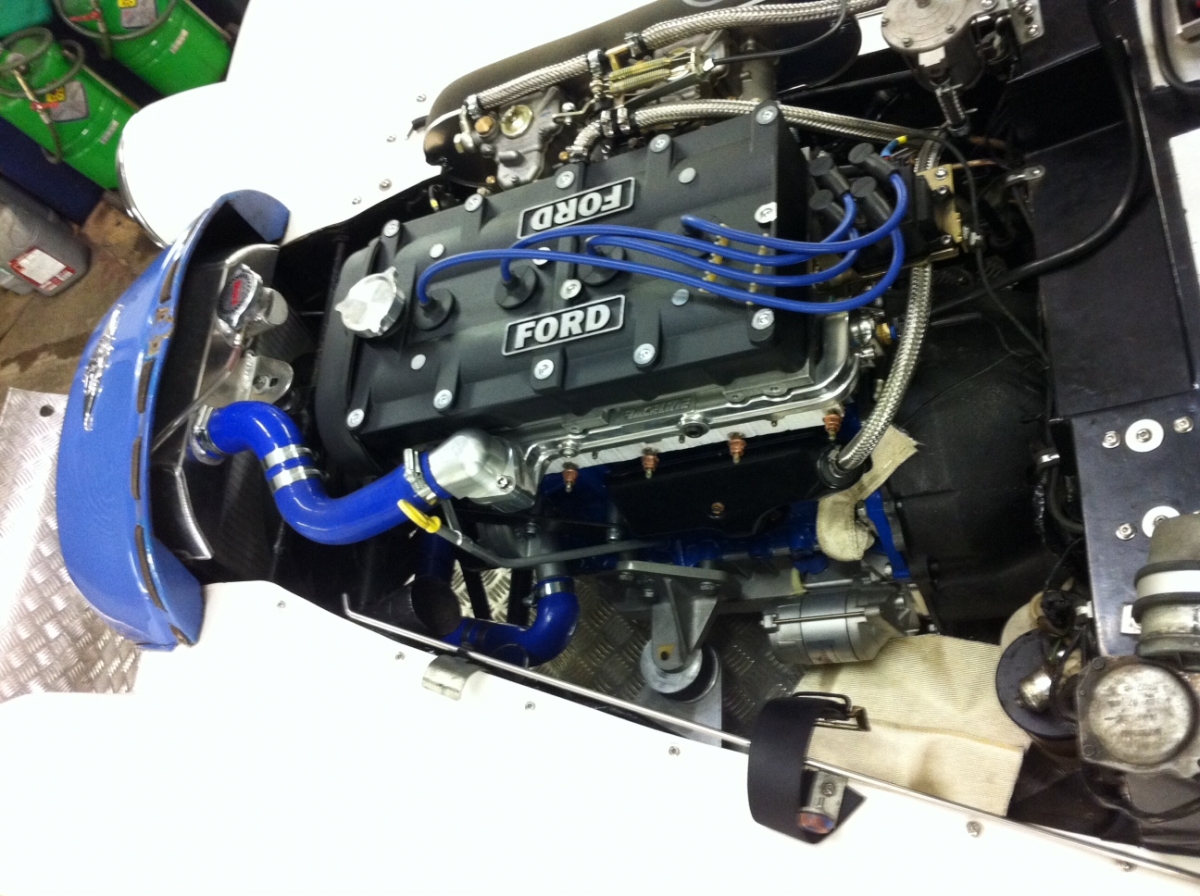
Another faf was the ignition leads, these were from Retro Ford. As the cam cover is new it clearly needs special lead ends to seal the holes... so I picked up a set of 8mm race leads in blue. As Retro Ford specialise in old-school conversions their leads are designed to be run down through the inlet manifold 2 leads between 1&2 and 2 leads between 3&4. This means you hide the coil under the inlet manifold ala BDA. On this departure from the stated strategy, I wanted to keep the coil on the back of the engine, where Morgan as Morgan have a recess in the bulkhead here and it's easy to access for maintenance. We have the ITG filter to contend with every time if we put it under the manifold. So this meant I had a bunch of Ignition Leeds all the same length for a variable length install... well that looked rubbish. So having borrowed a set of Lead fabrication crimpers (these things are seriously expensive) I took apart 3 of the leads, shortened them and re-assembled them shorter to make a uniform curve onto the coil.. much better.


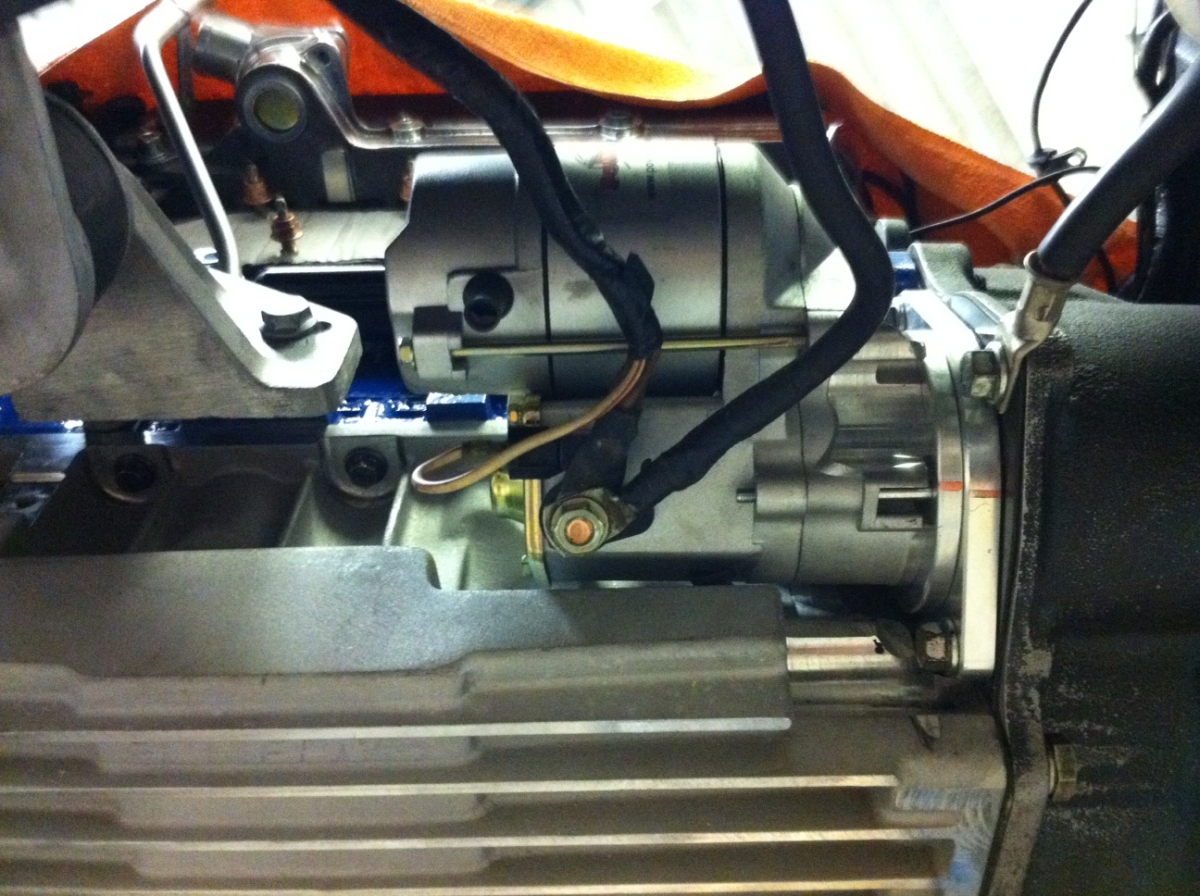
The last job of the day was fitting the starter... again this was a time consuming job... just bolt in.. nope.!

As the raceline starter we had been supplied was wrong last week.... Right part number on box and on sealed packet which the starter was in.. but wrong part in the bag! We could not check the starter hole in the dust plate. Dag-nam-it... it would be slightly different... if we'd used the other dust plate we had it would have been a no-brainer to get in.. but as it was we were be-jiggered if we were going to drop the engine out of the way to swap it.. in the end we used a special air powered needle nose band sander to enlarge the hole. We also ended up "adjusting" the sump slightly to get clearance in all the right places.. you can see how close it is - and this is a small form factor geared down starter!


Unfortunately I have not been able to work on it today, but dad's sorting out the coolant system, the fuel & Alternator electrics and the coil harness. Unfortunately the Oil pressure sensor and the Oil temp sensor had not arrived Friday so these will go on next week. On Sat I need to take it to get it's manifold made. smile


Joined: Jul 2011
Posts: 3,643
W
Talk Morgan Addict
Offline
Talk Morgan Addict
W
Joined: Jul 2011
Posts: 3,643
Apart from the time element, modifications that you are having to make challenge your engineering skills and inventive thought processes. Great stuff.


Ian
2011 Plus 4
Wild Mogs Reims 2019, Goodwood 2018, Isle of Man 2017, Carried on to Caramulo" 2016
Joined: Oct 2006
Posts: 2,403
C
Talk Morgan Expert
OP Offline
Talk Morgan Expert
C
Joined: Oct 2006
Posts: 2,403
Nearly there!!!

So this week has been a week of clearing off the smaller jobs.


  • Plumbing in the cooling system
  • Testing the fan operation
  • Extending the Alternator loom and wiring it in
  • Drilling, tapping and installing the Oil Temp sensor plus wiring in
  • Installing the Oil Pressure sensor
  • Wiring in the Coolant Sensor
  • Fitting Oil Filter & Filling with Oil (Calibrating dip-stick)
  • Filling with Coolant
  • Filling some fuel, Calibrating the manual tank dip-stick, testing the fuel gague in cockpit, testing plumbing, completing electrics for pumps
  • Re-fitting seats


Coolant System
We use a combination of Samco hoses to make the shapes requried to plumb in the coolant system, in the end this was a combination of 90 Degree bends with joiners. This made the closest OEM looking solution. We tested the over-ride switch and and bridged out the otter fan switch and the fan runs fine both times. Looks like the coolant system is all complete.


Fuel System
We ran a heavy duty feed to the rear of the car and decided to use the existing dash mounted switch to power up some relays to act as a local switch for the 3 pumps. We filled the tank one gallon at a time and notched the tank dip-stick each time. This will give a way of accurately managing fuel level given the usual challenges of the Morgan OEM fuel gauge. That said, the fuel sender and the gauge is working fine. Having plumbed and wired everything in we flipped the switch to prime the swirl pot... sorted.. step one completed. Step two, testing the Volvo main pump... well... let's just say it was a little over-powering. The main pump blew the fuel filter apart!! So in the end we reverted to a high flow Facet unit and mounted it recessed where the Volvo unit would have been.. So now.. it's all working.


General Wiring
The alternator wiring was extended from the N/S to the O/S and using the Brise instructions the loom adaptor they provide was spliced together, which means we also now get a battery light on the dash. The horn had to move slightly to the front side of the cross head. We knew the alternator may need some spacing once we had a suitable 5 groove belt and having turned it by hand we found that a slight miss-alignment meant the belt wound itself off. So with an extra washer on the alternator it stayed on ok.. so all set on that front.
The other wiring that needed sorting was the ECU and Telemetary sensors. The Oil Temp (important for racing), Oil Pressure (variable, not 7psi switch) and Coolant Temp. So Friday night we spent most of the night soldering these and splicing them into the relevant looms. Dash, DL1 and Omex.

Next Steps
This morning I trailered the car round to Hayward and Scott to get the exhaust fabricated. There were some other interesting cars already getting sorted out. Anyhow, this week will see the exhaust manifold and side exit system fitted. Which leaves getting the ECU set-up next Monday.

This is handy as the TyCroes final race regs came out today.... We're number 20 and 201.


Joined: Sep 2011
Posts: 14,723
Likes: 149
Member of the Inner Circle
Offline
Member of the Inner Circle
Joined: Sep 2011
Posts: 14,723
Likes: 149
Originally Posted By cerealsurfer
This is handy as the TyCroes final race regs came out today.... We're number 20 and 201.

Was that luck or was it planed that way? I assume all you have to do is stick on or pull off the "1" depending on which of you is piloting.

I think that following this saga means that I am going to have to come and watch you race at least once. Thank goodnees for low cost flights smile


Peter

[Linked Image]
Joined: Oct 2006
Posts: 2,403
C
Talk Morgan Expert
OP Offline
Talk Morgan Expert
C
Joined: Oct 2006
Posts: 2,403
Originally Posted By Gambalunga
Originally Posted By cerealsurfer
This is handy as the TyCroes final race regs came out today.... We're number 20 and 201.

Was that luck or was it planed that way? I assume all you have to do is stick on or pull off the "1" depending on which of you is piloting.

I think that following this saga means that I am going to have to come and watch you race at least once. Thank goodnees for low cost flights smile

Well hey.. that's really flattering.

Double drives usually have the extra number added to make ID easy. We tape over the extra number in the driver change-over area.

As for the season.. if you do decide you fancy coming over. Probably the best spectator experiences are at either Goodwood on the 4th August, Curborough 2nd Sept or Castle Combe on the 27th October.


  • Goodwood will have sun (fingers crossed), a wide selection of entries and good facilities an plenty of places to stay.
  • Curborough is the MSCC Club Sprint, there will be only Morgans there (probably about 40), you can see the whole track, although not many places to stay locally.
  • Castle Combe will probably have the season decider race and has good viewing facilities - it's been dry over the last 4 years but not necessarily warm, sunny or easy to get to.


If you do decide to pop over, message me and we'll make sure you are welcomed.


Joined: Feb 2011
Posts: 14,009
Member of the Inner Circle
Offline
Member of the Inner Circle
Joined: Feb 2011
Posts: 14,009
Peter...I'll probably go to Curborough to spectate. Cheap flight to Birmingham and I'll put you up.


Jays
Former Morgan owner. Gone but hopefully not forgotten!
Page 7 of 41 1 2 5 6 7 8 9 40 41

Moderated by  TalkMorgan 

Link Copied to Clipboard
Powered by UBB.threads™ PHP Forum Software 7.7.5