The Series1 Roadster has a large trumpet air box on the nearside. The lower trumpet part, which channels air from the inverted louvres on the side of the bonnet is held in place by two hex headed sleeve bolts, which are quite obvious. These two bolts also fix the whole filter box to a bracket on the cam cover. So first remove the two bolts and slide the trumpet downwards and remove.
The two halves of the air box are held together by four cross head set screws. Two are visible above the hex bolts, but two are behind the filter box, and can only be accessed when the box is taken off the engine. Once the two hex headed sleeve bolts are out, all that remains is to slacken off the jubilee clip on the air trunking, and remove the electric plug on the airflow meter. This has a typical plastic wedge safety clip.
Once all this has been done, here's the back of the box, as removed. You can now see the two crosshead set screws which are normally hidden from view - about 2/3 down the photo.

I have a K&N filter (fitted by a PO) and the filter oil had migrated onto the back of the air box, so it was very scruffy round the back.
The next photo shows the K&N, which is an excellent fit. I've also cleaned up this half and removed the white manufacturer's sticker which was coming unstuck anyway. On the bottom lip is a small grey patch. This is where the gell coat had cracked. I repaired this with a blob of JB Weld, and blew it over with a spot of black paint (sparingly).

Inside the upper/outer half of the box, it's very, um, home made looking. Note the secondary gauze filter which is bonded into this half, at the exit to the air flow meter, and the use of a thin neoprene strip which acts as a seal. Unusually this is not my doing!!!!


I couldn't leave it like this, so out came the paint.....satin finish. The rudimentary neoprene seal is clearly visible.

And out came the K&N............

Now with the K&N back in place. The lower trumpet is close to the exhaust manifold, so I applied some insulation, and also fixed two washers with double sided tape, as the holes were getting 'chavelled' by the studs. One washer is visible, but the other is concealed behind one of the box fixing mouldings.

Here's the upper/outer part of the air box. The hot water tube from the top hose passes right under this in a contoured groove. So there will be significant heat sink into the air box. In order to reduce this, I've applied more reflective insulation along this channel.

And finally re-assembled:

The two halves fit together without a flange, and it's the neoprene seal which fits against the air filter element to provide the seal. The four setscrew fixings hold it square.
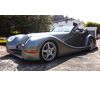
As a final note, this is how the engine looks with the filter out of the way:

You can see that the grey HT lead covers are a bit on the short side, so that's another job for the future. The screwdriver is just visible in the airflow trunking Jubilee clip, and the airbox fixing bracket is the gold oblong bracket with two studs.

That's all for now.